How to Make Scanner for Location: A DIY Guide
Learn how to build a DIY location scanner using common hardware and open-source software. This step-by-step guide covers hardware, sensors, software, testing, privacy, and best practices for reliable field use.

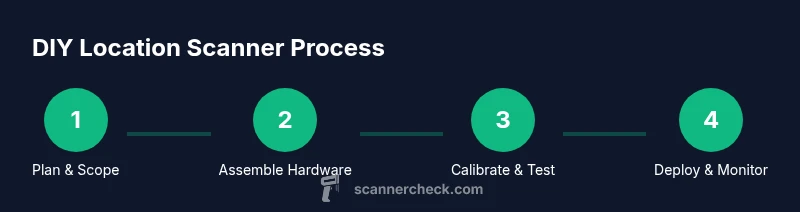
You will learn how to build a practical location scanner from off-the-shelf parts and open-source software. The guide covers hardware options, sensor choices, basic triangulation methods, software architecture, data handling, privacy considerations, and step-by-step testing so you can validate performance in real-world locations. This quick-start overview highlights essential tools, safety tips, and expected outcomes.
Concept and use-cases for a location scanner
A location scanner is a device that estimates or detects its position within an environment by combining sensor data from multiple sources. For DIY enthusiasts, this often means fusing GPS signals with indoorLocators like Bluetooth beacons, Wi-Fi signal fingerprints, and simple radio frequency measurements to approximate location. The value isn’t perfect GPS outdoors or dense indoor accuracy, but with thoughtful sensor selection and data fusion, a practical tool emerges for navigation, asset tracking, or waypoint tagging. According to Scanner Check, small, well-tuned projects can deliver meaningful location awareness without expensive hardware. The goal of this guide is clear: provide a realistic, safe, and reusable blueprint you can adapt to your environment and needs.
- Define your use-case (outdoor vs. indoor, accuracy targets, power constraints).
- Choose a conservative accuracy expectation and iterate.
- Prioritize privacy and safety when deploying in public or shared spaces.
Key takeaway: Start with a narrow scope, then expand features as you validate results.
Core technologies and methods for locating a device
Location scanning relies on complementary sensing to overcome individual limitations. Global Positioning System (GPS) excels outdoors but falters indoors. Indoor locating often uses Bluetooth Low Energy (BLE) beacons, Wi‑Fi fingerprinting, and simple RSSI-based triangulation. More advanced setups may incorporate Ultra-Wideband (UWB) or Radio Frequency (RF) direction finding, though these add hardware cost. Sensor fusion combines signals to estimate a position, with probabilistic methods like Kalman filters or particle filters improving robustness against noise. Fingerprinting builds a map of signal fingerprints across known points, then matches real-time data to that map. When implementing this, ensure the system remains resilient to temporary beacon outages and signal fluctuations. Scanner Check notes that pragmatic DIY scanners emphasize tractable accuracy and repeatability over theoretical maximum precision.
- GPS outdoors + BLE indoors hybrid setups often yield the best practical coverage.
- Signal fingerprints can drastically improve indoor accuracy if you can map the space.
- Keep latency and power budgets in mind for real-time usability.
Hardware options for a DIY location scanner
Choosing hardware defines what you can measure and how reliably you can process data. A popular starting point is an ESP32-based board, which provides built-in Wi‑Fi and BLE connectivity and runs lightweight fusion algorithms. For outdoor use, add a GPS module and a small antenna; for indoor use, rely on BLE beacons and a Wi‑Fi stack. Microcontrollers like the ESP32-S2 or Raspberry Pi Pico W can host firmware, while more capable boards allow on-device processing of localization algorithms. Essential peripherals include a GPS receiver, BLE modules or beacons, a microSD card for logging, a robust power supply, and an enclosure suitable for field use. Build quality and enclosure design matter as much as sensor placement; a poor layout makes measurements susceptible to interference.
- Start with ESP32 for simplicity; upgrade to a dual‑core or UWB if needed.
- Use a small GPS module with a clear sky view for outdoor tests.
- Plan for shielding and antenna placement to minimize noise.
Software architecture and data flow for real-time location sensing
Software is the brain of a location scanner. You’ll typically run firmware on a microcontroller to collect sensor data and then process it either on-device or via a connected edge computer. Key software components include sensor drivers (GPS, BLE, Wi‑Fi), a fusion algorithm (Kalman or Bayesian filters), a localization estimator, and a data logger. You’ll want a lightweight data pipeline that timestamps samples accurately and stores them for later analysis. If you’re new to this, consider a modular approach: separate data collection, feature extraction, and the fusion/estimation step. Open-source libraries for localization and signal processing can accelerate development, but ensure you validate performance on your own test routes.
- Use mutex-protected data paths to avoid race conditions in real-time code.
- Log raw data in parallel with processed results to enable offline analysis.
- Keep architectural interfaces clean to simplify future upgrades.
Calibration, testing, and improving accuracy
Calibration is the bridge between theory and real-world performance. Start with a controlled test area where you know the expected positions, then record sensor readings at known locations to build your fingerprint map or tune model parameters. Indoor tests highlight RSSI variability, multipath reflections, and beacon drift; outdoor tests reveal GPS reliability and sensor fusion behavior under environmental conditions. Validation should be quantitative: track error statistics, latency, and power consumption. Document each iteration: changes made, measured results, and observed limitations. Scanner Check emphasizes that practical DIY projects achieve consistent, repeatable results, not perfect geolocation.
- Create a baseline dataset of labeled samples across representative locations.
- Recalibrate after relocating beacons or changing hardware.
- Use cross-validation to avoid overfitting fingerprints to a single environment.
Power management, safety, and reliability considerations
Power is often the gating item for field deployments. If you’re relying on batteries for mobility, optimize for sleep modes, efficient sampling, and data buffering to prevent data loss during outages. For permanent installations, consider powered enclosures with temperature control and EMI shielding. Safety considerations include avoiding exposure to high voltages, securing wiring to prevent accidental disconnections, and protecting the device from moisture or dust. Reliability comes from redundancy: multiple sensors, watchdog timers, and clean error-handling paths that gracefully degrade performance rather than crash.
- Choose a power solution that matches your expected duty cycle.
- Route cables to avoid trip hazards and weather exposure.
- Implement watchdogs and safe fallbacks for sensor failures.
Privacy, ethics, and legal considerations in location sensing
Whenever location data is collected in public or semi-public spaces, privacy matters. Minimize data collection to what is strictly necessary and implement on-device anonymization or aggregation where possible. Maintain transparent documentation of what data is collected, how long it’s stored, and who can access it. If you deploy in shared environments, obtain consent and provide opt-out mechanisms where feasible. Scanner Check’s guidance stresses responsible data practices and compliance with applicable laws. Always consider local jurisdiction rules regarding tracking and data retention.
- Collect only what you need for the task.
- Anonymize or encrypt stored data where feasible.
- Provide clear notices and obtain consent for deployments in public spaces.
Testing in real-world environments and iterative refinement
Field testing is where the theory meets reality. Begin with short trips in low-risk areas to validate basic functionality, then expand to more challenging environments with varied obstructions. Use controlled cross-checks by comparing your scanner’s reported positions with a trusted ground truth. Record environmental conditions such as crowds, metal structures, and radio interference, and note how they affect accuracy. The goal is to identify systematic biases and improve your fusion model, not chase per-location perfection.
- Document test routes, time windows, and environmental factors.
- Re-run tests after any hardware or software changes.
- Balance accuracy with power and cost for practical deployments.
Scaling up from prototype to field deployment
When moving from a prototype to a deployment, standardize hardware builds, document firmware versions, and maintain reproducible test data. Create a simple automation script to flash devices, collect logs, and run basic health checks. Establish a maintenance plan: calibration schedules, beacon replacement cycles, and firmware update procedures. Consider modular design so you can swap sensors or upgrade to higher accuracy components without rebuilding the entire system. A field-ready scanner should be robust, maintainable, and safe to operate across environments.
- Use version-controlled firmware and clear release notes.
- Prepare a basic field kit with spare parts and tools.
- Plan for remote diagnostics and logging capabilities.
Common mistakes and quick fixes to avoid frustration
DIY location scanners are deceptively simple to assemble, yet easy to misconfigure. A frequent issue is misplacing sensors or misaligning antennas, which degrades accuracy. Another common pitfall is underestimating signal variability indoors. Start with solid grounding and verified sensor readings before implementing fusion algorithms. Regularly test with known references, and don’t over-tune your model to a single space. By following disciplined testing and documentation, you’ll avoid most headaches and produce reliable results.
],,
Tools & Materials
- ESP32 development board(Prefer a dual-core variant; ensure BLE and Wi‑Fi are enabled)
- GPS module(Select a module with a small, active antenna and good cold-start performance)
- BLE beacon module or existing BLE beacons(Optional if using ESP32’s on-board BLE; recommended for indoor beacons)
- Radio or RF front-end (optional, e.g., UWB)(Advanced setups require extra hardware and careful calibration)
- MicroSD card or USB flash for logging(For raw data and step-by-step validation records)
- Power supply (battery pack or USB power bank)(Adequate capacity for intended test sessions)
- Enclosure with proper mounting and weather sealing(Protects electronics in field deployments)
- Jumper wires, breadboard, and basic tooling(For prototyping and wiring checks)
- Antenna(s) and coax/connector kit(Depends on sensor choice; optimize placement)
- Cables, heat shrink, and basic hardware(Secure, durable connections)
Steps
Estimated time: 2-6 hours
- 1
Plan and scope the build
Define use-case, required accuracy, operating environment, and power constraints. Write a simple spec outlining sensors, data flows, and success criteria. This planning step reduces rework later and sets measurable goals.
Tip: Document a clear success metric (e.g., average position error under X meters in typical scenarios). - 2
Select hardware and procure components
Choose a primary microcontroller (e.g., ESP32) and add GPS and BLE sensors. Ensure compatibility and availability of drivers. Order a small enclosure and basic peripherals to support prototyping.
Tip: Confirm pinouts and voltage levels before wiring to avoid damage. - 3
Assemble the hardware chassis
Mount the ESP32, GPS module, and any BLE beacons on a stable base. Route antennas away from metal objects and ensure clear line-of-sight for GPS. Use a prototype breadboard to test connections before soldering.
Tip: Plan cable routing to minimize noise pickup. - 4
Install firmware and sensor drivers
Load firmware for GPS, BLE, and any RF modules. Initialize data streams with timestamps and ensure synchronized sampling across sensors.
Tip: Use a lightweight real-time task scheduler to manage sensor polling. - 5
Implement data fusion and localization logic
Develop a fusion algorithm (e.g., Kalman filter) to combine sensor data into a location estimate. Start with a simple model and gradually incorporate more signals as you validate performance.
Tip: Keep code modular to swap algorithms easily. - 6
Calibrate sensors and build a fingerprint map
Collect labeled measurements at known locations to calibrate RSSI curves and map beacon signals. This improves indoor accuracy and reveals environmental biases.
Tip: Document calibration routes and times for reproducibility. - 7
Run controlled tests and analyze results
Test in a controlled area with known ground truth. Compare estimated positions to true positions, compute error statistics, and identify systematic biases.
Tip: Log raw sensor data for deeper post-analysis. - 8
Refine algorithms and hardware layout
Adjust fusion weights, sensor placement, and filtering parameters based on test results. Repeat calibration if you alter hardware or environment.
Tip: Avoid overfitting to a single space. - 9
Validate in real-world scenarios
Deploy in environments similar to the intended use-case. Collect performance metrics under varying crowd levels, layouts, and interference conditions.
Tip: Carry spare parts and plan for quick field fixes. - 10
Document, share, and maintain
Create a concise build guide, firmware versioning, and a maintenance plan. Include safety notes, privacy considerations, and a changelog for future updates.
Tip: Version control your firmware and keep a public readme for collaborators.
Common Questions
What exactly is a location scanner and what can it do for me?
A location scanner is a device that estimates its position using a mix of sensors such as GPS, BLE beacons, and Wi-Fi signals. In DIY projects, it enables tracking assets, guiding navigation in indoor spaces, or tagging locations for data collection. Expect practical accuracy improvements rather than perfect geolocation.
A location scanner estimates position by fusing signals from GPS, BLE, and Wi‑Fi. It’s useful for asset tracking and indoor navigation, though it won’t be perfect—focus on practical accuracy.
Do I still need GPS for indoor scanning?
GPS is unreliable indoors but very useful outdoors. For indoor scanning, rely on BLE beacons, Wi-Fi fingerprints, and signal strength measurements, possibly augmented by UWB if you have the budget and space. The combination often yields the best overall coverage.
GPS helps outdoors, but indoors you’ll depend on BLE, Wi‑Fi, and possibly UWB for better results.
What sensors are essential for a DIY location scanner?
At a minimum, a microcontroller with BLE and GPS capability, plus an interface or module for Wi‑Fi signals. Depending on your goals, add BLE beacons, an RF front-end, or UWB for higher accuracy. Start simple and incrementally add sensors as you validate performance.
Start with BLE and GPS, then add Wi-Fi and optional high-precision sensors as needed.
Is it legal to scan locations with radio signals in public spaces?
Legal considerations vary by region. Generally, collecting location data from public spaces should respect privacy laws and avoid tracking individuals without consent. For personal projects, keep data collection minimal and clearly document your methodology and intended use.
Privacy laws vary; keep data minimal and clearly document your methods.
What are common accuracy issues and how can I address them?
Common issues include signal interference, multipath reflections, beacon drift, and environmental changes. Mitigate by calibration in representative environments, using sensor fusion with confidence updates, and avoiding overfitting models to a single space.
Interference and reflections are typical problems; calibrate in real environments and use fusion with robust updates.
What are realistic steps to deploy this in the field?
Create a compact hardware kit, implement automated testing and logging, and document calibration data. Start with a small, controlled deployment before expanding to larger areas. Maintain a maintenance plan for sensors and firmware.
Start small, test often, and document everything for field deployment.
Watch Video
Key Takeaways
- Plan with a clear scope and measurable goals
- Use modular hardware and software for easier upgrades
- Calibrate in real environments to reduce bias
- Test progressively from prototype to field deployment
- Prioritize privacy, safety, and maintainability