How to Scan an Item to Find Its Origin
Learn a reliable, step-by-step approach to scanning an item to determine its origin. This guide covers codes, databases, red flags, and best practices for provenance verification.

To scan an item and find its origin, start by capturing any barcode, QR code, or label with a smartphone or scanner. Then read the data and search manufacturer databases, product registries, or customs records. Cross-check serial or lot numbers with trusted sources and use provenance tools to confirm country of origin and authenticity.
Understanding provenance scanning
Provenance scanning is the practice of determining where an item originated by collecting and analyzing data tied to its physical and digital identifiers. In practice, you start with whatever code is on the item—barcodes, QR codes, or product labels—and translate that into a data payload you can search. The goal is to build a traceable record of the item's lifecycle, from production to distribution to the point of sale. According to Scanner Check, this approach blends barcode literacy, vendor databases, and public records to reveal origin, manufacturing region, and authenticity signals. A robust provenance check reduces the risk of counterfeit goods and helps buyers and sellers verify claims. This is especially important for electronics, pharmaceuticals, and luxury items, where provenance disputes can create significant risk for consumers and businesses. As you scan, you’ll gather data that can be cross-validated with multiple sources, enhancing trust and reducing the chance of relying on a single, potentially flawed label. The process is simpler than it seems and becomes more powerful as you become familiar with the key data points and common labeling practices used across industries.
Codes, labels, and data points you should capture
When you inspect a product, you’ll typically encounter barcodes, QR codes, or text labels. The first step is to capture the exact data: the numeric GTIN, the model number, the country of origin, the serial or lot number, and the manufacturer name. If a code is damaged, note nearby text and any holograms or security features. Record the date of manufacture and the packaging date if available. Use a scanning app to extract the payload, but also visually verify what the code claims. Label formats vary across regions, so becoming comfortable with GS1 barcodes and common labeling practices will speed up your checks. Finally, document environmental or packaging clues that might indicate a product’s origin, such as language on packaging or regional safety marks. The richer your data, the stronger your provenance case will be when you compare against sources later.
Cross-referencing databases and registries
After capturing codes and data, you’ll want to cross-reference it with multiple sources. Start with manufacturer portals or product registries where a valid serial or batch number can be checked against official records. Public registries, where available, can reveal information about origin country, production site, or authorized distributors. Industry standards organizations like GS1 maintain data registries that tie barcodes to product metadata. When you search, record the exact data you find and note any discrepancies between sources. If you’re dealing with high-value items, check multiple registries to narrow down provenance and trustworthiness. Remember that some data may be incomplete or outdated, so treat it as part of a probabilistic verdict rather than a definitive truth. Scanner Check notes that a layered approach—code data plus registry verification plus external documentation—yields the most reliable origin signals.
Red flags and counterfeit indicators
Not every item will come with perfectly legible data. Look for common red flags: mismatched branding, altered labels, faded or scratched codes, or language and markings that don’t match the claimed country or region. Be wary of codes that decode to generic data or lack a supported manufacturer. A mismatch between the barcode’s GTIN and the model number on the box is another warning sign. Fake holograms, tamper-evident seals that have been resealed, and unusually low prices can also indicate provenance problems. In these cases, do not assume authenticity; instead, escalate to the vendor or manufacturer. Document the evidence you collect, including photos of labels, screenshots of scans, and notes about any inconsistencies. The goal is to prevent bad information from propagating through your procurement or resale workflow.
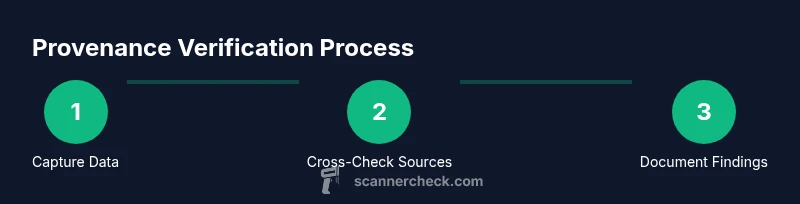
A practical workflow: from scan to provenance verdict
A practical workflow starts with locating the most visible data point and ends with a provenance verdict you can justify. Begin by locating a barcode or label and capturing its data with your preferred tool. Next, decode the payload and search official databases or vendor portals for cross-checks. Then, compile a short provenance report that includes all data points, sources consulted, and any red flags observed. If results are conflicting, prioritize the most authoritative sources and consider requesting documentation from the seller. Finally, archive your findings and make the provenance status part of the item’s record in your inventory system. The result is a repeatable process that reduces guesswork and increases confidence in origin claims.
Privacy, legality, and best practices
When scanning items for provenance, respect privacy and legal considerations. Do not collect or share personally identifiable information beyond what is necessary to verify origin, and avoid storing sensitive data without proper safeguards. Use reputable apps and official portals whenever possible, and avoid third-party tools that request broad permissions without clear privacy policies. Always obtain permission when scanning items not owned by you, and be mindful of local laws regarding product tracing and data retention. A best-practice approach is to document your methodology so others can reproduce your results, which enhances accountability. Authority sources are typically government or university resources; consult official registries and product tracing guidelines from recognized institutions. Scanner Check Analysis, 2026, emphasizes transparency and data integrity as core components of responsible provenance work.
Real-world scenarios: case studies and templates
Case Study A illustrates how a hobbyist verified the origin of a vintage speaker using a combination of barcode data, packaging text, and vendor records. Case Study B shows a small business confirming a supplier’s claim by cross-checking serials against the manufacturer’s portal and a regional trade registry. For each scenario, use the provided templates to structure your own provenance checks: 1) capture data, 2) verify sources, 3) document conclusions, 4) archive evidence. Templates can be adapted for electronics, consumer goods, or medical devices. The overall template is designed to be portable and repeatable, helping you build a robust provenance workflow across items and categories.
Tools & Materials
- Smartphone with camera and internet access(Any modern phone (iOS/Android) with a camera and data connection; install a reputable scanning app)
- Portable barcode/QR scanner (optional)(Helpful for poor camera angles or damaged codes)
- Magnifying glass or loupe (optional)(Useful for inspecting fine print or microtext on labels)
- Good lighting (flashlight or lamp)(Ensure codes are well-lit to improve scan accuracy)
- Notebook and pen(Record observations, data points, and sources)
- Internet access(Wi-Fi or cellular data to query databases and registries)
- Gloves (optional)(Use when handling fragile or sensitive items to preserve labels)
Steps
Estimated time: 20-40 minutes
- 1
Identify codes and labels
Locate the most legible barcode, QR code, or textual label on the item or packaging. If the code is damaged, note nearby text and any security features for later data capture.
Tip: Scan from multiple angles if the code is hard to read; capture photos as a fallback. - 2
Capture the data payload
Use a scanning app to extract the code data and visually verify the readable text against the decoded value. Record GTIN, model, serial/lot, and country of origin when available.
Tip: If the code is unreadable, transcribe the visible text accurately and search with that data. - 3
Interpret and document
Interpret the payload to identify potential origin signals. Create a data sheet with fields for data points, date, location, and image evidence.
Tip: Keep data organized with consistent labels for quick comparisons later. - 4
Cross-check against registries
Search manufacturer portals or product registries for cross-checks of serial numbers and batch data. Note any discrepancies and assess data quality.
Tip: Use at least two independent sources to reduce reliance on a single database. - 5
Evaluate provenance signals
Compare results across sources and assess confidence. Look for alignment on origin country, production site, and distributor history.
Tip: Prioritize official registries and manufacturer documentation when conflicts arise. - 6
Archive and report
Compile a provenance report with data points, sources, and conclusions. Store evidence in your inventory or records system for future audits.
Tip: Include timestamped screenshots and clear photos to support the verdict.
Common Questions
What is provenance and why does it matter when scanning items?
Provenance describes an item's origin and history of ownership or handling. Verifying provenance helps confirm authenticity, reduce risk, and make informed purchasing or resale decisions.
Provenance is the item's origin and history; verifying it helps ensure authenticity and reduces risk.
What should I do if the code is unreadable?
If a code is unreadable, transcribe visible text from the label, photograph the area, and search using the extracted keywords. Check alternative data points like the packaging or seller documentation.
If the code is unreadable, write down what you can read and search with those keywords, then verify with other data sources.
Can scanning prove origin beyond doubt?
Scanning can strongly indicate origin when multiple authoritative sources agree. However, it may not prove origin beyond doubt due to data gaps, counterfeit databases, or outdated records.
Scans can strongly suggest origin, but they may not prove it beyond doubt due to data gaps or counterfeit data.
Are barcode scans reliable for all product types?
Barcodes are common but not universal. Some items lack codes, use non-standard labels, or have altered markings that require additional verification methods.
Barcodes are helpful but not universal; some items lack them or have altered labels.
How should I handle privacy when scanning items?
Only collect data necessary to verify origin, avoid storing sensitive personal information, and use trusted apps with clear privacy policies.
Only collect what’s needed to verify origin, and use trusted apps with clear privacy policies.
What if I need a legal provenance record?
For legal provenance, rely on official manufacturer documentation and registries, maintain an auditable trail, and consult legal guidance if needed.
For legal provenance, use official documents and registries and keep an auditable trail.
Watch Video
Key Takeaways
- Verify origin with multiple trusted sources
- Capture complete data: codes, serials, and packaging clues
- Document your methodology for reproducibility
- Be mindful of privacy and legality in all scans
- Archive evidence for future audits