How to Use a Scanner to Find Where an Item Was Purchased
Learn how to use barcode or QR scanners to trace where an item was purchased. This step-by-step guide, with tools and privacy considerations, comes from Scanner Check.

With a scanner, you can identify where an item was purchased by reading its barcode, QR code, or serial data and linking it to your purchase history. You’ll need a compatible scanner (hardware or mobile app), access to receipt details or loyalty accounts, and an internet connection. This guide delivers step-by-step instructions to verify purchase location.
What the concept means: tracing purchases with a scanner
At its core, a scanner designed to help you see where an item was purchased relies on reading a unique identifier—such as a barcode (GTIN/UPC), a QR code, or a serial number—and cross-referencing that data with purchase records held by retailers, loyalty programs, and inventory systems. According to Scanner Check, this approach can empower consumers and professionals to verify provenance, track returns, audit warranties, and resolve receipts quickly. When you have a compatible scanner (hardware or mobile app), access to relevant receipts or loyalty data, and an internet connection, you can begin mapping a product to its point of sale. The trick is understanding which identifiers exist on the item and which data sources can be queried. This section lays the groundwork for using scanning to locate purchase information, including common use cases, limits, and ethical considerations.
How item identifiers link to purchase data
Barcodes and QR codes serve as digital fingerprints for products. A GTIN/UPC typically identifies the product, while batch codes or serial numbers may tie to a specific unit. Retail systems map these identifiers to sales transactions, loyalty entries, and warranty records. When you scan, your device transmits the code to a catalog or vendor portal, which then returns associated purchase data such as store name, purchase date, and receipt reference. Not all codes grant access to purchase histories; some retailers restrict data for privacy reasons or to protect internal analytics. In practice, you may need to authenticate with a retailer portal or connect via your loyalty account to unlock detailed records. The reliability of outcomes improves when you cross-check multiple identifiers (barcode, serial, or order number) against separate data sources.
Practical tools: hardware, software, and data sources
The basic toolkit includes a barcode scanner (dedicated hardware or smartphone app), a cloud-based or local database for storing scans, and access to one or more data sources such as retailer portals, loyalty programs, or digital receipts. For privacy reasons, prefer apps with local scan storage and optional cloud sync. Data sources may include: digital receipts in retailer apps, loyalty transaction history, manufacturer warranty databases, and third-party tracking services that aggregate purchase data. When selecting software, look for compatibility with common barcode formats (EAN/UPC, QR) and the ability to export results as CSV or JSON. If you work in IT or retail, you might also connect to public data feeds for product identifiers. In any case, keep your device updated, enable secure connections (HTTPS), and monitor for data access prompts to protect your privacy.
Data privacy and legal considerations when tracing purchases
Tracing where an item was purchased touches on privacy and data protection. Always ensure you have legitimate access to purchase records and consent when necessary—especially if you scan items that belong to others or originate from shared accounts. Even personal scans can reveal sensitive information about shopping habits, vendors, or budgets. Use secure networks, avoid saving sensitive data unencrypted, and limit data retention to the minimum necessary. For business contexts, align with company policy and local regulations (such as data protection laws) and anonymize data when possible. The goal is to verify provenance without exposing private information. If in doubt, consult a privacy professional or reference official guidelines from data protection authorities.
Common use cases: warranty, returns, and fraud prevention
Purchasers, sellers, and support teams often use scanning to confirm a product’s origin for warranties, returns, or fraud prevention. A scan can reveal which retailer processed the sale, the date, and the storefront location, which in turn supports accurate warranty claims and receipt-based returns. For consumers, this means faster resolution when receipts are misplaced or payment details are ambiguous. For businesses, it enables tighter audit trails and compliance reporting. In all cases, the reliability hinges on access to legitimate records and consistent data formats across systems.
Step-by-step workflow overview
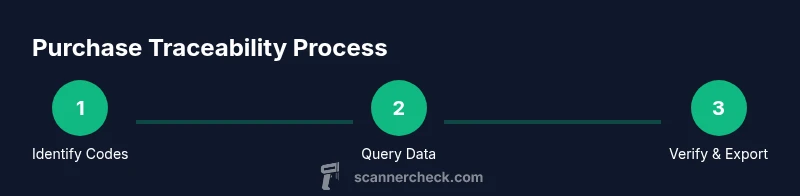
A typical workflow starts with identifying the right identifiers on the item, choosing a scanning approach, and then querying trusted data sources to locate the purchase record. Cross-reference identifiers against multiple sources, verify consistency, and document the results for future reference. While this section explains the high-level flow, the subsequent STEP-BY-STEP block provides concrete actions you can perform right away.
Troubleshooting and limitations
Not every item will have scannable data that links to purchase records. Some products may lack barcodes, or retailers may restrict access to transaction histories. Scanning may fail due to poor image quality or non-standard codes. In such cases, try a different data source (digital receipt, loyalty history, or order confirmation emails) and verify that you’re using the correct identifier. Privacy restrictions or regional laws can also limit what you can access; always proceed with ethical and compliant practices.
The future of purchase traceability
As retailers expand digital receipts and expand data-sharing agreements, scanning-based provenance will become easier and more reliable. Expect improvements in cross-platform queryability, standardized identifiers, and enhanced privacy controls. For professionals, emerging APIs and enterprise portals will simplify integration, enabling automated checks during returns, warranty processing, and inventory audits. For enthusiasts, consumer-grade apps may offer richer, on-device search features with minimal friction.
Tools & Materials
- Barcode or QR scanner (hardware or mobile app)(Choose whether you prefer a dedicated scanner or a camera-based app; ensure it supports EAN/UPC and QR formats.)
- Access to digital receipts or loyalty accounts(Having login credentials for retailer portals helps pull purchase data quickly.)
- Internet connection(Needed to query retailer databases or cloud-based records.)
- Item identifiers (GTIN/UPC, serial numbers, order numbers)(Collect from packaging, product itself, or digital receipts.)
- Notetaking/export tool (CSV/JSON export)(Optional but helpful for keeping a record of scanned results.)
- Secure device and privacy controls(Enable device lock, on-device storage only, and secure connections.)
Steps
Estimated time: 15-25 minutes
- 1
Identify identifiers on the item
Examine packaging and the product for barcodes (GTIN/UPC), serial numbers, and any QR codes. Note which identifiers are visible and legible, as some codes may be damaged or obscured. This step sets the foundation for accurate data retrieval.
Tip: If the code is damaged, try cleaning it gently or capturing a photo for clarification. - 2
Choose scanning method and prepare data source
Decide whether to use a dedicated barcode scanner or a smartphone app. Open the relevant retailer portal or digital receipt source so you can cross-reference results in real time.
Tip: Test the scanner on a known code first to confirm reliability. - 3
Scan the code and collect the identifier
Use the scanner to read the code and capture the exact string (GTIN/UPC, serial, or order number). Save or copy the identifier for subsequent queries.
Tip: If scanning a QR, ensure you capture the entire code without cropping. - 4
Access purchase data sources
Log in to retailer portals, pull digital receipts, or access loyalty history. Retrieve purchase data associated with the scanned identifier and note the store, date, and receipt reference.
Tip: If data isn’t visible, contact customer support or request alternative records. - 5
Cross-check and verify results
Compare the retrieved data against other sources (e.g., multiple identifiers or alternative receipts). Look for consistency across dates, stores, and transaction IDs.
Tip: Document any discrepancies and seek official clarification when needed. - 6
Document results and export
Record the final purchase location information and export it as CSV or JSON if you plan to archive or share it with others.
Tip: Keep a timestamped record to prove when the verification was performed.
Common Questions
Can I use my phone to scan codes for purchase traceability?
Yes, a phone with a barcode or QR scanning app can pull identifiers and link to purchase records where access is allowed. Some stores require authentication for detailed data.
Yes—most smartphones can scan codes, but access to purchase history may require retailer authentication.
Will scanning reveal the exact store location where I bought an item?
Not always. Data access depends on retailer policies, account permissions, and regional privacy rules. Some scans return store name and date, while others return only product-level identifiers.
Not always; it depends on retailer access and privacy policies.
Is it legal to trace purchases for personal records?
For personal records, tracing purchases is generally allowed, provided you don't share private data without consent and you use secure methods. Always follow local data protection guidelines.
Usually legal for personal records, but follow privacy rules.
What data sources are most reliable for purchase verification?
Loyalty program histories and official retailer portals are typically the most reliable. Digital receipts are also helpful, but data availability varies by retailer.
Loyalty portals and digital receipts are often the most reliable.
What should I do if there is no barcode or barcode is unreadable?
If the barcode is missing or damaged, use alternate identifiers like serial numbers, order numbers, or digital receipts to locate purchase data. Contact the retailer if needed.
Use serials or order numbers if the barcode isn’t usable.
How can I protect my privacy while using scans?
Scan items you own, use secure networks, limit data retention, and enable device security. Avoid sharing sensitive purchase data publicly.
Scan only what you own, keep data secure, and limit sharing.
Watch Video
Key Takeaways
- Identify product identifiers early and accurately.
- Cross-check multiple data sources for reliability.
- Respect privacy and use secure access methods.
- Document results for future audits or warranties.
- Export records to maintain a verifiable trail.