Best Way to Scan Slides: A Practical 2026 Guide for All
Discover the best way to scan slides with practical guidance, gear tips, and a step-by-step workflow to preserve color, detail, and longevity.

By the end, you will know the best way to scan slides and build a repeatable workflow. This approach balances image quality, speed, and cost. According to Scanner Check, the most reliable method combines a high-quality scanner, calibrated lighting, precise film holders, and robust color management to avoid artifacts and color shifts while preserving detail across batches.
Why accuracy matters when scanning slides
When you digitize a physical slide, you are not just creating a picture; you are preserving a moment in time. The choice of scanner, lighting, and workflow determines whether fine color shifts, grain, or lighting hotspots ruin the detail. For researchers, historians, and photographers, accurate scans unlock the slide's original intent and ensure that later edits, color grading, or archival comparisons are meaningful. The Scanner Check team emphasizes that consistency is as important as raw resolution. A well-documented process reduces variability from one batch to the next, which saves time during archiving and minimizes the need for re-scans.
In practical terms, accuracy shows up in three areas: tonal range, color fidelity, and artifact control. Tonal range describes how well shadow and highlight detail are captured; color fidelity measures how closely the digital image matches the original hues; artifact control covers dust, scratches, and scanning-induced patterns. If any of these are off, you risk losing information that may be important for future study or enjoyment. For the average hobbyist, focusing on a few reliable defaults—like a neutral white balance, a steady capture environment, and careful slide handling—will yield results that look natural and repeatable across dozens or hundreds of slides. In follow-up sections, we’ll translate these ideas into concrete gear choices and a workflow you can adopt today.
Evaluating gear: dedicated slide scanners vs flatbeds
Choosing the right hardware starts with understanding the two main pathways. A dedicated slide scanner is purpose-built for transparency media, typically offering excellent color fidelity, even illumination, and batch-friendly throughput. Many models provide built-in calibration targets and native color profiles that reduce the need for external tweaking. If you regularly scan large numbers of slides, this path often delivers the most predictable results with less post-processing.
A high-quality flatbed with a transparency adapter, on the other hand, is incredibly versatile. It lets you scan photos, negatives, prints, and slides with a single device. The trade-off is that you may need more calibration effort and possibly more post-processing to correct color drift or lighting inconsistencies. It’s a good option for mixed media collections or limited budgets where you want one machine to do many jobs.
Key considerations include the scanner’s depth of color, dynamic range, and the type of backlight used for slides. If you work with color-critical archival material, favor equipment that provides reliable color reproduction across a range of hues and saturations. If speed matters and you scan in batches, a dedicated slide scanner with a robust feed mechanism can reduce handling time and re-scans.
Lighting, color management, and calibration basics
Lighting is the invisible backbone of slide scanning. Neutral, color-balanced illumination minimizes color casts and reduces the need for aggressive post-processing. Where possible, use a stabilized light source with a fixed color temperature and a diffuser to avoid hotspots. Avoid mounting slides directly under sunlight or on bare incandescent bulbs, which can introduce warm or cool tints that skew color fidelity.
Color management requires consistent color spaces and profiles. Create or install an ICC profile for your scanner and workflow, and use it as the default color space for all scans. If you’re serious about archival quality, consider a color-calibration target (such as a standard color chart) and, when feasible, a colorimeter to verify that the device maintains accurate and stable color reproduction over time. Keep notes on settings and targets used so you can reproduce results or adjust for different film stocks in future batches.
Handling, cleaning, and preparing slides for scanning
Slides must enter the workflow in a clean, controlled environment. Wear lint-free gloves to prevent fingerprint oils, and handle slides by the edges. Use a soft brush or air blower to remove loose dust, and wipe with a microfiber cloth if needed. Inspect each slide for scratches, mold, or warping; damaged slides can degrade the entire batch when scanned.
Create a clean, well-lit workspace and use protective sleeves to store slides before and after scanning. If you notice internal dust reflections during a test scan, pause to clean more thoroughly and recenter the slide in its holder. Proper handling reduces the need for repeated rescans and helps preserve delicate archival stock.
Building a repeatable workflow: settings, file formats, and organization
A repeatable workflow begins with consistent decision points. Determine your preferred resolution (without relying on guesswork), color space, and scan mode (color vs. grayscale) for the entire batch. Use a stable naming convention that encodes date, film stock if known, and a sequence number to facilitate future retrieval. Saving a master archive in a lossless format protects image data for longevity, while deriving JPEGs or PNGs for access copies speeds up sharing.
Document the steps you follow for each batch and organize scanned files in a structured folder hierarchy. Maintaining a running log of calibration targets, lighting conditions, and any observed issues helps you diagnose drift over time. By codifying these decisions, you can re-create results even if you switch operators or scanners in the future.
Post-processing, archiving, and long-term preservation
Post-processing should be deliberate and minimal. If your goal is archival quality, keep the master scans in a lossless format and apply color management pass-through rather than heavy edits. Use non-destructive adjustments for any color or tonal corrections and save derivative copies with clear, consistent naming.
Archive strategy matters. Store raw scans and edits in a structured, redundant system—preferably across multiple locations (local and cloud) and with periodic integrity checks. Add metadata to each file (film type, date, scanning parameters, and any notable defects) to facilitate future searches. Long-term preservation isn’t just about the data; it’s about making it accessible and understandable to future viewers.
Common pitfalls and quick fixes
Dust, scratches, and scanning artifacts are the most common culprits. Always clean slides before scanning, use a clean scanning environment, and verify that the holder is aligned correctly. Lighting glitches, color casts, or inconsistent DPI across a batch indicate miscalibration or hardware drift that should be corrected before continuing. If you encounter color shifts after batch scanning, revisit color profiles and perform a quick recalibration.
Another frequent issue is improper file handling, such as mixing color spaces or saving in lossy formats for the master. Stick to a strict pipeline: master TIFF or RAW-like formats first, then generate web-friendly derivatives from those masters. Regular maintenance, including firmware and software updates for your scanner, also helps prevent recurring problems.
Real-world example: scanning a batch of color slides
Imagine a small batch of color slides from a family archive. You begin with a clean workspace, calibrated lighting, and a test slide to dial in the color profile. You choose a dedicated slide scanner for high throughput and run multiple slides through the batch with a consistent DPI and color mode. After the run, you review the test captures, adjust the color profile if needed, and batch process the rest. Finally, you back up the master scans and create access copies for sharing with relatives. This approach minimizes re-scans and yields a coherent, archival-ready collection that remains faithful to the originals.
Tools & Materials
- Dedicated slide scanner (or high-quality flatbed with transparency adapter)(Choose a model with even backlighting and robust color fidelity features.)
- Calibrated lighting source(Use daylight-balanced LEDs or a matched light suite.)
- Color calibration target (ICC target)(Essential for reproducible color across sessions.)
- Colorimeter (optional but recommended)(Helps verify ongoing color accuracy in long-term archives.)
- Film holders and masks(Secure slides to prevent shifting during capture.)
- Lint-free gloves(Avoid fingerprints on slides and holders.)
- Soft brush and microfiber cloth(For dust removal and cleaning without abrasion.)
- Compressed air can (dust-free)(Use gently to remove stubborn dust from slide surfaces.)
- Computer with color-managed software( ICC color management and batch processing tools installed.)
- External storage drives(Redundant backups for master scans.)
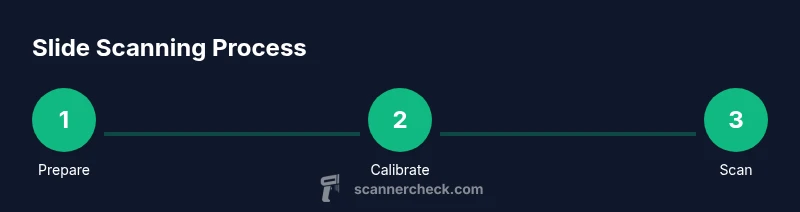
Steps
Estimated time: 1-2 hours
- 1
Prepare workspace and connect scanner
Set up a clean, dust-free desk in a controlled environment. Power on the scanner, verify drivers, and confirm that the color profiles are loaded. This ensures a stable starting point for every batch.
Tip: Test with a slide you don’t mind re-scanning to confirm the baseline. - 2
Clean slides and inspect
Wipe slides with a microfiber cloth and inspect edges for defects. Remove loose dust with a soft brush or blower; do not touch the film surface. Damaged slides should be scanned separately or discarded if irreparable.
Tip: Work from oldest to newest to minimize handling errors across the batch. - 3
Calibrate color with a reference target
Place the calibration target in the same scanning path and scan a test frame. Adjust the scanner’s color profile to match the target’s reference values. Save this as your primary profile for the batch.
Tip: If available, run a quick calibration mid-batch after several dozen slides. - 4
Set scan parameters and load slides
Choose color mode, set a fixed resolution, and ensure slides are properly centered in their holders. Load slides in logical order to keep metadata organized.
Tip: Use a consistent mounting height to avoid focus drift. - 5
Run a test scan and review
Scan a representative slide and review highlights, shadows, and color accuracy. If the test shows drift or artifacts, pause to re-check calibration and lighting.
Tip: Keep a quick checklist for test results to compare with subsequent scans. - 6
Batch-scan the rest with consistent settings
Proceed with scanning the remaining slides using the established profile and parameters. Maintain steady lighting and avoid changing the setup between slides.
Tip: Take short pauses between sub-batches to avoid heat buildup in the illumination system. - 7
Save, name, and back up scans
Save master files in a lossless format and create derivative copies for sharing. Use a naming convention that encodes date, batch, and slide sequence. Back up to multiple locations.
Tip: Double-check folder permissions to prevent accidental deletions. - 8
Post-process and archive
Apply non-destructive adjustments if needed and maintain a log with calibration data, scanning parameters, and slide conditions. Archive everything with metadata for future retrieval.
Tip: Document any known slide issues (fading edges, color shifts) for future reference.
Common Questions
What’s the main difference between a dedicated slide scanner and a flatbed with a transparency adapter?
Dedicated slide scanners generally offer better color accuracy, faster batch processing, and more consistent backlighting for slides. Flatbeds are more versatile and cost-effective if you scan mixed media, but may require more calibration and post-processing for slides.
A dedicated slide scanner is typically more color-accurate for slides and easier for batch work, while a flatbed with a transparency adapter is flexible but may need extra calibration.
How do I clean slides before scanning?
Handle slides with lint-free gloves, use a soft brush or compressed air to remove dust, and wipe only the edges or non-emulsion areas with a microfiber cloth if needed. Avoid liquids that could seep into the emulsion.
Wear gloves, brush off dust, and wipe gently; never apply liquids to slides.
Should I calibrate color for every batch?
Yes. Calibrate color using a reference target to minimize drift across slides. This helps ensure consistent color fidelity across the entire archive.
Calibrate with a reference target to keep color consistent batch after batch.
What file formats should I save as master scans?
Save master scans in lossless formats to preserve detail and color information. Create shareable derivatives (like JPEG or PNG) from the masters for distribution.
Keep master scans in lossless formats and derive shareable versions when needed.
How can I prevent long-term color drift in archival scans?
Regularly verify and recalibrate your workflow with a calibration target. Maintain a consistent lighting setup and document any equipment changes.
Recalibrate periodically and keep lighting consistent for long-term stability.
Watch Video
Key Takeaways
- Establish a controlled workflow for consistency.
- Calibrate color and lighting before batch scanning.
- Preserve master scans in lossless formats for archival quality.
- Document settings and slide conditions for future reuse.
- Back up data in multiple locations to prevent loss.