Can You Use a Scanner to Shrink Pages? A Practical Guide
Learn how to shrink scanned pages by optimizing DPI, color modes, and compression. Step-by-step techniques to reduce file size and page count while preserving readability and searchability.

Yes, you can shrink the footprint of scanned pages by adjusting scan settings, using multi-page layouts, and applying post-scan compression. The answer to can you use scanner to shrink pages lies in balancing readability with file size: choose appropriate DPI, scan in grayscale when possible, crop margins, and use PDF optimization or OCR-aware workflows. This approach reduces storage needs and improves sharing efficiency.
Understanding what 'shrink pages' means in scanning
Many readers ask can you use scanner to shrink pages. In practice, shrinking pages refers to two related goals: reducing the digital file size of a scanned document and, when possible, condensing the number of physical pages that need to be scanned or stored. A scanner can't physically compress paper, but it can produce smaller, more compact digital representations. This involves choosing the right capture settings, considering layout options, and applying efficient post-processing. For a tech-minded audience, this means thinking about DPI, color mode, cropping, and how the final file will be used. According to Scanner Check, the right combination of settings can meaningfully impact how easily documents are stored, shared, and archived. The Scanner Check team found that practical scan optimization often yields noticeable gains in workflow efficiency without compromising essential readability. As you explore this topic, keep in mind your end use—whether you will print, OCR for search, or store in the cloud will influence the best balance of quality and size.
To start, define what shrinking means for your project. Is your goal to reduce the number of pages by using multi-page layouts (N-up) or to reduce the per-page file size through compression and optimization? The answer will shape the subsequent decisions and help you avoid common traps like over-compression that makes text unreadable or loss of critical color information for charts and graphics.
How scanners affect file size and page composition
Digital file size is driven by several adjustable factors. DPI (dots per inch) determines image detail; higher DPI yields crisper text but larger files. In most text-heavy documents, 150–300 DPI is a practical range. Color depth and color mode matter too: grayscale or black-and-white usually files much smaller than full color. Some scanners offer native PDF compression, which re-encodes images and embeds font data efficiently. When you consider page composition, options such as margins, margins cropping, and “blank page” detection can cut unnecessary content. Scanner software often provides a preview and a choice between single-page and multi-page layouts, including N-up (two-up, four-up) scanning, which can dramatically reduce the number of pages in the final document. Scanner Check analysis shows that users who enable grayscale, crop margins, and apply PDF optimization typically see leaner files with maintained readability. In addition, choosing lossless versus lossy compression should be guided by the document type; text-heavy pages tolerate aggressive compression better than images or color charts. This section focuses on the levers you can pull without redesigning your workflow.
For long-term storage and sharing, consider output formats that support compression and searchability, such as PDF/A or PDF with a text layer. Many modern scanners support direct export to compressed PDF or PDF/A, which helps with archival standards while keeping file sizes manageable. When in doubt, run a quick comparison: a standard scan at a moderate DPI versus an optimized PDF with margins cropped and color reduced. The goal is to identify the smallest, readable output that fulfills your use case.
Tools & Materials
- Scanner with adjustable DPI and color modes(Look for grayscale/black-and-white options; DPI range around 150–300 for text; higher DPI for detailed graphics.)
- Computer or tablet with PDF/software editor(Needed for compression, cropping, and merging pages.)
- USB or network connection to scanner(Stable connection prevents scan retries.)
- Original documents and test pages(Use test pages to calibrate settings before large scans.)
- Optional: post-processing software (OCR-capable)(OCR improves searchability and may affect file size slightly.)
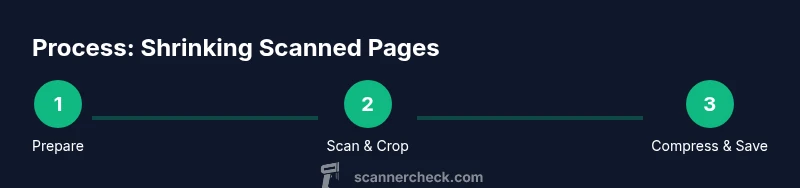
Steps
Estimated time: 30-60 minutes
- 1
Prepare documents
Sort pages, remove staples, and ensure pages lie flat. A clean precede reduces skew and improves crop accuracy, which helps keep margins tight and file sizes predictable.
Tip: Use a clean, flat surface and test a page to confirm alignment before starting the batch. - 2
Choose scanning settings
Select grayscale or black-and-white color mode, set a comfortable DPI for text (120–300 DPI typical), and choose a resolution that preserves readability with minimal data. Enable automatic page detection if available to separate pages correctly.
Tip: Start with 200 DPI in grayscale for text-heavy documents and adjust if charts need color. - 3
Enable multi-page layout (N-up)
If your goal is to shrink page count, choose N-up (2-up or 4-up) so multiple pages are captured on a single sheet. This reduces the final document size and makes reviewing fewer pages easier.
Tip: Verify legibility after N-up to ensure text isn’t cramped. - 4
Crop margins and remove blanks
Use the crop tool or automatic margin detection to trim the whitespace around pages. This directly reduces file size and improves readability in the final PDF.
Tip: Double-check that essential margins aren’t cropped away, especially for documents with headers/footers. - 5
Save with compression
Export to a compressed PDF or PDF/A variant. If available, enable image compression, font subsetting, and metadata removal to reduce size without hurting accessibility.
Tip: Keep a backup of the uncompressed scan for reference if needed later. - 6
Review and adjust
Open the final file, zoom in to verify legibility, check for artifacts, and adjust processing settings if necessary. Re-scan specific pages if needed rather than redoing the entire batch.
Tip: Run a quick side-by-side comparison of the original and compressed output.
Common Questions
Can you shrink pages by scanning at a lower DPI?
Yes, lowering the DPI reduces image data and file size, but you may sacrifice readability if you go too low. Find a balance that preserves legibility for your documents.
Yes. Lower DPI reduces file size, but be careful not to sacrifice readability.
What is N-up scanning and how does it shrink pages?
N-up scanning arranges multiple original pages on a single scanned page. This reduces the number of pages in the final file and can dramatically shrink the document size while keeping text legible.
N-up combines pages on one sheet to shrink document size.
Should I compress PDFs during scanning or after?
You can do both. Compress during export to reduce size immediately, and, if possible, re-optimize after OCR to maximize readability and searchability.
Compress during export and re-optimize after OCR if you want the best balance of size and readability.
Does OCR increase file size?
OCR can add a small text layer for searchability, which may increase size slightly, but modern compressors offset most of that impact.
OCR adds a text layer, which can slightly increase size but improves searchability.
Do I need specialized software to shrink pages effectively?
Not always. Many scanners include built-in optimization. For advanced control, use PDF editors or OCR software to fine-tune compression and layout.
Often, built-in scanner options are enough, but specialized software offers more control.
What about preserving image quality for diagrams or charts?
Keep color or grayscale for pages with charts if detail matters. Use higher DPI and retain lossless options for illustration-heavy documents, then compress where possible.
If charts matter, preserve color and detail and don’t over-compress those pages.
Watch Video
Key Takeaways
- Define shrink goals before scanning
- Optimize DPI and color mode for readability and size
- Use N-up layouts to reduce page count
- Crop margins to remove blank space
- Always verify readability after compression