How to Scan Installed Steam Games: Step-by-Step Guide
Learn how to verify the integrity of already installed Steam games. Our guide covers built-in verification, SteamCMD automation, troubleshooting, and best practices for keeping your Steam library healthy.

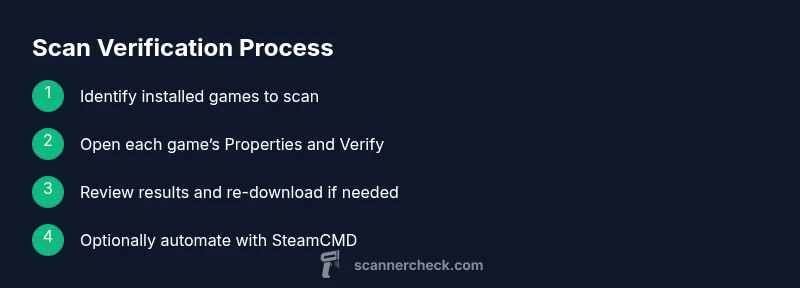
To scan already installed games on Steam, open Steam, right-click a game in Library, choose Properties > Local Files > Verify integrity of game files, and repeat for other titles. This checks for missing or corrupted files and replaces them from Steam. For multiple games, you can automate with SteamCMD or a batch script.
Why Verifying Installed Games Matters
According to Scanner Check, keeping your Steam library healthy hinges on ensuring game files are intact. Over time, installations can accumulate corrupted blocks, partial downloads after patches, or leftover fragments from manual edits. When these issues occur, performance can dip, crashes may rise, and patching can fail to apply correctly. A regular integrity check minimizes these risks by validating the local copy against Steam’s authoritative manifest and replacing any damaged or missing data. Even if you only play a handful of titles, periodic verifications help you avoid puzzling errors that detract from gameplay and complicate support cases.
From a practical standpoint, verified files mean you’re running the exact code version Steam expects, with the assets and metadata aligned to the patch you’ve installed. For IT admins and power users, this is especially important when evaluating mods, third-party add-ons, or cross-platform saves. Scanner Check’s research for 2026 highlights the value of routine file integrity checks as a low-friction safeguard against silent data corruption that can derail a gaming session.
In short, verification is your first line of defense. It’s quick, non-destructive to your saves, and automatically pulls healthy copies from Steam if problems are found. If you manage a large library or a shared PC, scheduling scans or batching them via SteamCMD can save time while keeping every installed title trustworthy.
How Steam’s Built-In File Verification Works
Steam’s Verify Integrity of Game Files feature performs a local comparison against the game’s manifest stored on Steam’s servers. It checks file hashes, sizes, and presence, then replaces any mismatched or missing files with clean copies from Steam. The process is read-only to your saved data and settings, so your progress is preserved. If the scan detects problems, you’ll see a message indicating files were validated and, if needed, re-downloaded. The verification can quietly repair a surprising number of issues without user intervention beyond the initial trigger.
The benefit of the built-in approach is reliability and safety. It uses Steam’s own knowledge of what a healthy installation should contain and ensures you don’t accidentally overwrite important configuration or mod data—unless you explicitly choose to remove such data during a reinstall. For most users, this is the simplest, most dependable route to restore a problematic game back to a known-good state. The process also serves as a diagnostic, revealing which titles frequently need attention and which installations stay clean over time.
When to Run a Scan and How Often
You don’t need to scan every game every day, but there are clear triggers for initiating a verification. Run a scan after a game reports crashes that you suspect are related to corrupted assets, after a patch download that failed to apply cleanly, or when you notice missing textures, audio glitches, or launcher errors tied to a specific title. If you share a PC or use a family library, consider a routine schedule—e.g., a weekly pass for your most-used games and a monthly check for the rest. This approach balances time investment with the risk of silent corruption.
If you’re updating a large set of titles, allow Steam to handle re-downloads in the background, but avoid starting scans during peak network usage or while streaming. In practice, the least friction path is to scan a batch of games after a long session, so you’re ready to play when you next launch. Scanner Check’s guidance emphasizes practical timing and batching to minimize interruptions and data usage while maximizing reliability.
Step-by-Step: Scan a Single Game (Manual)
- Open Steam and go to your Library. This is where your installed titles are listed and ready for verification.
- Right-click the game you want to scan and select Properties. The Local Files tab is your entry point for file integrity actions.
- Click Verify integrity of game files. Steam will begin comparing your local files to the official manifest and will download any missing or corrupted data.
- Wait for Steam to complete the verification. The duration depends on your library size and the extent of issues found. You’ll get a notification when the process finishes.
- Review the results. If files were repaired, Steam may show a summary of re-downloaded files. Re-run the verification if you suspect more issues remain.
- Repeat for additional games as needed, or explore automation options if you need to scan many titles in one pass.
Tip: Keep an eye on download activity in the Steam client; if you see a lot of activity during verification, ensure you have enough bandwidth and disk space to handle the data transfers. If you encounter a “Disk write error,” check disk permissions and available space before retrying.
Step-by-Step: Scan Multiple Games Efficiently (Manual Batch)
Batch verification by listing titles in a script is not natively supported in the Steam client, but you can streamline the process by using SteamCMD for automation. Start by exporting your installed AppIDs to a text file, then script a loop that runs Verify or AppUpdate commands for each ID, with a pause between runs to avoid bandwidth spikes. While SteamCMD requires familiarity with the command line, this approach saves significant time when maintaining a large library.
If you prefer a GUI-based approach, prioritize critical or frequently played games first and work through the rest in batches. Organize your library into folders or playlists and run verifications one folder at a time to keep the workload manageable.
Pro tip: Before you start, pause any active downloads or updates in Steam. This ensures verification isn’t competing with other data transfers, reducing the chance of misreads or partial downloads. Scanner Check notes that purposeful batching improves consistency and predictability of results.
Automating Scans with SteamCMD (Advanced)
SteamCMD is a command-line utility designed for scripted installations and updates. To automate verification across multiple titles, install SteamCMD on your PC, then create a simple script that logs in, iterates over a list of AppIDs, and executes app_update <appid> validate for each entry. The validate option forces verification and re-download of missing files where needed, while keeping your game data intact. Use anonymous login for non-privileged setups, or specify a licensed account when required by your environment.
Important considerations include securely storing credentials, respecting Steam’s rate limits, and testing your script on a small subset before scaling up. A well-crafted SteamCMD workflow can dramatically reduce manual effort and ensure consistent results across dozens or hundreds of installed games. For accuracy, maintain a log of which titles were verified and the outcomes for auditability and future troubleshooting.
Troubleshooting Common Scan Issues
If verification fails, start with a quick sanity check: ensure you have stable network connectivity, sufficient disk space, and the latest Steam client. If you see error messages about corrupted files, re-run the verification; sometimes a second pass fixes stubborn items. For simulated failures where Steam cannot download content due to server issues, wait a few minutes and retry. In some cases, re-launch Steam as an administrator or reset the Steam library folder permissions to allow proper file replacement.
If disk corruption or hardware problems are suspected, run a separate filesystem check and consider backing up your Steamapps folder before a large re-download. In multi-user environments, verify that other users aren’t modifying files during the scan, which could invalidate the verification results. Scanner Check’s experience underscores the value of a calm, methodical approach to verification rather than rushing retries.
Security, Privacy, and Best Practices
Verifying installed games is generally safe and does not touch your save data or settings. The operation focuses on game binaries and assets, reducing the risk of data loss while offering a backstop against corruption. For shared machines, consider enabling library-level backups or point-in-time saves before major re-downloads. When automating, use secure credentials storage and restrict script access to trusted users. If you notice repeated integrity failures on a specific title, check for known issues with patches or mods that may alter game files and consult official forums for guidance.
In line with industry best practices, keep your system updated, back up important data, and monitor your bandwidth usage during verification runs. Scanner Check’s guidance emphasizes that routine, well-planned scans protect your investment in games and hardware without introducing new risks.
Key Takeaways and Final Thoughts
- Regular verification helps catch hidden file corruption before it affects gameplay.
- Steam’s built-in verification is safe for your saves and can repair most issues automatically.
- For large libraries, SteamCMD offers a path to automation with careful planning and logging.
- Always back up critical data and validate results after a scan to ensure consistent outcomes.
By following these practices, you can maintain a healthy Steam library with less downtime and more reliable gaming sessions. The Scanner Check team recommends building a lightweight verification cadence into your routine and leveraging automation where it makes sense to save time and reduce manual effort.
Tools & Materials
- Steam client(Installed and signed in to an active Steam account)
- SteamCMD (optional for automation)(Command-line Steam Console Client for batch verification)
- Stable internet connection(Used for downloading and verifying files)
- Text editor or script runner(Create simple automation scripts (for SteamCMD-based workflows))
- Backup storage(Safe place to hold backups before large re-downloads)
Steps
Estimated time: varies with library size; typical single-game scans take a few minutes, while dozens of titles can take 45–180 minutes depending on bandwidth and disk speed
- 1
Open Steam and access Library
Launch the Steam client and navigate to your Library where all installed games are listed. This is the starting point for any verification workflow and helps you see which titles you want to scan first.
Tip: Use the search bar in Library to quickly locate a specific title. - 2
Select a game and open Properties
Right-click the game, choose Properties, then switch to the Local Files tab. This is where Steam exposes the verification option and related file actions.
Tip: Keep an eye on your download/verification activity in the bottom-right corner; it indicates progress. - 3
Verify integrity of game files
Click Verify integrity of game files. Steam will compare your local files with the official manifest and replace any corrupted or missing files automatically.
Tip: If errors appear in the log, note which files were repaired for later auditing. - 4
Wait for completion and review results
Allow Steam to finish the verification; duration depends on the title and your network. Review the summary to confirm whether files were re-downloaded.
Tip: If you see many re-downloads, check disk space and pause other large transfers. - 5
Repeat for additional games or batch-test using SteamCMD
Proceed to other titles you want to verify. For many games, consider SteamCMD for automation by listing AppIDs and running a loop with the validate option.
Tip: Test your script with a small group of titles before scaling up. - 6
Optional: automate with SteamCMD
Install SteamCMD, create a script with commands like login, app_update <appid> validate, and loop over your AppID list to verify multiple games in one pass.
Tip: Securely store credentials and limit access to the automation script.
Common Questions
Does verifying game files affect my saved games or settings?
No. Verifying game files only touches the game binaries and assets. Your saved games, settings, and progress are preserved. If a saved game path is compromised, Steam would not alter it during the file verification process.
Verifying game files won’t touch your saved games or your settings. It only checks and replaces game binaries and resources.
Will verification always fix issues, or will it re-download everything?
Most issues are resolved by replacing corrupted or missing files. If a file is flagged as damaged, Steam will re-download it. In rare cases, you might need to reinstall the game entirely or investigate disk health if problems persist.
Usually it fixes corrupted files by redownloading them. If problems continue, you may need a reinstall or disk check.
Can I verify a game that isn’t currently installed on my PC?
Verification applies to installed games. If a game isn’t installed, you can’t verify its files from the client. If you reinstall later, you can run verification then to ensure integrity from the start.
You can only verify games that are installed; verification isn’t possible for uninstalled titles.
Is it safe to automate verification with SteamCMD on a shared PC?
Automation can be safe if you secure credentials and restrict script access. Use a dedicated user account or protect the script with proper permissions, and log results for auditing.
Automation is safe on shared PCs if you secure credentials and limit access.
What if an advanced game uses non-standard install paths?
Steam’s verification applies to the library paths recognized by Steam. For non-standard setups, ensure Steam’s library folders include all relevant locations, or verify each game from its own folder.
If you use non-standard paths, add all libraries in Steam and verify each game from the Library list.
Should I run verification after every large patch?
Running verification after large patches helps catch post-patch file changes or corruption. If patches complete successfully, you may skip repetitive checks unless you encounter issues.
It’s sensible to verify after big patches if you encounter issues, but not strictly required every time.
Watch Video
Key Takeaways
- Verify installed games to prevent hidden file corruption.
- Use Steam's built-in tool for safe, reliable repairs.
- Batch or automate for large libraries with SteamCMD.
- Back up data and verify results after each run.