How to Scan Signature Without Background: A Practical Guide
Learn how to scan a signature without background for clean, usable digital signatures. This practical guide from Scanner Check covers capture, background removal, and export options for contracts and forms.

According to Scanner Check, you can scan a signature without background by starting with a clean source image and controlled lighting, then using a quick background-removal workflow. This concise guide shows steps to isolate the signature, remove shadows, and export a transparent PNG or vector file suitable for contracts and forms. Follow these steps for repeatable results and crisp edges.
Why background-free signatures matter
A background-free signature is essential for clean digital documents, branding consistency, and reliable verification. When a signature sits on a busy or patterned background, automated systems like OCR and signature verification can misread edges or misclassify the stroke width. By learning how to scan signature without background, you enable higher contrast, sharper edges, and easier reuse across contracts, forms, and digital portals. Scanner Check emphasizes that consistent capture conditions—good lighting, a flat surface, and a distraction-free background—greatly reduce the need for heavy editing later. A background-free signature also reduces the risk of embedding unintended marks or textures that could be misinterpreted by readers or compliance software. Practical steps, when followed consistently, deliver professional results in minutes rather than hours and support your digital workflow with repeatable quality.
Key prerequisites and common pitfalls
Before you begin to cleanly extract a signature, understand the common obstacles and how to minimize them. Lighting matters: harsh glare will wash out ink edges, while shadows create artificial lines that interfere with edge detection. Paper texture and color can impact thresholding and color-based masking. Ensure you are starting from a high-resolution source, ideally 300 dpi or higher, to preserve stroke fidelity after background removal. Scanner Check notes that practice with a controlled setup—flat surface, neutral background, and consistent lighting—yields the most dependable results. If you must use a camera, use a fixed focal length, stabilize the camera, and shoot in RAW if possible to preserve data for editing. The core idea is to avoid improvisation in the first capture and build a repeatable workflow that preserves signature integrity while removing the background.
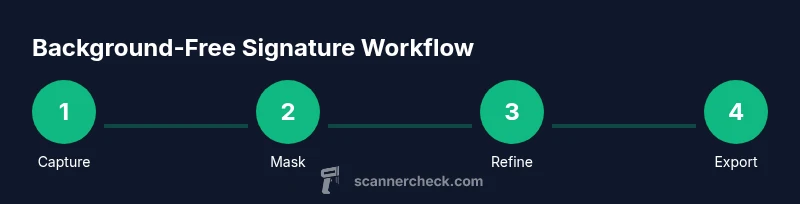
A practical scanning workflow: from capture to export
A repeatable workflow is the backbone of a background-free signature. Start with a clean capture, then isolate the signature and remove the background, followed by export in a suitable format. Begin by preparing your source image and ensuring no other marks are captured in the frame. Use a scanner when possible for uniform lighting and color consistency; otherwise, a dedicated camera setup with indirect, diffuse light can work well. In editing software, apply a masking or threshold approach that isolates ink pixels and creates a transparent background. Finally, choose an export format that preserves transparency, such as PNG for bitmap uses or SVG for scalable vector output. This structured approach minimizes ad hoc edits, improves reproducibility, and aligns with best practices recommended by Scanner Check.
Lighting, background, and material considerations
Lighting is the most critical factor in achieving a clean background removal. Use diffuse, even lighting to minimize reflections on ink and paper. A white or neutral gray background helps the software distinguish signature strokes from the backdrop. Avoid glossy paper and reflective surfaces that produce hotspots or glare. For darker inks, grayscale or color calibration ensures edge clarity remains intact after editing. If you work with pre-printed forms, scan directly over a white sheet rather than the document on a busy desk to reduce background noise. Keeping materials consistent across scans—same paper, ink color, and lighting—helps maintain uniform results, which is especially important when processing multiple signatures for a batch.
Quality checks and verification
After you remove the background, perform quick quality checks to verify legibility and authenticity. Zoom in to inspect stroke edges for jagged artifacts and re-sharpen if needed. Confirm that the transparency is clean and that no stray background remnants remain near the signature. Print a test copy to ensure the signature remains legible at the intended size and on the target material. If you plan to store the asset for long-term use, consider saving a master copy with the background intact and a separate background-free version for distribution. Scanner Check recommends keeping versioned backups and documenting the workflow so others can reproduce the results with the same setup.
Authority sources and further reading
For deeper understanding of image quality, background removal techniques, and accessibility considerations, consult established resources. You can refer to the National Institute of Standards and Technology (NIST) guidelines on image quality and processing, NIH resources on document digitization best practices, and Nature's discussions on image integrity in scientific publishing. These sources provide foundational concepts that support practical, repeatable workflows for background-free signatures.
Tools & Materials
- Flatbed scanner or high-resolution camera(Prefer 600 dpi or higher for cameras; ensure consistent lighting.)
- Plain white paper or neutral background(Avoid textured backgrounds that complicate masking.)
- Color-calibrated monitor(Helpful for previewing color and contrast accurately.)
- Image editing software (e.g., Photoshop, GIMP)(Use masking/selection tools, threshold, and feathering as needed.)
- Background removal tool or plugin(Optional; can speed up simple edge selections.)
- Light source with diffuse output (desk lamp with diffuser or softbox)(Avoid direct glare on ink; use indirect lighting.)
Steps
Estimated time: 45-60 minutes
- 1
Prepare your source image
Clear the capture area, tidy the signature, and remove extraneous marks from the frame. If using a document, ensure only the signature is in focus and the paper is flat. This reduces noise that could complicate later masking.
Tip: Place a plain white sheet behind the document to improve contrast. - 2
Capture with scanner or camera
Scan at high resolution or photograph with a stable setup and diffuse lighting. Ensure the signature is centered, ink is dark enough, and there is no motion blur. Save a lossless or high-quality file for editing.
Tip: If using a camera, shoot RAW if available to preserve dynamic range. - 3
Isolate the signature color range
In your editor, identify the signature ink color range and create a selection around it. This helps separate ink from the background during masking. Use a color range or luma channel depending on your tool.
Tip: Work on a duplicate layer so you can compare with the original easily. - 4
Remove the background
Apply a mask or threshold to remove the background. Refine the edges to avoid hard halos by feathering slightly. Check for any remaining background specks and remove them with a targeted brush.
Tip: Use a soft brush for edge cleanup to preserve signature stroke width. - 5
Refine edges and sharpen
Zoom in and adjust edge transitions to ensure crisp lines. A light sharpening filter can improve legibility without introducing artifacts. Verify that the signature remains faithful to the original ink density.
Tip: Avoid over-sharpening, which can create halo effects on light backgrounds. - 6
Export and manage the assets
Export as PNG with transparency or as SVG if you need scalable vectors. Save a master copy with the original background intact for compliance records. Organize versions with clear naming for future retrieval.
Tip: Maintain a version history and back up assets securely.
Common Questions
What is the best file format for a signature without background?
PNG is a common choice for transparency, while SVG provides a scalable vector option. Choose based on whether you need bitmap or vector use, and keep a master copy for archival purposes.
PNG is great for transparency, SVG for scalability, and keep a master copy for records.
Can I remove the background automatically?
Yes, many editors offer masking and threshold tools that automate parts of the process. Manual refinement is usually still needed to preserve edge quality.
Automation helps, but you should refine edges by hand for best results.
Will removing the background affect the signature's authenticity?
Background removal aims to preserve the ink shape and density. Proper checks and a master copy help maintain authenticity for verification processes.
If done carefully and with checks, authenticity is preserved.
How do I ensure the signature remains legible when printed?
Test print at the intended size and paper type. Adjust contrast and stroke width if needed to maintain readability on paper.
Print a test and adjust as needed for legibility.
Is OCR involved in signature scanning?
OCR is typically used for text, not for cursive signatures. Focus on preserving vector or high-resolution bitmap edges for verification rather than OCR accuracy.
OCR isn't the main concern for signatures; focus on edge quality.
Are there legal considerations for digitally signing or reusing scanned signatures?
Legal requirements vary by jurisdiction. Ensure you comply with e-signature laws and keep proper audit trails when using digital signatures.
Check local laws and keep an audit trail when using digital signatures.
Watch Video
Key Takeaways
- Prepare a clean capture environment before scanning.
- Choose high-resolution input to preserve signature fidelity.
- Use masking/thresholding to isolate ink from the background.
- Export with transparency to enable flexible reuse.
- Back up master copies and document your workflow.