How to Stop Scanner from Auto Cropping
Learn how to stop auto cropping on scanners. This guide explains causes, how to disable auto crop, and best practices to preserve edges and improve scan quality.

To stop auto cropping, you’ll disable auto crop or edge-detection features in your scanning software, then set fixed margins and a stable page size. Start by testing a few easy adjustments, save your preferences as a default profile, and evaluate edge retention across document types. This approach reduces unexpected crops and improves consistency across scans.
Why auto-cropping happens
Auto cropping in scanners is typically triggered by edge detection, page-size detection, or preset margins in the scanning software. According to Scanner Check, these features aim to produce clean scans quickly but can inadvertently trim content if margins are misread or the document isn’t perfectly aligned. A quick test page comparison helps you understand your baseline, and recognizing why crops occur is the first step to stopping them. In practice, most crop issues arise with low-contrast backgrounds, mixed media (text plus photos), or margins that are near the scanner bed’s edge. By understanding the root cause, you gain a predictable path to reliable, edge-preserving scans.
How edge detection and page size detection work
Modern scanners use image analysis to locate the document edges and decide where to crop. Edge-detection looks for high-contrast boundaries, while page-size detection tries to confirm the correct sheet size. If the background is not uniform or the document isn’t flat, the detection may misread edges, triggering cropping that removes content on the sides. These mechanisms are valuable for speed and neatness, but they can be too aggressive if your documents vary in margin and color. Knowing this helps you adjust strategy rather than fight the tool.
Assessing your current scanning settings
Start by opening your scanner’s software and locating all cropping, margin, and page-size controls. Document the exact option names you see: Auto Crop, Edge Detection, Crop to Content, Margin Guides, or Page Size Detection. Then, perform a controlled test: use a standard document with known margins, scan once with default settings, then with auto-cropping disabled. Compare the results side by side to identify what caused the crop and what margins you want to preserve. This baseline work saves time later when you apply consistent settings across documents.
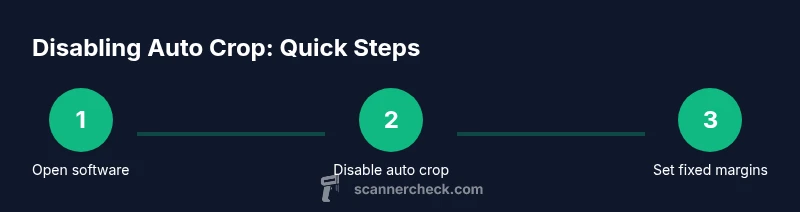
Step-by-step plan to disable auto cropping: overview
The goal is to move from flexible, automatic crops to a stable, manual crop model. Start by turning off any auto crop or edge-detection features, then define fixed margins or a fixed crop size. Save these choices as a default profile so every scan uses the same margins. Finally, test with representative documents to ensure your margins are preserved across formats and paper sizes. This plan reduces variability and makes edge content predictable.
Brand-specific adjustments (common platforms)
Most scanner brands provide a dedicated scanning application or control panel where you can disable auto crop. For Windows users, look for an option labeled Auto Crop, Crop to Content, or Edge Detection in the scanning software. On macOS, the same logic applies in the Image Capture or vendor software, but names vary. If you cannot find a setting, consult the vendor’s support page; many brands offer a saved profile for fixed margins. The key is consistency—once you identify the correct toggle, apply it to a default profile and reuse it for routine scans.
Best practices for preserving edges and quality
- Use fixed margins consistently (e.g., 3–6 mm/1/8–1/4 inch) to avoid cropping content.
- Scan at a reliable DPI (300–600) and color mode appropriate to your documents to preserve detail.
- Calibrate the scanner bed if supported, and keep the document flush with the edge for accurate reading.
- Always preview the scan before saving; if the crop still appears, adjust the margins slightly and re-scan.
Troubleshooting: when cropping persists
If disabling auto crop doesn’t help, verify that you aren’t hitting a separate crop option in the export or save step (for example, “Save as PDF with crop” or “Trim margins”). Check for software updates and firmware updates for the device, as newer firmware can adjust edge-detection behavior. Try a different document type (plain paper vs. glossy photo) to see if the crop behavior is document-dependent. As a last resort, contact the manufacturer’s support with a sample scan and your current settings.
Tools & Materials
- Scanner with adjustable cropping/edge-detection controls(Ensure firmware supports disabling auto crop and saving as default profile)
- Computer (Windows/macOS) with scanning software(Have the vendor software installed and updated)
- USB cable or wireless connection(Used for direct scanning and quick testing)
- Test documents with clear margins(Include a plain page and one with a border or form to observe cropping)
- Calibration/clean handling sheet(Optional aid to ensure the glass is clean and aligned)
Steps
Estimated time: 30-50 minutes
- 1
Open scanning software and locate crop options
Launch the vendor or native scanning app. Navigate to the settings or preferences area and find terms like Auto Crop, Crop to Content, Edge Detection, or Margin Guides. Document where these controls live for future reference.
Tip: If you can’t find them, check the help section or model-specific guides and note the exact wording. - 2
Disable auto crop/edge-detection
Toggle off the Auto Crop or Edge Detection option. If there is a Save as Default or Profile option, enable it so new scans inherit this behavior.
Tip: Always apply changes to a named profile so you can switch back if needed. - 3
Set fixed margins or crop size
Define a fixed crop size or fixed margins and apply these as your default. Document the margins so you can reproduce the same crop on future scans.
Tip: Start with 3–6 mm margins and adjust based on test results. - 4
Run a test scan
Place a standard document, preview the scan, and confirm the edges are preserved. Compare to the default crop to ensure the new margins work.
Tip: Use a plain sheet and a form with edges to visually verify margins. - 5
Adjust document size detection if needed
If the software still crops, check for a separate option called Paper Size/Document Size. Ensure it understands the actual page size.
Tip: Set size to the exact paper type (A4, Letter, etc.) to avoid misdetection. - 6
Update firmware and software
Check for the latest firmware for the scanner and latest software updates. Restart after updates to ensure changes take effect.
Tip: Even a minor firmware patch can alter edge-detection behavior. - 7
Create per-profile defaults for common tasks
If you perform different tasks (invoices, forms, photos), create separate profiles with tailored margins and save them.
Tip: Label profiles clearly (Invoices_EdgeSafe, Forms_Focus) to avoid confusion. - 8
Validate with diverse documents
Test across a few paper types and sizes to confirm consistency. Keep notes on your test results for future reference.
Tip: Document the before/after changes to guide future adjustments.
Common Questions
What is auto cropping in scanners and why does it happen?
Auto cropping uses edge-detection and page-size rules to trim content. It can crop content if margins are misread or the document isn’t aligned. Understanding this helps you decide whether to disable it or adjust margins.
Auto cropping trims edges based on detected margins. If your margins are misread, disable the feature and set fixed margins.
How do I disable auto cropping on Windows/macOS scanning software?
Open the scanning software, locate Edge Detection or Auto Crop in the settings, and turn it off. Save changes to a default profile so every scan uses fixed margins.
Open the scanner software, turn off auto crop, and save as default to keep margins constant.
Will turning off auto cropping affect OCR accuracy?
Disabling auto cropping can improve edge fidelity, which helps OCR when document edges are sharp. However, inconsistent margins can require manual cropping or profile tweaking for best results.
Turning off auto crop can help OCR when edges are clear, but you might need to adjust margins for perfect results.
Do all scanners support disabling auto cropping?
Not all scanners expose an auto crop option in their software. If you can’t find the control, check the manufacturer’s site or update firmware; many models offer edge-detection toggles in vendor apps.
Some models lack a direct option; check for firmware updates or vendor apps for edge-detection controls.
What should I do if cropping persists after changes?
Recheck margins and ensure the correct document size is selected. Try a different profile, test again with a basic page, and verify there are no export-time cropping options involved.
If crops persist, recheck margins, confirm the correct page size, and test with a simple page.
When is post-processing a better option?
If edge preservation is inconsistent, use post-processing in an editor to crop non-content areas after scanning. OCR software can then focus on the extracted content.
Post-process if edges are inconsistent; crop after scanning and run OCR on the corrected image.
Watch Video
Key Takeaways
- Disable auto crop and edge-detection first
- Set fixed margins and save as default profile
- Test with representative documents
- Update firmware/software to ensure consistent behavior