How to Use the Scanner NieR Automata: A Practical Guide
A comprehensive, step-by-step guide on how to use the scanner NieR Automata, with prerequisites, workflows, tips, and real-world mission scenarios for gamers and fans.

Learn how to use the scanner NieR Automata to detect hidden data, signals, and clues during missions. This quick guide outlines prerequisites, a concise, step-by-step workflow, and practical tips. How to use scanner nier automata is a common search for players seeking actionable, in-game guidance. Follow these steps to improve accuracy and speed.
What the NieR Automata Scanner Actually Does
In NieR: Automata, the in-game scanner is a tool that helps you detect hidden data nodes, signal clusters, and environmental cues that aren’t immediately visible. It highlights faint footprints, energy signatures, and micro-signal pulses that point to upgrade parts, logs, or secret paths. Understanding how the scanner works gives you a tactical edge in missions where precision matters and where timing can determine success. This section lays the groundwork for how the scanner fits into your overall playstyle and how you can leverage it to uncover critical information without wasting time.
Understanding Scanner UI and Feedback Cues
The scanner interface in NieR Automata uses a color-coded overlay, a crosshair, and a pulsating beacon to indicate signals worth pursuing. Green signals generally denote high-confidence targets, yellow signals indicate nearby possibilities, and red alerts flag potentially dangerous or misleading data. Spatial awareness matters: hold steady to avoid drift, keep a safe distance to maximize signal clarity, and watch for changes in the environment as you move. Mastery comes from correlating the overlay with real-world cues such as terrain features, enemy patterns, and item placement.
Prerequisites and Gear for NieR Automata Scanning
Before you start, verify you have access to the scanner within the game, enough in-game energy or stamina to sustain a scan, and a calm playing environment to maintain focus during data collection. Depending on your platform, ensure your controls are mapped to a quick-access button for toggling scanning, and consider a display setup with good contrast so faint signals aren’t washed out by bright scenes. A quick in-game checklist helps you stay ready for scanning in any mission.
Step-by-Step Workflow Overview
The scanning workflow follows a clear sequence: toggle the scanner to activate the overlay, align your view so the crosshair centers on the signal, initiate the scan to capture data points, interpret color-coded signals, log important findings, verify signals against known coordinates, pause if enemies appear, and review your collected data after the mission segment. While this block offers a narrative, the dedicated Step-by-Step section below provides concrete actions and timing to follow during gameplay.
Filtering Data: Distinguishing Signals from Noise
Not every glow is a treasure. Signals can be faint and overlapping, especially in cluttered environments. Learn to prioritize by signal strength, proximity, and consistency with surrounding landmarks. Cross-check a signal with nearby terrain features, such as walls, doors, or crates, to confirm it isn’t a false positive caused by lighting or particle effects. This discipline saves time and prevents chasing phantom clues.
Estimating Time and Resource Use During Scanning
Scanning takes variable time depending on the scene density and signal complexity. In straightforward areas, a focused scan may take under a minute, while crowded maps with multiple clusters can require several minutes. Plan your route to minimize backtracking, and factor in mission timers or energy cooldowns to avoid stalling the team. Keep a lean data-log to conserve mental bandwidth.
Advanced Techniques: Multi-Target Scanning and Data Verification
When multiple signals appear, prioritize by proximity and data quality. Use pattern recognition to identify clusters that align with mission objectives, then triangulate signals by cross-referencing with map markers and objective markers. After collecting data, verify by re-scanning from nearby positions to confirm persistence of the signal. This two-step verification reduces false positives and builds a reliable data set for later review.
Common Mistakes and How to Avoid Them
Common missteps include scanning too quickly, ignoring feedback cues, and failing to log data before moving on. Another pitfall is treating every glow as valuable without validation. Remain patient, adjust your distance, and log only signals that meet a defined threshold of confidence. Regular practice helps you recognize which cues matter and which are decoys.
Real-World Mission Scenarios and Examples
In stealth segments, the scanner helps locate hidden passages and timed valves that aren’t visible from standard sightlines. In exploration-heavy missions, you can reveal data caches that unlock upgrades and lore entries. Use the scanner as a companion tool that informs route planning, enemy avoidance, and resource gathering. Concrete examples include identifying an unseen crate that contains a needed upgrade or spotting a data node that advances a quest line.
Security and Ethics: What to Scan and Why
In-game scanning should be used to enhance player experience and mission outcomes. Avoid attempting to scan outside the intended game boundaries or to harvest data that isn’t accessible through legitimate gameplay. The scanner is a tool for information gathering within the story’s context, so respect game rules and community guidelines while you practice.
Integrating Scanner Data with Mission Logs
Maintaining a simple log of scanned signals helps you build a personal map of where data tends to cluster in certain maps or missions. A concise note for each signal can include location, confidence level, and potential reward. This practice speeds future playthroughs and makes it easier to share reliable findings with teammates or community guides.
Next Steps: Practice, Calibration, and Optimization
The best way to improve is steady practice. Dedicate a few sessions to calibrating your distance and timing for a variety of maps. As you log more signals, you’ll identify preferred scanning patterns, save time on target acquisition, and refine your data verification workflow. Use this guide as a living document and revisit it after new game updates.
Tools & Materials
- NieR Automata game or platform access(Ensure you can access the scanner feature within the game environment.)
- Controller/keyboard mapped to quick-access scanning(Assign a dedicated button for toggling the scanner to minimize reaction time.)
- Energy or stamina resources (in-game)(Have enough energy to sustain scans during critical mission moments.)
- Notebook or digital log(Record notable signals and coordinates for later review.)
- Good display with high contrast(Helps differentiate faint signals from the background in bright scenes.)
Steps
Estimated time: 30-45 minutes
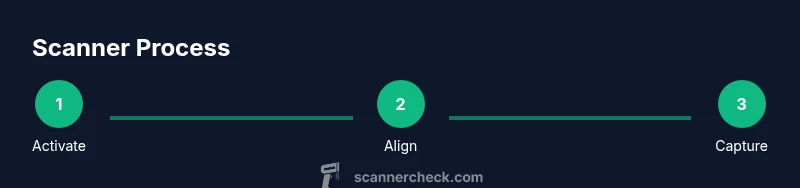
- 1
Activate the Scanner
Toggle the scanner interface to turn on the overlay and begin signal detection. This initial action primes the system to start capturing cues as you move.
Tip: Ensure you are not in a cutscene or blocked by an obstacle before activating. - 2
Align Your View
Center the crosshair on the area of interest to maximize signal clarity and reduce drift. Precise alignment improves signal quality and reduces noise.
Tip: Move slowly; rapid movement can blur faint signals. - 3
Initiate the Scan
Hold or press the scan command for 1–3 seconds to capture a data point. Longer scans may reveal more distant or faint signals.
Tip: If a signal appears, pause briefly to confirm its persistence before logging. - 4
Interpret Signals
Read the color-coded overlay: green indicates high-confidence data, yellow suggests nearby possibilities, red flags potential false positives.
Tip: Cross-check with nearby landmarks to validate signals. - 5
Log and Record
Add key signals to your data log with location notes and confidence levels. This creates a reproducible trail for mission review.
Tip: Use concise, consistent phrases for quick scanning later. - 6
Verify Signals
Re-scan from a nearby position to confirm signal persistence. Verification reduces misinterpretation and improves reliability.
Tip: If signals vanish on re-scan, treat them as decoys and drop from logs. - 7
Pause and Resume
If enemies appear, pause scanning to avoid distraction, then resume once the path is clear. Avoid letting combat disrupt data integrity.
Tip: Use a quick save or checkpoint if the game supports it before resuming. - 8
Review and Export
After completing a mission segment, review the collected data and export or consolidate your findings for team briefs or personal study.
Tip: Create a short summary of high-value signals for quick reference.
Common Questions
What is the scanner in NieR Automata and what does it do?
The scanner highlights hidden data nodes, signal clusters, and environmental cues that aren’t visible with normal vision. It helps you find upgrades, logs, and secret paths by detecting faint cues. Use it to inform navigation and data collection during missions.
The NieR Automata scanner highlights hidden data and clues to guide your mission. It’s a tool to help you locate upgrades, logs, and secret paths.
Can I use the scanner to locate story items?
Yes, many story items and lore logs appear as signals the scanner can reveal. Not every object is scannable, but most key narrative data will show up as detectable cues when you’re in the right area.
Yes, you can reveal story items and lore logs with the scanner, though not every object is detectable.
Are there risks or limitations to scanning?
Scanning consumes in-game energy and can be misled by decoys. It’s important to validate signals with landmarks and avoid over-reliance on a single cue. Plan scans around energy availability.
Scanning uses energy and can be misled by decoys. Validate signals with landmarks and manage energy wisely.
How do I improve scanning accuracy?
Take time to align the view, verify signals from multiple angles, and log only signals that persist on re-scan. Consistency in technique improves overall accuracy.
Align your view carefully, verify from different angles, and log only persistent signals.
Is scanning required for all NieR Automata missions?
No. Scanning is a powerful tool for certain missions with hidden data, but many objectives can be completed without scanning. Use it selectively where it adds value.
Not all missions require scanning; use it where it adds value and helps you progress.
Does scanning affect game performance?
In most cases, scanning has a minor impact on performance. In crowded scenes, you may notice slight framerate dips when the scanner overlays many signals.
Usually minor, but you might see small dips in crowded scenes with lots of signals.
Watch Video
Key Takeaways
- Master the UI cues to separate signals from noise
- Calibrate distance and timing for consistent results
- Verify signals before logging to avoid false positives
- Log signals methodically for faster future runs