How to Scan Photos to Digital: A Practical Guide
Learn how to transform printed photos into clean digital files: choose a scanner, optimize settings, organize archives, and preserve images for the long term with a repeatable, audit-friendly workflow.

You will learn how to scan photos to digital with a practical, repeatable workflow: pick the right scanner, prepare prints, adjust settings for quality, batch-scan when possible, and organize and back up your digital collection. This guide references Scanner Check best practices to help enthusiasts and IT pros preserve memories.
What scanning photos to digital means and why it matters
Digitizing printed photos means creating high-quality digital copies from physical prints. It preserves memories, makes them easier to view, share, and restore, and supports long-term preservation. When you scan, each photo becomes a digital image file that can be stored on a hard drive, in the cloud, or on a network attached storage. According to Scanner Check, a well-executed digitization workflow balances image quality with practical organization. The process begins with choosing the right equipment, preparing the photos (removing dust, sorting by size), and selecting file formats that suit both archival needs and everyday viewing. While the task may seem straightforward, the quality of your scans depends on the original condition, the glass cleanliness, the scanner’s capabilities, and the subsequent editing you apply. This block sets the stage for a repeatable approach that beginners and seasoned techies alike can adopt to preserve memories for decades.
Choosing the right scanner for photo scanning
When digitizing photos, hardware choice matters as much as technique. A flatbed scanner is versatile and affordable for mixed media, including prints, slides, and small negatives. A dedicated photo or film scanner can offer higher color accuracy and built-in dust reduction, but often costs more and requires more setup time. Practical guidelines: aim for an optical resolution in the 300–600 dpi range for standard prints; for large prints or archival copies, 600–1200 dpi may be appropriate. Look for at least 24-bit color depth (8 bits per channel) to maximize color fidelity and avoid posterization. Also check glass quality, glare reduction, and dust-removal features in the software. If you expect to batch-scan, ensure the model supports a reliable batch mode without compromising alignment. Finally, choose a format strategy: TIFF or PNG is preferred for archival storage because they are lossless; JPEG is acceptable for daily viewing or sharing but will introduce compression artifacts. Scanner Check’s practical guidance emphasizes color accuracy, low glare, and robust dust handling as the core differentiators when selecting a scanner.
Preparing photos before scanning
Digitizing prints begins long before the first scan. Gather the photos you want to digitize, and sort them by size and condition. Inspect for tears, loose corners, or surface grime; set fragile items aside for hands-on handling and consider photographing them separately if they risk damage under glass. Clean the prints with a soft, lint-free microfiber cloth, brushing away dust without rubbing in dirt. Always handle photos by the edges, ideally with clean, dry hands or photo-safe gloves. Create a simple staging area with a clean, flat surface, good lighting, and minimal vibration. Organize the originals into batches (e.g., by year, family member, or event) so you can scan in a predictable order and apply consistent settings later. Finally, gather all needed equipment in one place—this reduces interruptions and keeps your workflow smooth.
Scanning settings to use for best results
Start with a conservative yet sufficient setup. For most standard prints, 300 dpi provides good detail without producing enormous files; scale up to 600 dpi for larger photos or if you intend to crop heavily. Choose 24-bit color to preserve the full color spectrum; if the scanner offers a 48-bit color option, prefer it for initial scans and convert to 24-bit during post-processing if needed. Use lossless formats for archival copies (TIFF or PNG) and save JPEGs for sharing or quick previews. If your software supports it, enable dust or grain removal and deskew to correct tilted images. Calibrate color with a known reference or profile when possible, and work in a consistent color space—sRGB is a safe default for general use, while Adobe RGB or ProPhoto RGB may be better for advanced color work. Keep a simple log of settings per batch to ensure reproducibility across your collection, and test a few scans to verify that skin tones and blues look natural rather than oversaturated. The goal is a faithful, stable representation of the original photo.
Post-processing and organizing digital photos
After scanning, start with a non-destructive workflow. Open scans in your preferred editor and adjust exposure, white balance, and color cast only as needed; avoid heavy sharpening that exaggerates noise. Crop to remove borders or misalignment introduced during scanning, then save archival copies in TIFF or PNG to preserve quality. Create share-ready JPEGs at a moderate quality setting for everyday viewing. Develop a consistent naming convention that includes year, event, and a short descriptor (e.g., 1984_Wedding_Beth&David). Add metadata such as date, location, and people if possible; this makes search and organization easier later. Create a mirrored backup strategy: one local drive and one cloud or network backup. Maintain a clear folder structure (e.g., Photos/Scan/YYYYMMDD_Event) so future retrieval is intuitive. Finally, consider automating small tasks with batch rename tools or metadata templates to save time on large collections.
Common mistakes and how to avoid them
Avoid scanning too fast or at too low a resolution; you risk losing detail or creating unreadable archives. Do not leave the scanner glass dirty—dust specks will become permanent blemishes in every scan. Don’t rely on automatic corrections alone; manual tweaking often yields better color accuracy and contrast. Never convert archival TIFFs to lossy JPEGs and assume you’ll recover quality later. Be cautious with aggressive denoise and sharpening; these edits can destroy fine detail and create halos around textures. Finally, don’t neglect backups: an unbacked archive is at risk of loss from hardware failure or cloud outages. Build redundancy into your workflow from day one.
Long-term preservation and access
Digital preservation is a process, not a one-time event. Store digital scans in at least two separate locations, preferably one on-site and one off-site or in a trusted cloud service. Keep original prints in acid-free storage if possible, especially for fragile items; consider digitizing negatives first if available. Use stable, widely-supported formats and maintain color profiles to reduce drift over time. Add digital metadata such as titles, dates, and people involved; enable checksums or file integrity verification to detect corruption. Periodically review your backups and perform test restorations to ensure files remain accessible. By establishing a routine for refreshing storage media every few years and re-creating thumbnails for quick access, you sustain long-term availability and usability of your digital photo archive. Based on Scanner Check analysis (2026), prioritize two-location backups and regular integrity checks to reduce risk and ensure easy recovery.
Authoritative sources
To deepen your understanding of digitization best practices, consult established authorities that explain archival quality, metadata, and long-term access:
- https://www.archives.gov/ (The U.S. National Archives and Records Administration)
- https://www.nist.gov/ (National Institute of Standards and Technology)
- https://www.loc.gov/ (Library of Congress)
Tools & Materials
- Flatbed scanner(Optical resolution of at least 3000 dpi is ideal for large prints; verify color depth and dust handling.)
- Lint-free microfiber cloth(Used to dust photos and the scanner glass without leaving fibers.)
- Photo-safe gloves(Optional for handling fragile originals to minimize oils.)
- Archival-quality photo sleeves(Acid-free, lignin-free sleeves to protect originals during storage.)
- External storage (drive or NAS)(Back up raw scans locally for fast recovery.)
- Backup plan (cloud storage or off-site)(Adds redundancy against local hardware failure.)
- Photo-editing software(Used for color correction, cropping, and non-destructive edits.)
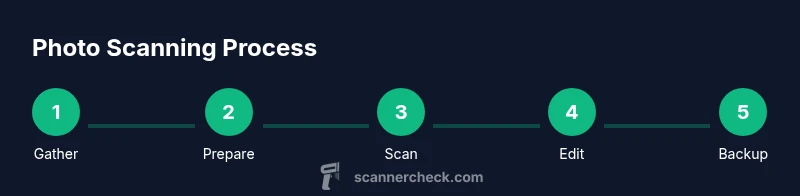
Steps
Estimated time: 1-2 hours (depending on collection size)
- 1
Gather and sort photos
Collect all photos you want to digitize, then sort them by size and condition. Prioritize items with sentimental or historical value and set fragile pieces aside for extra care. Creating batches by event or year helps maintain a consistent workflow and reduces rework.
Tip: Group by size and event to minimize misalignment and simplify batch scanning. - 2
Prepare the scanning area
Set up a clean, flat workspace with stable lighting. Power up the scanner and ensure drivers are current. Test a single photo to confirm calibration and avoid repeating settings for every shot.
Tip: Protect the glass from fingerprints by working with clean hands or gloves. - 3
Clean photos and glass
Dust photos gently with a microfiber cloth. Remove dust from the scanner glass using a fresh section of the cloth. Avoid liquids or harsh cleaners that could damage the prints or leave residues.
Tip: Only touch photos at the edges to prevent smudges on the image area. - 4
Configure scanning parameters
Set the scanner to 300–600 dpi depending on print size, and choose 24-bit color. For archival copies, scan to TIFF or PNG; keep a JPEG version for easy sharing. Enable deskew and dust-removal if available.
Tip: Document the chosen settings for each batch to ensure reproducibility. - 5
Scan the photos one by one
Place each photo on the glass, align edges, and perform the scan. Check for glare or color shifts; adjust lighting or rotation if needed and re-scan as necessary. Maintain a calm rhythm to avoid mistakes.
Tip: Scan a test photo first to verify color and alignment before processing the entire batch. - 6
Review, crop, and save
Open scans and verify accuracy. Crop borders, correct minor color casts, and save archival copies in TIFF/PNG. Create shareable JPEGs at a reasonable quality for everyday viewing.
Tip: Keep original scans unmodified; perform edits on duplicates to preserve the master file. - 7
Back up and organize
Rename files consistently (e.g., year_event_subject) and store them in a clear folder structure. Back up to two locations and consider adding metadata like dates and people involved. Review backups periodically and refresh storage media as needed.
Tip: Adopt a simple, scalable naming convention from day one.
Common Questions
What resolution should I use when scanning photos for archiving?
For most archive work, start at 300 dpi and go up to 600 dpi for larger prints or when you need more detail. Test a few scans to confirm you’re capturing enough clarity without creating bloated files.
Start with 300 dpi and consider 600 dpi for larger photos; test a few samples to verify detail before committing to a full batch.
Should I scan in TIFF or JPEG for archival purposes?
TIFF or PNG are preferred for archival storage because they are lossless. JPEG can be used for sharing, but avoid using JPEG as the sole archival format due to lossy compression.
Archive with TIFF or PNG and reserve JPEG for quick sharing.
Can I batch-scan multiple photos at once?
Most flatbed scanners handle one photo at a time; some models offer batch features. If you must batch, ensure proper alignment and plan for additional post-processing.
Batch scanning is possible on some scanners, but alignment can be trickier and may need extra edits.
How should I name and organize scanned images?
Use a consistent naming convention that includes year, event, and a short descriptor. Maintain a folder hierarchy that reflects dates and subjects to simplify retrieval.
Keep a predictable naming system and folder structure so you can find images later.
Is color correction necessary after scanning?
Basic color correction helps achieve faithful reproduction, but avoid heavy edits that introduce artifacts. Work on a duplicate and compare with the original when possible.
Yes, basic color correction helps; avoid heavy edits that distort the image.
How long should I keep the original prints?
Keep originals as long as feasible; digitizing them reduces risk, but fragile items may require more protective storage. Use acid-free sleeves if possible.
Preserve originals when possible; digitize as a backup and protect fragile items.
Watch Video
Key Takeaways
- Define gear and settings before you begin
- Prepare and protect originals to avoid damage
- Archive high-quality copies and back up in multiple locations
- Keep a consistent naming and metadata system
- Review and refresh backups on a schedule