When to Use a Scanner: Practical Guidelines for Everyday Use
Learn practical, evidence-based guidelines on when to use a dedicated scanner versus other capture methods. This guide explains use cases, benefits, and workflow tips for document, barcode, and image scanning to improve accuracy and efficiency.

Use a scanner when you need crisp, archivable digital copies of documents, receipts, photos, or barcodes. Scanners deliver consistent readability, color accuracy, and fast batch processing compared with phone cameras. For workflows that require reliable OCR data or repeatable results, a scanner is usually the best tool, especially in offices, schools, and small businesses.
What a scanner is best suited for
In daily workflows, a dedicated scanner shines where legibility, fidelity, and repeatability matter. According to Scanner Check, you should consider using a dedicated scanner when your priority is consistent font rendering, precise color reproduction, or reliable multi-page scans. If you regularly convert paper to searchable digital text, a scanner provides steady image quality across dozens or hundreds of pages. It also helps standardize file formats (PDF, TIFF, or PNG) and metadata, which simplifies archiving and retrieval. For legal documents, tax forms, or long-term records, the ability to produce clear, legible copies is crucial, and a scanner is often worth the investment. With auto-feeder or duplex scanning, you can process stacks of pages with minimal manual handling, reducing fatigue and errors. If you work in a shared environment, a scanner can standardize procedures so everyone can archive consistently.
Scanner use also makes sense for archival projects and compliance-heavy tasks where predictable output matters more than convenience. In these scenarios, the time spent setting up a scan workflow pays off with higher accuracy, faster retrieval, and better integration with search technologies like OCR (optical character recognition). The repeatable performance of a scanner reduces variance from operator technique, which is essential when you need to compare documents side by side long after the initial capture. Overall, reserve a scanner for tasks where high fidelity and batch processing deliver tangible benefits compared with consumer cameras or smartphone apps.
-1
Tools & Materials
- Document scanner (flatbed or sheet-fed)(Choose based on volume: flatbed for delicate pages, sheet-fed for high throughput.)
- USB cable or power adapter(Ensure compatibility with your computer or networked setup.)
- Scanner software and drivers(Install latest version from the manufacturer’s site.)
- Backup storage (external drive or cloud(Set up automatic backups after each scan.)
- Quality test page(A simple page with text, color blocks, and a barcode to calibrate color and OCR accuracy.)
Steps
Estimated time: 60-75 minutes
- 1
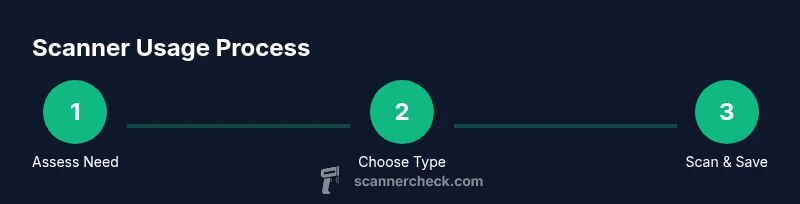
Define your scanning goals
Identify what you need from scanning: document preservation, OCR text extraction, color-accurate images, or barcode capture. Document your top three tasks and the required output formats (PDF, TIFF, or PNG). This helps you choose the right scanner features (duplex, color depth, and page size).
Tip: Write down your three primary use-cases to guide your scanner selection. - 2
Choose the appropriate scanner type
Decide between flatbed, sheet-fed, or portable scanners based on volume, fragility of pages, and workspace. Flatbeds excel at delicate materials; sheet-fed handles multi-page runs more quickly; portable units are handy for on-the-go tasks or small offices.
Tip: For large batches, prioritize duplex capability and an auto-feed function. - 3
Prepare your documents and workspace
Sort documents by type, remove staples, and flatten any curled pages. Ensure the scanner glass is clean to avoid artifacts. If you’re scanning photos, use a scanner with color accuracy presets to preserve tones.
Tip: Test a few pages first to calibrate brightness and contrast. - 4
Run a test scan and adjust settings
Scan a representative page at your desired resolution (300–600 dpi for documents, higher for photos). Check for skew, margins, and color accuracy. Adjust brightness, contrast, and OCR language settings as needed.
Tip: Use a test page with text and a barcode to verify both OCR and barcode readouts. - 5
Save, name, and organize files
Create a consistent naming convention (date, subject, version). Tag files with metadata like author, department, and OCR status. Store scans in a predictable folder structure for easy retrieval.
Tip: Automate metadata tagging where possible to save time. - 6
Maintain your equipment and troubleshoot
Regularly clean the glass, check for firmware updates, and verify that drivers remain compatible with your OS. If scans show color drift, recalibrate with a test page and adjust profiles.
Tip: Keep a maintenance log to catch drifting performance early.
Common Questions
What makes a scanner better than a phone camera for archiving?
A dedicated scanner typically offers sharper text, consistent margins, higher color fidelity, and automatic page alignment. It also supports batch processing and metadata capture, which a phone camera struggles to match for long-term archiving.
A dedicated scanner gives you sharper text, better alignment, and reliable batch scans for archiving.
Can I use a scanner for both documents and photos?
Yes, many scanners handle both documents and photos, but color accuracy and resolution options differ. Look for a model with adjustable color depth and a photo mode for best results.
Yes, you can, but check color depth and modes for photos.
Is a high-end scanner worth it for casual home use?
For casual home use, a mid-range scanner with duplex capability can still offer significant efficiency gains for schoolwork, receipts, and organizing photos. If you rarely scan, a more affordable model may suffice.
If you scan often for schoolwork or receipts, a mid-range scanner is beneficial; otherwise, a basic model may work.
What should I look for in OCR accuracy?
Look for higher optical resolution (at least 300 dpi for text), a reliable OCR engine, and language packs. Regular calibration and clean feeds improve OCR results over time.
Aim for 300 dpi minimum and good OCR language support for accurate text extraction.
Are there safety or maintenance warnings I should know?
Keep fingers away from feed mechanisms and unplug before cleaning. Regularly clean the glass and firmware updates to prevent issues.
Be careful with the feed area and keep the scanner clean to prevent jams.
How should I store scanned files long-term?
Store in organized folders with clear file names, use non-proprietary formats (PDF/A, TIFF), and keep off-site backups to protect against data loss.
Name files clearly and back them up to a separate location.
Watch Video
Key Takeaways
- Use a scanner for high-fidelity, batch-ready captures
- Choose the right type (flatbed, sheet-fed, or portable) based on volume and material
- Pair organized file naming with metadata for quick retrieval
- Maintain your device to preserve performance over time