Where Scans Go on Your Computer: A Practical Guide
Discover where scanned files typically save, how to locate them across OSes, and how to organize and back them up. Includes default paths, step-by-step setup, and tips for Windows, macOS, and Linux.

This guide shows exactly where scanned files usually land on your computer, how to locate them across Windows, macOS, and Linux, and how to organize and back them up for easy access. You'll also learn common default paths, tips to set your own save locations, and quick-troubleshooting tricks. We cover both local drives and cloud-synced folders to prevent misplacement.
Understanding where scans go on your computer
If you're wondering where do scans go on my computer, you’re not alone. The answer depends on your scanner app, your operating system, and how you save files. In most setups, scans land in one of a few familiar places: the Documents folder, a dedicated Scans folder, or a location you choose at save time. According to Scanner Check, most users benefit from sticking to a single default path so PDFs, images, and OCR outputs are easy to locate later. Establishing that default also reduces clutter from scattered files across several folders. Many people extend the benefit by syncing scans with cloud storage or mapping a network drive for collaboration. This article helps you map common defaults, locate existing scans across devices, and set up a predictable path that works on Windows, macOS, and Linux. With a consistent approach, you’ll save time and avoid the frustration of hunting through multiple folders.
Default save locations by OS
Scanner apps and operating systems influence where scans land by default. While there is no universal rule, a few patterns recur across Windows, macOS, and Linux. Common defaults include the Documents folder, the Downloads folder, or a dedicated Scans folder created by the app itself. Some programs automatically create a Subfolder named Scans inside Documents for quick access. If you’re using cloud storage connected to your PC, you may see a synchronized Scans or Scanned Documents folder there as well. The key is to learn your app’s default and then decide whether to keep it or redirect to a more centralized location. By keeping scans in one or two predictable locations, you’ll dramatically reduce the time spent hunting for files later.
Locating scans quickly
Locating a recently saved scan is easier when you optimize your search and check known paths. Start with a quick search in your file explorer or Finder for common extensions such as PDF, JPG, PNG, TIFF, or DOCX if you export OCR output. Look in the likely folders first (Documents, Downloads, Scans) and then broaden to cloud storage mounts or external drives if you use them. If you recently scanned multiple pages or batch scanned documents, sort by date to bring the newest saves to the top. Another fast tactic is to use the app’s built-in recent or history view, which often lists the last saved file with a direct path. Keeping a short, consistent naming convention also helps you locate files by content or date in seconds.
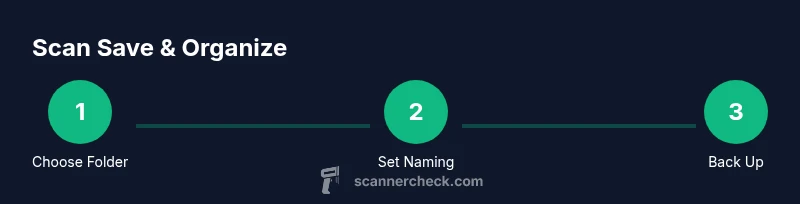
Organizing scanned documents: folder structure and naming
A clean folder structure makes every scan easy to find. Consider a top-level folder called Scans, with subfolders by year, then by project or document type (e.g., 2026/Invoices, 2026/Receipts, 2026/Contracts). Inside each folder, use a consistent naming pattern like YYYY-MM-DD_description.ext (for example, 2026-02-04_ClientInvoice_Invoice123.pdf). If you OCR scans, store text-searchable PDFs in the same folder and keep original image files together for reference. Regularly review and prune duplicates, and consider a short glossary file to explain naming conventions for new team members or household members using shared drives.
Setting a default save location in popular apps
To ensure scans arrive where you expect, set a default save location in your scanner software. In Windows, you typically find this under the app’s Settings or Preferences > Save Location, then choose a folder like Documents/Scans or a dedicated cloud-synced path. On macOS, many apps mirror the same idea in Preferences > Save Location, often pointing to Documents or a user-nominated folder. Linux users can usually set a default in the app’s configuration or rely on their file manager’s default path. If you frequently switch apps, consider selecting a single catch-all folder (e.g., Scans) and adjusting every app to point there.
Redirecting future scans and syncing across devices
If you use multiple devices, set up a chosen save location on each one and enable cloud storage synchronization. Saving to a cloud-synced folder (such as OneDrive, Google Drive, or iCloud Drive) ensures scans appear on all your devices, enabling cross-platform access. You can also map a network drive to a shared Scans folder for collaboration. The important part is consistency: ensure every device saves to the same cloud-backed path so you never waste time guessing where a file landed.
Backing up and securing scanned files
Backups are essential for scanned documents, which can be critical for records, tax, or legal reasons. Set up automatic backups to an external drive or a cloud backup service in addition to your primary cloud storage. Use versioning when possible, so you can recover from accidental edits or deletions. For sensitive documents, enable encryption and be mindful of permissions if you’re using shared folders. Regularly test restoration from backup to verify that your files are accessible when needed.
Troubleshooting common issues
If you can’t find a scan, double-check the app’s current save location in its settings, then search the most likely folders. Remember that some apps may save to a temporary location or revert to a system default if the user account lacks permissions. Check the scanner’s output format—PDFs may be saved differently from image formats. If you’re using cloud storage, confirm the file has synced and isn’t stuck in an offline state. Finally, keep a short, consistent naming convention to make future searches faster and more reliable.
Tools & Materials
- Computer with file system access(Windows, macOS, or Linux)
- Scanner or scanning app(Includes built-in or third-party apps (e.g., TWAIN-compatible scanner or mobile scanning app))
- External drive or cloud storage account(Useful for backups or cross-device access)
- Digital filing template (folder structure & naming convention)(A simple guide to keep saves consistent (e.g., Scans/YYYY/Project/YYYY-MM-DD_description.ext))
Steps
Estimated time: 25-40 minutes
- 1
Define a target save folder
Create a top-level Scans folder and decide on a subfolder scheme (by year, project, or document type). Establish a naming convention like YYYY-MM-DD_description.ext to make files sortable and searchable.
Tip: Document your chosen structure in a quick note so all devices follow the same system. - 2
Find your current default save location
Open your scanning app and locate Settings or Preferences to see where new scans are saved by default. Take note of both the folder path and the expected file type.
Tip: If you’ve never checked, assume the default is a generic Downloads or Documents path and plan to adjust. - 3
Create or confirm the Scans destination
Create the Scans subfolder if it doesn’t exist, and move an existing sample file there to confirm accessibility. Ensure the path is portable across devices if you plan to sync.
Tip: Avoid spaces or special characters in folder names to simplify cross-platform access. - 4
Set a new default save location
In the scanner app, select the new Scans path as the default save location. If using cloud sync, ensure the path points to the cloud-synced folder.
Tip: Test by performing a short scan and verifying the file lands in the new folder. - 5
Test with a real scan
Perform a test scan, export to the chosen location, and verify the file opens correctly (PDFs render, images view). Check for OCR results if applicable.
Tip: Name the test file consistently to evaluate naming rules. - 6
Configure backups
Set up automatic backups for the Scans folder to an external drive or cloud backup service. Enable versioning if available.
Tip: Schedule weekly checks to confirm backups complete without errors. - 7
Maintain and refine
Every few weeks, review the folder structure and naming templates. Archive older scans if the folder grows unwieldy, and adjust as your workflow evolves.
Tip: Document any changes to keep the team aligned.
Common Questions
Where do scans go by default on Windows, macOS, and Linux?
Most scanning apps save to the Documents, Downloads, or a dedicated Scans folder. The exact path depends on the app and OS. You can confirm by checking the app's preferences.
Most scans go to Documents or Downloads by default; check your app settings to confirm.
How can I change the default save location for scans in Windows?
Open your scanner app’s Settings or Preferences, find the Save Location option, and select the folder you want (e.g., Documents/Scans). Save changes and run a test scan.
In Windows, adjust the app’s Save Location in Settings and test a scan.
Can I save scans directly to cloud storage?
Yes. Choose a cloud-synced folder as the save location, or save locally and move the file to cloud storage. Cloud saves enable cross-device access and backups.
Sure—use a cloud-synced folder for easy access across devices.
What should I name scanned files to stay organized?
Use a consistent pattern like YYYY-MM-DD_description.ext. This makes it easy to sort by date and understand content at a glance.
Name files with the date and a short description.
What if I can’t find a recent scan?
Check the app’s current save location, then search common folders (Documents, Downloads, Scans) and your cloud drive. Use the file type and date filters to speed up the search.
If you can’t find it, search the likely folders by date and type.
Watch Video
Key Takeaways
- Know where scans save by default on your OS
- Set one predictable save location across devices
- Back up scans regularly with versioning
- Adopt a clear naming and folder structure