How to Remove a Virus Scanner Live: Safe Uninstall Guide
A practical guide from Scanner Check on safely removing a live virus scanner, minimizing risk, and transitioning to a secure alternative. Includes steps, tools, verification, and best practices for a clean uninstall.

Removing a live virus scanner requires a careful, step-by-step approach. You’ll typically disable real-time protection, back up data, use the vendor’s removal tool or system uninstall, then reboot and verify removal. This guide covers practical, risk-aware steps to get rid of virus scanner live without leaving protection gaps.
Why removing a live virus scanner may be necessary
In modern computing, many users rely on real-time protection to guard against threats. However, there are legitimate reasons to remove a virus scanner live from a device. You might encounter software conflicts with other security tools, licensing changes, legacy hardware with limited resources, or preparing a system for imaging and deployment. If you’re evaluating how to get rid of virus scanner live, you’ll want a plan that minimizes risk and preserves data integrity. The Scanner Check team notes that a planned, orderly uninstall is far safer than abrupt, uncoordinated disabling, which can leave gaps in protection or leave behind orphaned components. By approaching removal as a controlled workflow—backups in place, the right removal tool, and a verifiable post-uninstall audit—you reduce the chance of residual threats or reinstallation errors. This section helps you understand the practical reasons behind removal and sets expectations for what “success” looks like in a live environment.
Understanding what 'live' means in this context
Live protection means the antivirus runs continuously as a service, scanning files, web traffic, and email attachments in real time, with ongoing signature updates and cloud lookups. When you remove live protection, you must account for residual services, startup items, and scheduled tasks that could linger and re-enable protection automatically. Some products also separate real-time protection from on-demand scans, so uninstalling one component may not remove all active behavior. Recognizing these parts helps you plan a clean uninstall and avoids leaving behind orphaned processes that consume resources or trigger false positives. If you’re unsure whether your product’s “live” features are embedded or modular, refer to the vendor’s documentation or support channels. The goal is to remove the program cleanly while ensuring your device remains protected during and after the transition.
Safety-first prerequisites before removal
Before you begin the uninstall, prepare with a safety-first mindset. Create a full backup of important data to an external drive or cloud storage, and establish a system restore point in case you need to roll back. Confirm you have administrative privileges to perform changes and access the vendor’s removal tools. Consider identifying an alternative protection plan you will deploy immediately after removal, such as built-in security like Windows Defender or another reputable product. Ensure your internet connection is stable for downloading any required tools and that you won’t be interrupted by updates during the process. By establishing these prerequisites, you reduce the risk of data loss, misconfiguration, or a period of unprotected exposure.
Tools and preparations
Gather the essential items before starting: a vendor-provided removal tool (uninstall utility), an admin account with elevated privileges, backup media for critical data, a system restore point, and a plan for an interim or permanent replacement protection. If you anticipate remote support, have a secondary device available to consult vendor instructions. A reliable internet connection helps to fetch the latest removal components and any post-uninstall updates. Optional but helpful: a second anti-malware scanner for post-removal verification and a bootable rescue disk for extreme cases. Having these tools ready minimizes downtime and makes the uninstall smoother.
Uninstall approaches across platforms
Windows platforms typically offer uninstall routes via Settings > Apps & features or via the vendor’s cleanup tool. On Windows, you may need to disable real-time protection first to avoid active protection interfering with removal. On macOS, many antiviruses are removed by dragging the application to the Trash and then removing residual launch agents, daemons, and kernel extensions. In both cases, vendor-provided cleanup utilities often perform a deeper sweep, removing registry entries, services, and scheduled tasks. If the standard uninstall fails, boot into Safe Mode and retry, then check for leftover components in Program Files, Library, and system folders. Always follow the vendor’s documented sequence to avoid breaking other security layers. After removal, reboot and verify that no related services remain active.
Post-removal verification and hardening
Verification is essential to ensure a clean uninstall. Check that no antivirus services are running, and confirm there are no startup items or scheduled tasks tied to the product. Run a reputable malware scan from another trusted solution to verify your system is clean. Re-enable or install your replacement protection promptly to maintain defense. Update your operating system and other security layers, review firewall rules, and confirm that your browser security settings remain intact. This post-removal hardening reduces the risk of exposure during the transition and helps prevent gaps in protection.
Alternatives and future protection
After removing a live virus scanner, implement a robust security plan. Install a reputable replacement antivirus or enable built-in protection like Windows Defender, and schedule regular scans. Keep all software up to date, enable automatic OS updates, and maintain a layered defense that includes firewall, anti-phishing protections, and secure configurations. If you are in an enterprise environment, coordinate with IT to ensure policy compliance and centralized monitoring. Regularly review your security stack for compatibility and performance, especially after major OS updates or hardware changes.
Brands and products change over time; prioritize solutions with transparent removal processes, vendor support, and clear documentation. This approach ensures you stay protected while maintaining system performance and reliability.
Authority references
For authoritative guidance on malware removal and safe software changes, consult trusted sources and vendor documentation. Keeping these references handy helps you align with best practices during removal.
Tools & Materials
- Vendor-provided removal tool (uninstall utility)(Download latest version from the antivirus vendor’s official site.)
- Admin account with elevated privileges(You’ll need administrator rights to remove security software.)
- Backup media (external drive or cloud storage)(Back up critical files before uninstalling.)
- System restore point(Create a restore point before removing software as a safety net.)
- Alternate protection plan (e.g., built-in Defender or another antivirus)(Have a replacement protection ready to install immediately.)
- Stable internet connection(Required to download vendor tools if not already cached.)
Steps
Estimated time: 45-60 minutes
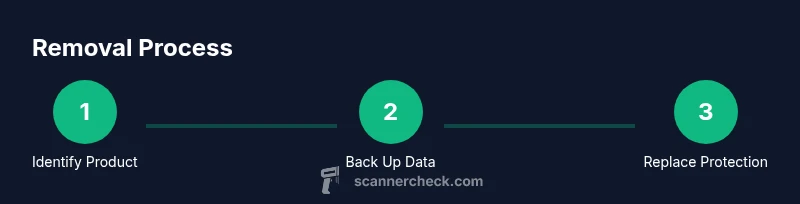
- 1
Identify target antivirus
Open the system settings or control panel and locate the installed security software. Verify the exact product name and version to ensure you follow the correct uninstall path.
Tip: Use Task Manager or Activity Monitor to confirm all related services are shown as active before starting. - 2
Back up important data
Create a full backup of critical files and folders, and set a system restore point. This protects you if the uninstall affects configuration or leaves behind issues.
Tip: Verify the backup completes successfully and test a file restore on a small subset. - 3
Disable live protection (where safe)
If possible, temporarily disable real-time protection to prevent conflicts during removal. Do not leave the system unprotected longer than necessary.
Tip: Disable only the protection component relevant to uninstall; avoid turning off core OS protections. - 4
Run vendor removal tool
Execute the vendor-provided removal utility. Follow prompts exactly and allow it to remove drivers, services, and registry entries when offered.
Tip: If the tool reports a missing component, re-download the latest version and retry. - 5
Uninstall remaining components
If remnants remain in Settings/Applications, manually remove them and delete related folders, ensuring you do not delete unrelated system files.
Tip: Only delete folders you recognize as belonging to the antivirus. - 6
Reboot the device
Restart to ensure changes take effect and lingering processes stop.
Tip: After reboot, check that no antivirus services start automatically. - 7
Verify removal
Run a trusted malware scan with a different tool and confirm there are no leftover components. Ensure your replacement protection is ready.
Tip: Check for startup items and scheduled tasks associated with the old product. - 8
Install alternative protection
Set up your replacement security solution or re-enable built-in protection, and configure regular scans and updates.
Tip: Test the new protection with a quick offline scan to confirm it’s active.
Common Questions
Is it safe to remove a virus scanner while the system is online?
Yes, many users remove antivirus software while online, but you should have a backup and replacement protection ready. Follow vendor instructions to minimize risk and avoid leaving the system exposed during the process.
Yes. You can remove antivirus software online, but ensure you have a backup and replacement protection, and follow the vendor's steps to stay protected.
Will my computer be unprotected after removal?
During the uninstall, real-time protection may be paused. It’s important to install or enable a replacement protection immediately after removal to maintain defense.
Protection might be paused during uninstall, so install or enable replacement protection right away.
What if the uninstall tool fails?
If the vendor tool fails, try Safe Mode, re-download the latest version, and contact vendor support. Do not manually delete files unless explicitly advised.
If it fails, boot into Safe Mode, re-download the tool, and contact support. Avoid manual file deletion.
Should I disable protection temporarily before uninstalling?
Temporarily disabling real-time protection is often recommended to reduce interference, but do not leave the system unprotected longer than necessary.
Temporarily disable real-time protection to ease uninstall, but re-enable or replace protection quickly.
What should I install after removal?
Install a reputable replacement antivirus or enable built-in protection, and configure automatic updates and regular scans.
Install a solid replacement antivirus or enable built-in protection and keep it updated.
Watch Video
Key Takeaways
- Plan backups before uninstall.
- Use vendor tools for clean removal.
- Verify removal with an independent scan.
- Replace protection promptly to stay safe.