How to Use a Bladder Scanner: A Practical How-To
A practical, evidence-based guide to using bladder scanner devices for estimating bladder volume. Learn prep, technique, interpretation, and documentation for safe, accurate results.

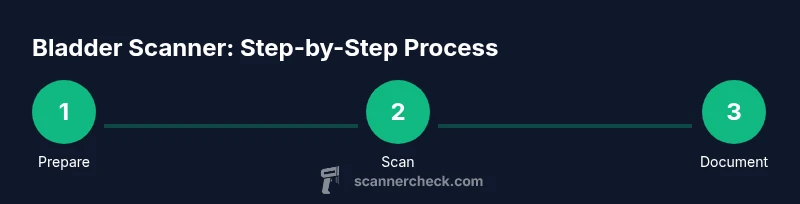
This guide teaches you how to use a bladder scanner to estimate bladder volume safely and efficiently. You’ll learn prep steps, correct patient positioning, device setup, scanning procedure, how to interpret results, and when to seek clinical guidance. By the end, you’ll be able to perform a bladder scan confidently and document findings accurately.
What is a bladder scanner and when is it used
A bladder scanner is a portable ultrasound device designed to estimate bladder volume noninvasively. It uses real-time imaging to measure how full the bladder is, which can help guide catheterization decisions, urinary retention assessments, and fluid management. When you learn how to use a bladder scanner, you gain a quick, noninvasive tool to support patient care, reduce unnecessary catheterizations, and improve documentation. In clinical practice, ultrasound-based bladder scanning is valued for its speed, repeatability, and ease of use across a range of settings—from acute care wards to long-term care facilities. It’s important to recognize that measurements are estimates influenced by patient anatomy and technique, so consistency and proper protocol are essential.
Prep and safety considerations
Before starting a bladder scan, confirm patient consent and explain the procedure to reduce anxiety and gain cooperation. Adhere to infection-control practices: wash hands, wear gloves if needed, and sanitize the transducer before and after use. Check device calibration and ensure you’re familiar with the device’s user guide for bladder-specific settings. Consider any patient-specific contraindicators (e.g., open wounds on the abdomen) and adjust positioning or postpone if safety or comfort could be compromised. Finally, ensure you have a private area or screen to preserve patient dignity during scanning.
Equipment basics and patient positioning
Use a bladder scanner that supports bladder volume measurements and confirm that the device is charged and ready. Select the appropriate mode (bladder scan/volume measurement) and ensure the transducer is clean. For optimal results, position the patient supine with knees slightly bent and the abdomen exposed in the lower midline. Gentle, uniform contact between the transducer and skin improves image quality, while excessive pressure can cause discomfort and alter readings. Use a generous amount of ultrasound gel to eliminate air gaps that degrade signal.
How to perform a scan: procedure overview
Apply a generous line of gel to the suprapubic area, then place the transducer on the abdomen. Align the probe with the bladder in the sagittal or transverse plane as directed by the device. Activate the scan and wait for the device to display a volume reading and an image. If your device offers multiple views, capture a sagittal view first, then confirm with a transverse view. Avoid shifting parts of the device during the scan, which can distort measurements. Record the reading and review any flag indicators from the device.
Interpreting and documenting results
Most bladder scanners report an estimated bladder volume in milliliters or a similar unit. Compare readings to patient symptoms, prior measurements, and device-specific normal ranges. Document the volume, the date/time, patient position, device model, and operator. If the result is near a decision threshold, consider repeating the scan to ensure reliability and document any reasons for deviations. Use consistent terminology in the EMR to facilitate future comparisons and clinical decision-making.
Troubleshooting and common errors
If readings seem unlikely (e.g., suddenly very large or small volumes), verify technique: check gel coverage, ensure correct orientation, and confirm the bladder is identified by the device. Patient factors such as obesity, high bowel gas, or prior abdominal surgery can affect image quality. Re-scan using a slightly different probe angle or position, and consider adjusting device settings if available. Regularly clean and inspect the transducer for wear, and ensure firmware is up to date.
Quality assurance and maintenance
Establish a routine: calibrate the device per manufacturer guidance, perform periodic image quality checks, and document maintenance actions. Sanitize the transducer before and after each use and dispose of single-use items properly. Keep a log of scans that includes operator name, device used, and any issues encountered. Training and ongoing competency checks help ensure consistent, accurate results across care teams.
Tools & Materials
- Bladder scanner device with bladder scanning capability(Ensure device is calibrated and in bladder scan mode.)
- Ultrasound coupling gel(Non-greasy, conductive gel; 5-10 mL per scan.)
- Disposable probe cover or sterile wipe(Use per infection control guidelines.)
- Alcohol wipes(Disinfect transducer before and after use.)
- Gloves(Wear disposable gloves during procedure.)
- Documentation form or EMR access(Record bladder volume, device, and time.)
- Privacy screen or drape(Preserve patient dignity during examination.)
- Tissue or cleaning cloth(Clean up gel and residue after the scan.)
Steps
Estimated time: Total time: 8-12 minutes
- 1
Prepare the patient and environment
Introduce the procedure, obtain consent, and ensure privacy. Verify the patient’s identity, gather materials, and position the patient comfortably to optimize accessibility to the suprapubic area. This initial step sets the stage for accurate scoring.
Tip: Explain the steps briefly to reduce anxiety and improve cooperation. - 2
Check device readiness and select mode
Power on the bladder scanner, confirm battery status, and choose the bladder scan/volume mode. If the device supports calibration checks, perform a quick verification before use.
Tip: If you’re unsure about settings, consult the device’s quick-start guide before proceeding. - 3
Apply gel and position the patient
Apply a generous line of gel to the lower abdomen and place the transducer over the suprapubic region. Align with the bladder and maintain gentle contact without applying excessive pressure.
Tip: Ensure gel coverage is continuous to avoid signal gaps. - 4
Acquire the scan and capture views
Activate the scan and obtain readings in the recommended planes (sagittal first, then transverse). Keep the probe steady and avoid shifting during acquisition. Record the displayed bladder volume.
Tip: If the image quality is poor, slightly adjust the probe angle and re-scan. - 5
Interpret, document, and review
Interpret the reported volume in the context of patient status. Document the reading, time, device name, operator, and any pertinent notes. If readings are borderline or inconsistent, consider a repeat scan.
Tip: Use consistent terminology and units in the EMR. - 6
Clean up and sanitize
Wipe the transducer with an antiseptic wipe, remove gloves, and dispose of single-use items appropriately. Wash hands and log any maintenance actions if required by policy.
Tip: Follow local infection-control policies for reusable equipment.
Common Questions
How accurate is bladder scanning compared to catheterization?
Bladder scanning provides an estimated volume and is less invasive than catheterization. Accuracy depends on device quality, operator technique, patient anatomy, and timing relative to events like urination. Use scanning as a screening tool and corroborate with clinical assessment as needed.
Bladder scanning estimates bladder volume and is less invasive than catheterization. Accuracy varies with device quality and technique, so use it as a screening tool and verify with clinical context.
Who should operate the bladder scanner?
Bladder scanners should be operated by trained clinicians or technicians with proper device-specific training. Ensure staff complete competency checks and follow the manufacturer’s guidelines.
Trained clinicians or technicians should operate the bladder scanner after completing device-specific training.
Can I use a bladder scanner on pediatric patients?
Some devices have pediatric or adjustable settings. Always follow the device guidelines and adjust technique accordingly to ensure accurate readings in children.
Some scanners have pediatric modes; use the device’s guidelines and adjust technique for kids.
What if readings differ between attempts?
If volumes differ, perform 2-3 scans and consider averaging or using the most reliable reading. Recheck technique and ensure consistent positioning.
If readings vary, take a few scans and use the most reliable one, ensuring consistent technique.
Are there safety concerns or contraindications?
Bladder scanning is generally safe when hygiene and proper technique are observed. Sanitize the transducer and follow infection-control guidelines.
Safe when you follow hygiene and proper technique; sanitize the transducer and follow infection-control guidelines.
What training resources are recommended?
Use manufacturer manuals, hospital in-service trainings, and professional guidance from reputable sources to build competency.
Refer to manufacturer guides and formal training to build competency.
Watch Video
Key Takeaways
- Use proper prep and positioning for reliable readings.
- Record volumes consistently and note device settings.
- Scan multiple times when readings vary to improve confidence.
- Maintain hygiene and device sanitation after each use.
- Pursue formal training to ensure competency.