What to Do Before an MRI Scan: A Practical Preparation Guide
A comprehensive prep guide for an MRI scan, covering safety checks, what to bring, how to ease anxiety, and what to expect during and after the procedure. Essential steps from Scanner Check for a smooth, comfortable experience in 2026.

Learn how to prepare for an MRI scan, including what to do mri scan prep, safety checks, and what to expect during the procedure. You’ll also find tips to stay comfortable and a clear path for discussing results with your clinician. This quick guide points you to a step-by-step workflow.
What to do before an MRI scan
If you’re preparing for an MRI, you’re asking the right questions about what to do mri scan preparation. This imaging modality is safe for most people, but success hinges on careful pre-scan steps. In this section you’ll learn how to review medical history, confirm safety, and gather the items you’ll need. The goal is to minimize delays, reduce anxiety, and ensure a smooth experience for you and the technologist. Start by completing the safety screen, verifying implants, and following facility-specific instructions. Always tell the team about any metal in or on your body, pregnancy status, or recent tattoos with metallic pigments. Bring a list of medications and previous imaging if available, as this helps the radiologist tailor the exam. Dress in metal-free clothing and remove jewelry, piercings, and hearing aids unless the staff approves otherwise. If you’re unsure about a device, ask your clinician in advance to confirm compatibility with MRI’s strong magnetic field.
Scanner Check notes emphasize that preparation reduces delays and improves comfort. By having your medical history ready, you help the radiology team select the appropriate sequences and contrast strategy. If contrast is planned, inform the staff about kidney issues or prior allergic reactions. A well-prepared patient tends to have a smoother experience and more accurate results.
MRI basics and what it measures
MRI is a noninvasive imaging method that uses a powerful magnetic field and radio waves to produce detailed pictures of soft tissues, organs, and vessels. Unlike X-rays or CT scans, MRI does not rely on ionizing radiation, which makes it a preferred option for many diagnostic questions. Understanding the basics helps you feel more confident: the machine creates images by aligning hydrogen atoms in your body and then detecting how they respond when the magnetic field is turned on and off. The result is high-contrast images that reveal anatomy and pathology with excellent soft-tissue detail. Depending on the area being examined, a radiologist may tailor the coils and sequences to enhance specific tissues, such as the brain, joints, or abdomen.
Safety checks and medical considerations
Before you enter the MRI suite, you’ll complete a safety screen to identify any implants, devices, or circumstances that could interact with the magnetic field. Common disqualifiers include certain pacemakers, aneurysm clips, cochlear implants, metal fragments near critical areas, and some older surgical devices. Pregnancy status is usually discussed, though MRIs can be performed safely in many cases. If a contrast agent—typically gadolinium—is planned, your clinician will review kidney function, prior reactions to contrast, and current medications. People with severe kidney disease may require alternative imaging or special precautions. If you have claustrophobia or anxiety, discuss options such as anti-anxiety strategies or open MRI variants with your care team.
What to bring and what to expect on arrival
Arrive early to complete forms and verify identity. Pack essential items and avoid bringing metal objects; remove jewelry, watches, and belts. Bring medical documents, a list of current medications, prior imaging studies, and any implant documentation if available. Wear comfortable clothing without metal components and consider a loose-fitting gown provided by the facility. If a contrast agent will be used, plan for potential aural protection and follow NPO instructions if provided by the facility. The staff will verify your information, check for contraindications, and guide you to the MRI suite. Expect to be asked to change into a gown, lie down on a padded table, and listen to the noises of the scanner while being asked to stay still.
The contrast agent: when it’s used and what to expect
Some MRI scans use a gadolinium-based contrast agent to improve tissue differentiation. If your physician recommends contrast, you’ll be screened for allergies and kidney function. Most patients tolerate gadolinium well, but rare reactions can occur. You may need an IV line for the contrast injection, and the technologist will monitor you for any discomfort or adverse reactions during and after administration. Afterward, you’ll continue the scan with the same attention to stillness and proper positioning to obtain high-quality images. If you have concerns about gadolinium, discuss alternatives with your radiologist.
During the scan: staying still and managing noise
MRI machines are loud, with banging and buzzing noises during image acquisition. You’ll receive ear protection and be instructed to remain as still as possible to preserve image quality. Depending on the body part, the patient may be asked to hold breath for brief periods or switch between sequences. If the noise becomes uncomfortable or you feel restless, raise your hand for assistance. The technologist stays in contact through an intercom, and positioning aids such as cushions or foam pads help maintain comfort during longer scans.
After the scan: reading results and next steps
Once the scan is complete, images are sent to a radiologist for interpretation. Depending on the exam, preliminary findings may be shared with your clinician or you may be told to schedule a follow-up appointment for a full read. Results are typically summarized in a report that highlights normal anatomy, incidental findings, or areas of concern. If you had a contrast agent, you are advised to drink fluids and monitor for any unusual sensations. Your clinician will discuss the results with you, outlining any recommended next steps, additional imaging, or treatment plans.
Tips for comfort and accuracy
To maximize comfort and ensure high-quality images, wear comfortable clothing, arrive early, and ask questions if you’re unsure about any instruction. Hydrate unless told otherwise, and avoid wearing large amounts of makeup or hair products that contain metal. Bring a trusted companion if it helps your comfort, but confirm with the facility about any visiting policies. If you’ve had prior MRI scans, review the imaging history with the staff to avoid unnecessary repetition. Finally, communicate openly about anxiety, claustrophobia, or pain so the radiology team can adjust positioning or offer relaxation strategies.
Special cases and alternatives
Pediatric, elderly, or mobility-impaired patients may benefit from shorter protocols, distraction techniques, or sedatives under medical supervision. In some cases, CT or ultrasound can provide necessary information when MRI is contraindicated or impractical. Your healthcare team will discuss the best imaging option based on clinical questions, safety, and the patient’s comfort. Always consider seeking a second opinion if you have concerns about the chosen modality.
Tools & Materials
- MRI safety questionnaire form(Completed medical history and safety screen before entry)
- Government-issued ID(For patient verification and appointment matching)
- List of implants and devices(Include pacemakers, joint replacements, cochlear implants, or surgical clips)
- Metal-free clothing(Wear metal-free attire; remove jewelry, belts, and metal buttons)
- Hearing protection (MRI-safe)(Earplugs or MRI-approved earmuffs)
- Medical documents / prior imaging(Bring prior reports or CDs/DVDs if available)
- Insurance information(Bring card if applicable; not always needed for every MRI visit)
- Comfort items (optional)(Blanket or small pillow for longer exams if allowed)
Steps
Estimated time: 60-90 minutes
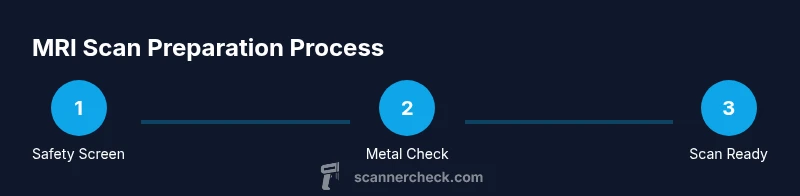
- 1
Review safety screen with staff
Before entering the MRI suite, confirm that your medical history, implants, and any devices have been clearly communicated and understood by the technologist. This step reduces risk and ensures the appropriate protocol is chosen for your body and condition.
Tip: If you’re unsure about a device, bring documentation or contact the clinic in advance for clearance. - 2
Dress in metal-free clothing
Put on metal-free clothing or a provided hospital gown. Remove all jewelry, watches, piercings, belts, and any metallic accessories to avoid interference with the magnetic field.
Tip: Consider wearing comfortable, loose-fitting clothes and avoid wearing hair accessories with metal components. - 3
Prepare documents and implants info
Gather your ID, insurance, list of medications, and any prior imaging studies. If you have implants or devices, bring the documentation and any manufacturer details to assist the radiologist’s safety screening.
Tip: Create a small binder or digital folder for quick access at check-in. - 4
Follow pre-scan instructions
Adhere to any fasting or hydration instructions if a contrast agent will be used. Confirm whether you should avoid caffeine or special foods for the test you’re having. Inform staff of any pregnancy status or recent illnesses.
Tip: Ask about time gaps between contrast administration and any planned activities after the exam. - 5
Enter the scanner and position correctly
Lie still on the table with the head or body positioned as instructed. Use cushions or supports to reduce movement and ensure comfort during the scan. The technologist will guide you to relax and breathe normally when not instructed otherwise.
Tip: Minimize movement by visualizing a calm scenario or counting breaths during longer sequences. - 6
Monitor acoustics and respond to cues
Wear ear protection and listen for intercom instructions. If you experience discomfort, signal the operator; adjustments can be made to padding or positioning without compromising image quality.
Tip: Keep your eyes closed or focus on a steady breathing pattern to reduce anxiety. - 7
Review post-scan expectations
After the scan, your images are sent to a radiologist who will assess and prepare a report. Ask the technologist when you can expect results and whether a follow-up appointment is recommended.
Tip: Write down any symptoms or questions you want addressed when you receive the results.
Common Questions
Do MRIs use radiation?
No. MRI uses magnetic fields and radio waves, not ionizing radiation like X-rays or CT scans. This makes it a preferred option for many soft-tissue assessments.
MRIs do not use radiation; they rely on magnets and radio waves to create images.
Can I eat before an MRI?
In most cases, eating is fine. Some contrast-enhanced exams may have fasting or hydration requirements, so follow your facility’s instructions or ask your clinician.
Usually you can eat before an MRI, but check if your exam uses contrast.
Should I remove all jewelry and metal?
Yes. Remove all jewelry, watches, and metal accessories. Metal can distort images and pose a safety risk in the magnetic field.
Remove metal items before the scan to prevent image distortion and stay safe.
What if I’m claustrophobic?
Tell your clinician. Options include shorter protocols, open MRIs, breathing techniques, or mild sedation under supervision.
If you’re anxious, talk to your team about gentler options or sedation.
When will I get the results?
A radiologist will interpret the images and send a report to your clinician. Talk to your provider about when and how you’ll receive the results.
The radiologist reviews the scans and your doctor will share the results with you.
Is gadolinium contrast risky?
Gadolinium-based contrast is generally safe, but discuss allergies and kidney function with your care team. Alternatives exist if needed.
Contrast is usually safe, but tell your doctor about allergies or kidney issues.
Watch Video
Key Takeaways
- Prepare safety information in advance for a smooth MRI.
- Wear metal-free clothing and remove all metal items.
- Ask about contrast and timing if uncertain.
- Know what to expect during and after the scan.