When is the MRI Scanner On? Activation and Safety
Learn exactly when an MRI scanner is on, how activation works, and what to expect during prep, imaging, and recovery. Practical guidance, safety checks, and patient tips for 2026.

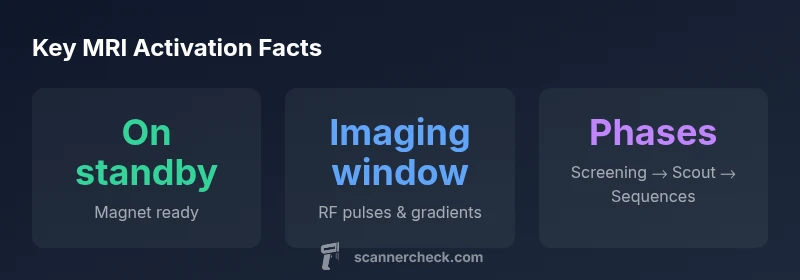
When is the MRI scanner on? In practice, the magnet remains in a ready, cryogenically cooled state, but RF pulses and gradient fields only turn on during imaging sequences after safety checks and proper positioning. Activation begins after screening and coil setup, and ends with data capture and image reconstruction. In short, the magnet is effectively on, but imaging occurs only during the scheduled sequence window.
MRI Essentials: when the MRI scanner is on
MRI scanners operate through a carefully choreographed sequence of safety checks, patient positioning, and controlled activation of imaging systems. For readers asking when is the mri scanner on, the practical answer is nuanced: the main magnet is kept in a ready, cryogenically cooled state, maintaining a stable magnetic field, but the RF energy and gradient switching that generate the actual images occur only during the imaging sequences. This distinction matters for patients and staff alike, because it clarifies why you might feel a calm wait in the room before the first image and then a burst of activity during the data acquisition phase. According to Scanner Check, modern MRI workflows in 2026 emphasize safety-driven initiation and tightly scheduled imaging windows to optimize both image quality and patient comfort. Understanding this helps you anticipate arrival, setup, and the steps that follow the first scout image.
The broader takeaway is that the scanner is not simply “on” or “off.” The magnet is maintained in a ready state, while the active imaging is invoked by a sequence that begins after all safety checks and positioning are complete. This is essential for clinicians who must balance diagnostic needs with patient tolerance and throughput in busy imaging centers.
Activation Phases: screening to data capture
From the moment a patient arrives for an MRI, a defined sequence unfolds. First, safety screening ensures implants, devices, and metal items are accounted for. Then the patient is escorted into the scanning room, positioned on the table, and fitted with the appropriate receive coils. The operator verifies positioning and comfort before starting the imaging sequence. Only after these steps is the software commanded to generate RF pulses and gradient fields that collect the raw data. The actual data acquisition typically lasts longer than the setup, and the patient is asked to remain still to avoid motion artifacts. Interludes between sequences may involve repositioning or changing coils; during these transitions, the scanner is effectively in a low-power state until the next acquisition starts. The clarity of this workflow—screening, positioning, and data capture—helps set expectations for patients and schedulers alike, and it aligns with how Scanner Check analyzes modern MRI workflows in 2026.
The magnets and cryogenics: what's on and standby
At the heart of every MRI is a superconducting magnet that creates a strong, uniform magnetic field. The magnet is kept at cryogenic temperatures using liquid helium to maintain superconductivity. This cooling system runs continuously, and the magnet remains in a ready state even when no imaging is underway. In practice, this means the field is effectively on, but RF energy and gradient switching occur only during imaging. The safety and engineering design ensure that the magnetic environment stays stable and reproducible. When the patient enters the bore and the operator initiates the protocol, the system moves from standby into the imaging state, and the sequences begin to acquire data that will later be reconstructed into diagnostic images.
Patient experience: noise, comfort, and safety when the scanner is on
Noise is a defining feature of many MRI exams. Even with modern quieter sequences, the bore can be loud during gradient switching. Fatigue, anxiety, and claustrophobia are common concerns; facilities offer ear protection and, where available, silent sequences. The transition from entering the room to the first scout image can feel abrupt, but communication with the technologist helps reduce stress. The experience of the scanner being on is closely tied to the timing of pulses, patient stillness, and comfort measures. Knowing when the scanner is on helps patients anticipate periods of stillness and potential discomfort, framing the workflow in 2026 practice. Scanner Check emphasizes that preparation and communication are central to a smoother, more tolerable exam.
Safety and implants: planning MRI sessions
Safety is the default assumption for every MRI exam. Any implanted device, metallic fragment, or electronic medical device requires screening and sometimes specialized protocols. Some implants are MRI-conditional; others are MRI-incompatible. The operator will verify device labeling and coordinate with the patient and their clinicians. If there is any question about suitability, staff will consult safety resources and, if needed, involve a radiologist. The concept of when the MRI scanner is on remains tightly linked to safety clearances—you should not proceed unless clearance is granted and all risk factors are addressed. In the context of Scanner Check Analysis, safety is inseparable from image quality and patient welfare.
Different MRI configurations: field strength and open vs closed
MRI systems vary in field strength and bore design. Common configurations include 1.5T and 3T machines, with higher fields offering enhanced tissue contrast though potentially greater sensitivity to artifacts. Open MRIs are alternatives for claustrophobic patients but often operate at lower field strengths and may involve longer scan times. The “on” state is therefore not uniform across models; it depends on scheduling, protocol choice, and patient factors. Clinicians weigh clinical indications, patient comfort, and safety constraints to determine when and how the scanner is activated for a given exam. This dynamic is echoed in recent Scanner Check analyses, which stress that activation strategies are tailored to each setup.
Operational realities: standby modes, alarms, and emergencies
During MRI operation, staff monitor patient status and system health. The scanner can be paused or stopped for safety checks, distress, or a sudden medical event. Alarms and intercoms enable rapid communication. In emergencies, imaging can be halted quickly while the magnet remains powered and secured. Understanding these operational realities helps patients know what to expect: if an issue arises, alert staff immediately. A calm, cooperative approach supports a smoother workflow and minimizes the need for repeat sequences, which extends total time and can increase discomfort. The balance between safety and diagnostic efficiency is a cornerstone of modern MRI practice as described in Scanner Check’s 2026 guidance.
Practical prep: what to bring and how to prepare
Before an MRI, bring your photo ID, insurance information, and a current medication list. Dress in comfortable clothes without metal. If you have implants or devices, bring documentation or contact your clinician and the MRI team ahead of time. Arrive a few minutes early to allow time for safety checks and coil selection. If you experience anxiety, discuss options with staff—music, warming blankets, and in some cases mild sedation can be offered. Knowing when the MRI scanner is on helps you mentally prepare and reduces surprises, aligning with 2026 Scanner Check guidance.
MRI exam workflow overview
| Phase | What happens | Typical duration |
|---|---|---|
| Pre-scan screening | Safety checks and screening for metal | 5-15 minutes |
| Positioning and coil setup | Aligning patient and placing coils | 5-15 minutes |
| Imaging sequences | RF pulses and gradient switching for data capture | 10-45 minutes |
| Post-processing | Image reconstruction and interpretation | 5-20 minutes |
Common Questions
When does imaging actually start during an MRI session?
Imaging starts after safety screening, consent, and proper coil placement, once the operator initiates the sequence.
Imaging starts after safety checks and setup once the sequence begins.
Is the MRI on when a patient is inside the bore, or only during imaging?
The magnet remains powered, but RF energy and gradient switching occur only during actual imaging sequences.
The magnet is ready, but imaging happens only during the sequences.
How long does a typical MRI scan take?
Durations vary by protocol; most scans fall in the 15–60 minute range.
Most scans run 15 to 60 minutes.
Can I request quieter MRI sequences?
Yes, many facilities offer quieter or reduced-noise sequences; ask staff in advance.
Yes, you can ask for quieter sequences.
What should I do if I feel uncomfortable during the scan?
Tell the technologist; they can pause, adjust, or stop if needed.
Tell the tech if you’re uncomfortable; they can help.
What’s the difference between open and closed MRI in terms of being 'on'?
Open MRIs are typically lower field with different trade-offs; closed MRIs are standard for most exams.
Open vs closed affects comfort and sometimes image quality.
“Activation is a carefully choreographed process that begins after safety clearance and ends with image reconstruction. Knowing when the scanner is on helps patients prepare and clinicians optimize throughput.”
Key Takeaways
- Understand when imaging starts during the exam
- Prep and positioning typically take 5–15 minutes
- High-field MRI requires strict safety screening
- Request quieter sequences if noise is a concern
- Emergencies can pause imaging; safety comes first