How to fix scanner on HP printer: Step-by-step guide
A practical, AI-assisted guide to diagnose and fix HP printer scanner issues, covering connectivity, drivers, firmware, and safe maintenance to restore scanning fast.

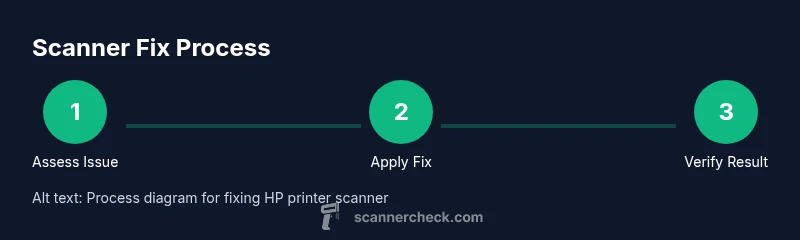
You're here to fix the scanner on your HP printer. This guide walks you through practical, reliable steps to diagnose and restore scanning, from cables and settings to driver updates. By following these steps, you can usually recover scanning without external help. According to Scanner Check, most HP scanner issues come from connectivity, driver mismatches, or outdated software.
Why the HP scanner might stop working
According to Scanner Check, many HP printer scanning problems originate from simple, fixable causes rather than complex hardware faults. In practice, a scanner can fail to respond due to connectivity glitches, a paused scanning service, outdated drivers, or mismatched software. The symptoms vary: a blank scan, a distorted image, or a complete loss of the scanner option in the software. Understanding these common culprits helps you prioritize steps and avoid chasing phantom issues. This section introduces the most frequent scenarios and how they manifest, so you can quickly triage your HP printer and decide which fixes to try first.
Keep in mind that HP scanners are designed to work over USB or wireless networks. If your computer and printer aren’t on the same network, or if the USB cable is loose, the scan button may do nothing. The goal of this guide is to help you identify the root cause—whether hardware, software, or settings—and apply targeted fixes that restore reliable scanning without unnecessary detours.
Prepare before you begin
Before diving into fixes, gather essential information and prepare a clean workspace. Note your printer model, current firmware version, and the operating system on your computer or mobile device. Ensure the printer is powered on and connected to the same network as your computer if you intend to scan over Wi‑Fi. Create a quick recovery plan: back up any custom scan presets, and have a contingency in place if a step requires more time. By laying a solid foundation, you reduce frustration and make the subsequent steps more efficient. This preparation phase also minimizes the risk of data loss or misconfiguration as you troubleshoot.
If available, download the latest HP Scan or Print and Scan Doctor tool from HP’s official support site. These tools can identify driver mismatches or services that aren’t running as expected. With a clear plan and the right tools, you’ll move through the steps with confidence and speed.
Check cables, connections, and basic settings
The first line of defense is to verify physical connectivity and software settings. Start by ensuring the printer is connected to power, and that the USB cable (if used) is firmly seated at both ends. For wireless scanning, confirm that the printer and your computer are on the same network and that the printer shows as online in the printer settings. Check the HP scanning software to see if the scanner appears in the device list; if not, reselect the device, or remove and re-add it. On many systems, selecting the scanner from the scan dialog or the HP software menu locks the path and starts the connection cleanly. If the issue is intermittent, try a different USB port or temporarily disable a VPN or firewall that might block the scan path.
Consider cleaning the scanner glass lightly with a microfiber cloth; smudges can distort scans and create the impression of a nonfunctional scanner. If the device recently updated, a reset of the software can reestablish a proper link between the hardware and the application. At this stage you’re diagnosing whether the problem lies with basic connectivity or a deeper software fault.
Update drivers and firmware
Driver and firmware mismatches are a frequent source of scanning problems. Start by visiting HP’s official support site and entering your printer model. Download the latest printer driver package and the latest firmware for the scanner. Install the driver first, then reboot the computer and printer to ensure the changes take effect. After updating, re-open the HP scanning interface and test a sample scan. If your system uses Windows, you can also run the built-in “Print and Scan Doctor” or HP’s diagnostic utility to verify the installation.
If you’re on macOS or Linux, ensure the correct CUPS or imaging stack is updated and that the HP software has permission to access the scanner in System Preferences or Privacy settings. A clean driver installation can resolve stubborn detection issues that reappear after a minor OS update. Precise version matching ensures the scanner is properly recognized by your OS and applications.
Reinstall scanner software and adjust scan settings
Sometimes the problem isn’t the hardware but the software stack that communicates with the scanner. Uninstall the HP scanning software completely, then reinstall the latest version from HP’s site. After installation, reset scan preferences to their defaults to eliminate any misconfigured custom settings. In your scan dialog, verify the target is set to “Scanner” or the name of your HP device, and check options such as color mode, resolution, and destination (PDF, JPEG, or TIFF).
If you frequently scan to a specific app, confirm the app’s scanner path is up-to-date. Disable any third-party scanning utilities temporarily to determine whether they interfere with HP’s driver. This step helps isolate whether the problem lies in HP software or an external program that hooks into the scanning process.
Reset hardware and perform a factory reset
When software corruption or misconfigured preferences persist, a cautious reset can restore normal operation. Power cycle the printer by turning it off, unplugging the power cord, waiting 60 seconds, and then plugging back in and turning on. If your HP model supports it, you can perform a soft reset from the printer’s control panel rather than a full factory reset. Some devices offer a factory reset in the settings menu; this erases user preferences and resets network configurations, so back up any critical settings beforehand. After reset, reconfigure network or USB connections and re-run a test scan.
Avoid frequent factory resets; this is a last resort when software-level fixes fail. If the reset resolves the issue but a future OS or app update re-creates it, you’ll know the problem lies with compatibility rather than hardware.
Hardware troubleshooting if issues persist
If software fixes fail, deeper hardware checks may be warranted. Start with cleaning the scanner glass and lid—dust and smudges can reduce scan clarity and make it appear as though the scanner is broken. Inspect the scanner lid alignment and ensure nothing is physically obstructing the scanning path. If your printer’s service manual allows, gently remove the scanner housing to check for obvious issues like jammed rollers or foreign objects. Be mindful of static discharge and preserve warranty terms before attempting internal access. Do not force any components.
For networked scanners, check the router’s settings to ensure no port blocking or traffic shaping is impeding scan transmissions. If you hear unusual noises or evidence of wear, contact support rather than attempting risky internal repairs. In most cases, hardware problems require professional service or a replacement unit.
When to contact HP support
If you’ve exhausted common fixes without success, it’s time to reach out to HP support. Gather your printer model, serial number, firmware version, OS version, and a summary of the steps you’ve tried. HP’s support team can guide you through advanced diagnostics or arrange repair options if the device is still under warranty. If your retailer provided extended coverage, consult those resources first. When talking to support, provide concise details: what happened, when it started, and any recent changes to software or network configuration. This information helps accelerate resolution and minimizes back-and-forth.
Safe maintenance to prevent future issues
Proactive maintenance reduces the odds of future scanner problems. Regularly clean the scanning glass with a microfiber cloth, avoiding harsh cleaners that could leave residue. Keep firmware and driver software up to date, and periodically verify network configuration if you rely on wireless scanning. When you install new software, test the scanner early in the process to catch conflicts. Finally, document any recurrent symptoms and the fixes you’ve tried so you can repeat successful steps quickly if the issue recurs.
Note: This guide emphasizes practical, safe, and best-practice steps to diagnose and fix the HP printer scanner. If any action feels risky, stop and consult official HP documentation or support.
Tools & Materials
- HP printer with built-in scanner(Model supports scanning; ensure it’s online and reachable from your computer)
- Computer or mobile device(Windows/Mac/Linux or iOS/Android with scanning software)
- Power cable(Plug into a reliable power source; avoid power strips during testing)
- USB cable (optional)(Use if you are testing via USB directly to a PC)
- Wi-Fi network access(Stable network for wireless scanning; same subnet as the printer)
- Microfiber cloth(For cleaning the scanner glass and lid)
- Compressed air or soft brush(Dust removal from the scanner path and vents)
- Screwdriver set (if you are comfortable)(For optional internal inspections; voids warranty if not done correctly)
Steps
Estimated time: 2-3 hours
- 1
Power cycle
Turn off the printer and unplug the power cord. Wait 60 seconds, then plug back in and power on. This clears temporary faults and reinitializes hardware connections.
Tip: Always unplug before touching internal areas; wait a full minute to ensure capacitors discharge. - 2
Verify connections
Check that the USB cable is firmly connected if you’re using USB. For wireless setups, confirm the printer appears online in the network and that the device you’re scanning from can reach it.
Tip: Test a scan from the printer control panel to confirm the device path is valid before using the computer. - 3
Test scan path
Open the HP scanning software and select the correct scanner. Run a quick test scan to see if the issue reproduces. If not, the problem may be with the path or software later in the chain.
Tip: Note the exact scanner name shown in the software; misidentification is a common cause of failures. - 4
Update drivers
Visit HP’s official support site, download the latest driver package for your model, install, and reboot both computer and printer. This addresses many compatibility problems with OS updates.
Tip: Prefer the full driver suite over minimal drivers for consistent scanner behavior. - 5
Reinstall HP scanning software
Uninstall the existing HP Scan/Print software, then reinstall the latest version. Reset scan preferences to defaults to avoid lingering misconfigurations.
Tip: Back up custom presets before uninstalling so you can restore them later. - 6
Test with different software
If you have alternate scanning software, test with it to determine whether the issue is HP software-specific or a broader OS problem.
Tip: A positive result with alternate software suggests a path forward with HP software settings. - 7
Firmware update
Check for a printer firmware update and apply it if available. Firmware fixes can resolve low-level communication problems between hardware and software.
Tip: Update firmware using a wired connection when possible to avoid interruption. - 8
Clean the scanner path
Gently clean the scanner glass and the lid with a microfiber cloth. Dust or smudges can cause poor scan quality that looks like a nonfunctional scanner.
Tip: Do not use abrasive cleaners on the glass; use a lint-free cloth and a glass cleaner sparingly. - 9
Factory reset (last resort)
If persistent software issues remain, perform a factory reset and reconfigure settings. This should be a last resort after other fixes have failed.
Tip: Note any network configurations you lose so you can restore them quickly. - 10
Contact support if needed
If the issue continues after all fixes, contact HP support with model, serial number, and a summary of steps tried. They can advise on warranty options or service.
Tip: Collect evidence like error messages and scan logs to speed up the support process.
Common Questions
Why is my HP printer scanner not responding?
Common causes include connectivity issues, outdated drivers, or scanner services not running. Start with a power cycle, verify connections, and then update drivers.
If your HP scanner isn’t responding, check connections, reboot, and update drivers to restore function.
Do I need to reinstall drivers to fix the scanner?
Reinstalling can fix corrupted drivers and misconfigurations. Uninstall old drivers completely, then install the latest from HP.
Sometimes reinstalling drivers solves stubborn scanner issues.
Can I scan over Wi-Fi if the printer is on a different network?
For wireless scanning, both devices must be on the same network. Verify network settings and ensure the printer shows as online.
Yes, but only if both devices share the same network and the scanner is enabled.
What should I do if the scanner glass is dirty?
Clean the glass with a microfiber cloth and light glass cleaner. Dirty glass can ruin scans and resemble a nonfunctional scanner.
Clean the glass to improve scan quality.
Is a factory reset safe for the HP scanner?
A factory reset can fix software issues but clears personalized settings. Back up configurations before proceeding.
A reset can solve software problems but may require reconfiguring settings.
How do I update the HP scanning software on Windows?
Open HP software, check for updates, or download the latest from HP’s site. Install and reboot before testing again.
Update the HP scanning software to fix bugs and improve compatibility.
What if the issue persists after updates?
Run HP’s diagnostic tools, like HP Scan Doctor, and consider contacting support for hardware assessment or warranty options.
If it still fails after updates, use the HP diagnostic tools or contact support.
Can third-party scanning tools interfere with HP scanning?
Yes, other scanning apps can conflict with HP software. Disable or uninstall nonessential tools to test HP’s path.
Sometimes third-party tools block scanning; try with HP only.
Watch Video
Key Takeaways
- Verify connections and network stability.
- Update drivers and firmware regularly.
- Reinstall scanning software when needed.
- Clean the scanner glass and path for best results.
- Escalate to HP support if issues persist.