How to Install a Scanner in Epson L3210
Learn how to install and configure the built-in scanner on the Epson L3210. This factual, practical guide covers drivers, software, network setup, and troubleshooting to get you scanning efficiently.

By the end of this guide you will know how to install the scanner on your Epson L3210, including driver setup, software installation, and network scanning configuration. You’ll need a computer, a USB cable, and internet access. According to Scanner Check, start with the official Epson drivers and firmware from Epson’s site, then enable the scanner in your operating system settings before testing a sample scan.
Overview: What you’re installing and why it matters
The Epson L3210 is a compact printer-scanner that blends everyday document tasks with digital workflows. If you want to convert paper into searchable PDFs or share scans across devices, you’ll need to complete the scanner setup correctly. This section introduces what you’re about to do when you learn how to install scanner in epson l3210, including driver installation, software choices, and basic network configuration. You’ll benefit from a stable driver stack, a reliable scanning app, and a workflow that supports routine tasks such as scan-to-email, cloud storage uploads, or OCR-enabled searches. In this guide you’ll see practical steps, field-tested troubleshooting tips, and best practices drawn from Scanner Check’s evaluation of common home and small-office setups. Following these steps minimizes driver conflicts, reduces scanning delays, and improves image quality from day one.
Before you start: prerequisites and safety
Before you touch the L3210, gather the essentials: a computer with an appropriate operating system, a USB cable or access to your local network, and a solid internet connection to download drivers. Check the printer’s power, LED status, and ensure the device isn’t in sleep mode during setup. Decide whether you’ll scan primarily from the desktop or share the scanner across multiple devices. According to Scanner Check, confirming OS compatibility with Epson’s current driver package reduces the risk of missing features or driver mismatches. Ensure you have admin rights to install software, and prepare a clean, dust-free workspace with clear cable routes to avoid accidental tugs during setup.
Required drivers and software
This block identifies the main software components that let the scanner function: the official Epson driver package that enables both printing and scanning, Epson Scan 2 (or compatible scanning software), and optional OCR or cloud integration features. The goal is a stable driver stack rather than a bundle of conflicting apps. Scanner Check emphasizes downloading only from Epson’s official site and verifying any available checksums or digital signatures. If you’re on Windows, you may see multiple components; install the essential scanning module first, then add extras if needed. On macOS, grant the necessary permissions for the driver to access the scanner in System Preferences. Keep a backup of the installer in case you need to reinstall later.
Connecting the L3210 to your computer
You have two primary connection paths: USB for direct, reliable scanning and wireless for network-based scanning across devices. Start by powering on the L3210 and ensuring it is ready. For USB, use a direct port on the computer and a high-quality cable; avoid hubs that can introduce interference. For wireless, confirm the printer appears on the local network, note its IP address, and verify reachability with a quick ping. If your OS supports WSD (Windows) or Bonjour (macOS), enable these discovery services to simplify setup. A stable connection is essential before driver installation.
Installing drivers on Windows
Windows installation typically involves running the downloaded driver package, selecting language and regional options, and following on-screen prompts to connect the printer when prompted. After installation, verify the L3210 is listed under Printers & Scanners and set it as the default scanner if desired. Open Windows Fax and Scan or the Epson Scan 2 app to run a test scan. If prompts request administrator permissions, approve them to complete the install. Restart the computer if the installer requests it, then test again.
Installing drivers on macOS
On macOS, download the macOS-compatible driver package from Epson’s site and run the installer. You may need to allow the installer in System Preferences > Security & Privacy. After installation, add the printer under System Preferences > Printers & Scanners and confirm that the scanner component is enabled. Open Preview or Image Capture to run a sample scan. If macOS prompts for permission, grant access to the scanning utility and confirm that the L3210 appears in the scanning menu.
Using Epson Scan 2 and the built-in preview
Epson Scan 2 provides controls for resolution, color mode, and file format. Set a default scan profile for frequently used tasks (e.g., 300 dpi for documents, 600 dpi for photos). The built-in preview helps verify alignment, exposure, and color before final output. If OCR is needed, enable the OCR option and choose the target language. Save scanned files to a designated folder or cloud service, and consider creating a named workflow for recurring tasks to speed up future scans.
Network setup and sharing
If you want to share the L3210 across multiple devices, enable network scanning. Assign a fixed IP address to the printer to prevent it from changing after rebooting the router. Install the necessary drivers on each computer or keep Epson Scan 2 in a shared network location. Configure firewall exceptions if scanning over the network is blocked. Test by scanning from another device to confirm that the printer is discoverable and that the resulting file arrives in the intended destination.
Common troubleshooting during installation
Common issues include driver not found, scanner not recognized, or device not appearing in the OS scanning list. Check physical cabling, ensure the driver version matches your OS, and verify that the printer is not in a hardware standby state. If problems persist, rerun the installer, temporarily disable antivirus or firewall restrictions, and confirm you’re using the latest driver from Epson’s site. A clean reboot of both PC and printer often resolves stubborn glitches.
Testing your setup with a test scan
Place a sample document on the glass, choose a test resolution (e.g., 300 dpi), and initiate a test scan. Review the resulting image for legibility, color fidelity, and edge-to-edge capture. If the scan looks off, adjust brightness, contrast, or color settings and retest. Save the file in the desired format (PDF, JPEG, or TIFF) and confirm that OCR-enabled text is searchable if that feature is needed. Document any anomalies for future reference.
Maintenance and updates after install
Keep drivers and scanning software up to date by checking Epson’s official site regularly. Clean the scanner glass and lids to prevent smudges from affecting scans, and inspect cables for wear. Periodically re-run a basic test scan to ensure continued reliability. If you notice performance issues, consider reinstalling the driver package or updating the OS to ensure compatibility with current scanning software.
Next steps and how to keep scanning smooth
With these steps complete, you’re prepared to integrate scanning into daily tasks and workflows. If you ever need a refresher on how to install scanner in epson l3210, revisit this guide as your reference point. Explore advanced features such as OCR, batch scanning, and cloud storage integrations to maximize efficiency. Remember to keep your software suite updated and periodically review your network setup to maintain reliable, fast scans across devices.
Tools & Materials
- USB cable (USB 2.0 or higher)(Length 1.5–3 meters; undamaged connector ends)
- Computer (Windows or macOS)(Administrative privileges may be required during installation)
- Internet connection(Needed to download drivers and software from Epson)
- Official Epson driver package(Download from Epson’s official site)
- Optional: Wireless router(For shared network scanning )
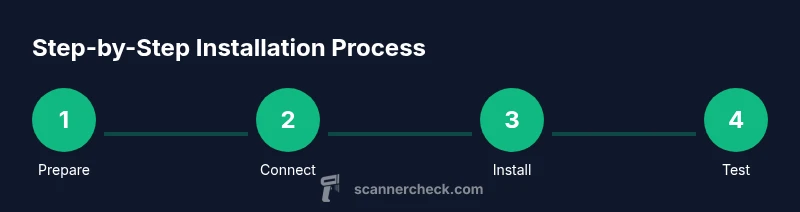
Steps
Estimated time: 45-60 minutes
- 1
Verify prerequisites and download drivers
Ensure your computer meets system requirements and download the latest Epson L3210 driver package for your OS. This initial check prevents later compatibility problems and accelerates the installation.
Tip: Always download from Epson’s official site to avoid tampered software. - 2
Connect the printer to your computer
Power on the L3210 and connect via USB to the computer, or connect to the same Wi‑Fi network for wireless scanning. Confirm the printer shows as ready in your OS before proceeding.
Tip: Use a direct USB port on your computer if you’re wiring, not a shared hub. - 3
Install the drivers and software
Run the downloaded installer and follow prompts. Install the essential scanning components first and add extras only if needed. The setup may include Epson Scan 2 or other utilities.
Tip: Close other apps during installation to prevent conflicts. - 4
Enable scanner in the operating system
In Windows, set the L3210 as the default scanner via Settings > Devices > Printers & Scanners. In macOS, add the printer under System Preferences > Printers & Scanners and ensure scanning is enabled.
Tip: Setting the scanner as default speeds up daily tasks. - 5
Install and configure scanning software
Install Epson Scan 2 or a preferred scanning app. Configure scan presets (resolution, color depth, file format) and enable OCR if required. Fine-tune defaults to match your typical documents.
Tip: Test multiple presets to find your ideal workflow. - 6
Run a test scan and troubleshoot
Place a document on the glass and perform a test scan. If issues arise, check cabling, driver version, and firewall settings. Re-run the installer if needed and reboot devices.
Tip: If the test fails, reboot both printer and computer, then retry.
Common Questions
Do I need to install Epson software to scan with the L3210?
Yes. Installing Epson Scan 2 or the computer’s built-in scanning utilities is typically required to access scanning features on the L3210.
Yes—install Epson Scan 2 or your computer’s scanning utility to enable scanning with the L3210.
Can I scan wirelessly with the L3210?
Yes, if the printer is on the same network as your computer. Wireless scanning is supported through Epson software and OS scanning tools.
Yes. Connect the printer to Wi‑Fi, then scan using Epson software or your operating system.
What if the driver installation fails?
Check connections, ensure you have admin rights, temporarily disable firewall, and re-download the driver package from Epson. If needed, try compatibility options.
If the driver install fails, verify connections, run as administrator, and retry with the latest driver from Epson.
Is the L3210 compatible with macOS Ventura or newer?
Yes, with the proper macOS-compatible Epson software and drivers. Download the correct package from Epson and restart after installation.
Yes—use the macOS-compatible Epson software and restart after installation.
How do I update the drivers in the future?
Visit Epson’s official support page, download the latest driver package for your OS, and re-run the installer. This keeps features like OCR working smoothly.
Check Epson's site for updates and reinstall the driver package when available.
Watch Video
Key Takeaways
- Install drivers only from official Epson sources
- Choose USB or network connection carefully
- Test with real documents to verify quality
- Maintain updates for drivers and software