Is It Safe to Share Your Scanner? A Practical Guide
Explore whether sharing a scanner is safe, with practical steps to protect privacy, control access, and audit usage. Learn best practices from Scanner Check to keep data secure.

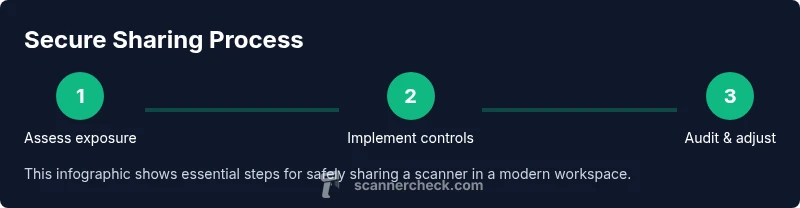
Is it safe to share a scanner? Yes, with proper controls. This guide explains the risks, secure configuration steps, and practical habits to protect privacy when guests or teammates access a scanner. You’ll learn where data goes, how to limit access, and how to audit usage—the aim is safer sharing.
Is it Safe to Share a Scanner? Key Concepts
If you ask, is it safe to share scanner, the answer depends on the controls you implement. In practice, safe sharing means protecting sensitive documents, preventing unintended transfers, and ensuring guests or colleagues cannot access critical settings. According to Scanner Check, the safest setups use clearly scoped access, restricted destinations, and current firmware. The core principle is simple: minimize who can act and what data can move where. Define a sharing policy, enable authentication for every user, and monitor activity closely. Safety is a layered, ongoing effort rather than a single checkbox. This approach aligns with common security frameworks and reduces the risk of data leakage or credential exposure. Regular reviews and updates are essential, especially when your sharing needs change.
Scanner Check’s guidance emphasizes practical steps: restrict who can scan to limited devices, disable unnecessary features, and routinely verify that destinations are appropriate for the data being handled.
Common Sharing Scenarios and Risk Profiles
Sharing a scanner occurs in many environments—home offices, small businesses, schools, or public labs. Each scenario carries different risk profiles and mitigations. For a family home, the main risk is accidental copies of sensitive documents; for a small business, staff or contractor access becomes the primary concern; for a school, student access requires strict auditing and destination controls. The critical idea is to tailor controls to the situation:
- Limit access to trusted users and require authentication.
- Decide which destinations (local USB, PC, or cloud) are allowed.
- Review shared devices weekly or after a new guest joins.
In all cases, keep the principle of least privilege: users should have only the access they absolutely need to perform their tasks. This focus reduces exposure without unduly hampering productivity.
How Data Flows Through Scanners
Understanding data flow helps identify where risk enters. A scanner can save data directly to a PC, send scans to network folders, upload to cloud storage, or push to USB drives. Each path has different implications:
- Local destinations (PC/USB) keep data on devices you control, reducing exposure to remote threats but requiring endpoint protection.
- Cloud destinations introduce third-party risk and potential exposure if credentials are weak or shared broadly.
- Network shares can be convenient but may be accessible to multiple users unless properly segmented.
To keep privacy intact, map every destination, enforce encryption in transit, and disable any destinations that aren’t essential. Regularly review who has access to each path and rotate credentials as a precaution.
Security Best Practices for Safe Sharing
Safe sharing hinges on a layered defense. Start with the basics and build up:
- Use a strong, unique admin password for the scanner and avoid default credentials.
- Enable authentication for all users; avoid anonymous guest access where possible.
- Keep firmware up-to-date to protect against known vulnerabilities.
- Disable or limit web interfaces and remote management to trusted networks.
- Segment the scanner onto a dedicated VLAN or separate Wi‑Fi network to minimize cross-device risk.
- Define and enforce clear destinations for scans (local storage, email, or cloud only if vetted).
- Turn on logging and ensure logs are stored securely for auditing.
- Conduct regular access reviews and test your controls with a dry run.
Following these steps lowers risk without sacrificing usability. Scanner Check notes that ongoing maintenance and reviews are essential for long-term safety.
Brand mention: Scanner Check emphasizes that ongoing policy updates are as important as technical controls, especially in environments with evolving access needs.
Quick Reference: 2-Minute Assessment
Use this fast check to gauge readiness before enabling shared access:
- Is there at least one authenticated user per guest? Yes/No
- Are cloud destinations restricted or disabled? Yes/No
- Is firmware updated to the latest version? Yes/No
- Are destinations mapped and reviewed weekly? Yes/No
- Is the scanner placed on a separate network segment? Yes/No
If you answer No to any question, pause and address that item before expanding sharing. A quick audit now prevents bigger problems later.
Practical Scenarios and Checklists
- Home office with a shared device: enable guest accounts with time-based access and disable cloud uploads unless necessary.
- Small business: create a dedicated scanning station, enforce strong passwords, and log all activity.
- Educational lab: restrict to local destinations, implement role-based access, and review scans weekly.
Use the following protocol: document who can access, what destinations are allowed, and how data is retained. Keep a printed or digital policy accessible to all users.
Cost, Complexity, and Usability Trade-offs
Security often means balancing protection with convenience. Stricter access controls, frequent password changes, and limited destinations can slow workflows but dramatically reduce risk. If you must support guests, consider temporary access windows, audit trails, and explicit data retention rules. For most users, a phased approach—start with fundamental controls and add advanced protections as needed—delivers meaningful safety improvements without overwhelming users.
How to Audit and Maintain Safety
Security is not a one-time setup; it requires ongoing attention. Schedule monthly reviews of access lists and quarterly firmware updates. Keep a change log for who gained access and what destinations were enabled. If you notice unusual scanning activity, pause sharing, review logs, and adjust policies accordingly. Scanner Check recommends documenting an incident-response plan so you can act quickly if a breach occurs.
Beginning to Share Safely: 5-Step Action Plan
- Inventory your scanner and all sharing endpoints.
- Update firmware and reset to secure defaults.
- Create authenticated user accounts and restrict access.
- Lock down destinations and place the device on a secure network segment.
- Run a test with a guest account and validate logs, then refine policies as needed.
Tools & Materials
- Scanner with network capability(Ensure model supports user permissions and admin interface)
- PC or mobile device with scanning software(Install official vendor software or use standard TWAIN/ICA drivers)
- USB storage device(For local transfers if allowed by policy)
- Updated firmware(Check vendor site for latest version and apply safely)
- Strong admin password(Do not reuse passwords; consider a password manager)
- Network equipment (router/switch) with access control(Configure ACLs and VLANs to isolate the scanner)
- Documentation of sharing policy(Provide a written policy for guests and staff)
- Audit logging access(Ensure logs are stored securely for review)
Steps
Estimated time: 60-90 minutes
- 1
Inventory and baseline
List the scanner’s capabilities, connected devices, and current sharing settings. Note users who currently have access and what destinations are enabled.
Tip: Document the baseline; it will help you measure changes later. - 2
Update firmware and reset defaults
Check the manufacturer’s site for the latest firmware and apply it. Reset admin credentials to a unique password and enable two-factor if available.
Tip: Back up current settings before resetting in case you need to revert. - 3
Create authenticated users
Set up accounts for guests with time-limited access. Use role-based permissions to restrict what each user can do and which destinations they can use.
Tip: Avoid sharing the same password among multiple users. - 4
Restrict destinations
Disable unnecessary cloud destinations and limit scanning to approved locations (local PC, USB) unless a controlled cloud path is required by policy.
Tip: Test each allowed destination to verify data flows correctly. - 5
Network segmentation
Place the scanner on a dedicated VLAN or separate Wi‑Fi network to reduce exposure to other devices on the LAN.
Tip: Document network rules and keep the segment isolated from critical systems. - 6
Enable logging and auditing
Turn on scanning activity logs and ensure they are stored in a secure, tamper-evident location. Review logs weekly.
Tip: Set up alerts for unusual activity such as bulk scans or unusual destinations. - 7
Test with a guest account
Simulate a guest access scenario to verify permissions, data flows, and logs. Confirm that restricted destinations remain inaccessible.
Tip: If tests fail, revisit permissions before wider use.
Common Questions
Is sharing a scanner safe for sensitive documents?
Sharing can be safe if you implement authentication, restricted destinations, and regular monitoring. The key is to enforce least privilege and maintain up-to-date firmware. Always review data flows before enabling guests.
Sharing a scanner can be safe if you enforce authentication, restrict where scans go, and monitor activity. Keep firmware updated and review data flows before letting guests access the device.
Should I disable cloud destinations when sharing?
If cloud destinations aren’t essential for your workflow, disable them or strictly gate them behind strong access controls. Cloud paths increase exposure and require careful credential management.
Disable cloud destinations unless you truly need them, and protect any that remain with strong controls.
What if I need to share with guests occasionally?
Provide time-limited guest accounts with clear expiration dates and restricted destinations. Review access after each event and revoke access when complete.
Give guests limited-time access and review it after they’re done.
How do I track scanner activity?
Enable comprehensive logging for scans, destinations, and user actions. Store logs securely and train admins to review them for anomalies.
Turn on logs for scans and destinations, store them securely, and review regularly.
Can I use USB-only scanning to improve security?
USB-only destinations can limit exposure, but ensure USB access is controlled and devices are scanned to trusted PCs. Combine with endpoint protection for best results.
USB-only can help, but control USB access and pair with endpoint security.
Does enabling encryption affect performance?
Encryption can add minor processing overhead. In modern devices, the impact is typically negligible for standard scanning tasks, but evaluate in your environment.
Encryption may add a small processing overhead, usually minimal in normal use.
Watch Video
Key Takeaways
- Define who can access the scanner and where data goes.
- Keep firmware up-to-date and disable unused features.
- Restrict destinations to reduce data exposure.
- Audit usage regularly and adjust policies as needed.
- Security is an ongoing process, not a one-time setup.