Scanner and 3D Printer: A Practical Comparison for Integrated Workflows
A thorough comparison of using a scanner and a 3D printer together for prototyping, reverse engineering, and DIY projects. Explore workflows, setup tips, tradeoffs, and best practices for hobbyists and professionals.

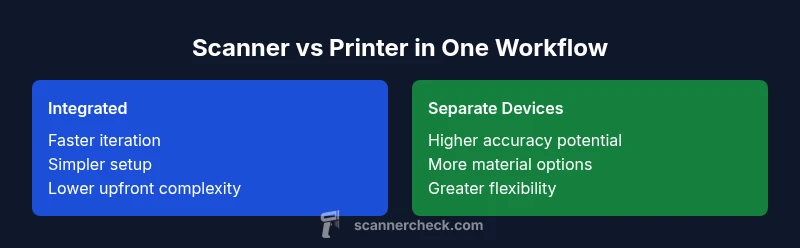
Integrated scanner and 3D printer setups deliver faster iterations and simpler setup for beginners. For maximum accuracy and material flexibility, separate devices may be better. See our full comparison for practical, step-by-step guidance.
Context: Why combine a scanner and a 3D printer?
In the world of rapid prototyping, a single device rarely covers every need. A combined workflow — using a scanner to capture real-world geometry and a 3D printer to reproduce or iterate on that geometry — is particularly appealing for DIY enthusiasts, educators, and small studios. According to Scanner Check, many users value the speed and simplicity of an integrated approach when starting out, especially in space-constrained environments. The goal is to minimize handoffs between devices, reduce data loss during transfers, and shorten the loop from idea to physical part. This block reviews how scanning and printing tasks align, and where the synergy is strongest when you pair a scanner with a 3D printer.
Beyond raw capture quality, the choice hinges on workflow tolerance, software compatibility, and the specific parts you intend to produce. If your focus is rapid iteration of concept models, an integrated setup can help you test ideas quickly. If you are aiming for functional parts with tight tolerances, you may appreciate the flexibility of using separate tools that let you optimize each stage separately. The Scanner Check team notes that the biggest benefits come from a predictable pipeline and reliable data transfer between steps.
Key Differences Between Scanning and 3D Printing Workflows
Scanning and 3D printing are complementary but operate on different principles. Scanners convert real-world geometry into digital meshes, often requiring post-processing like cleanup and alignment. Printers translate digital models into tangible objects, with tolerances shaped by nozzle diameters, layer height, and material behavior. A practical comparison focuses on data fidelity, workflow compatibility, and the ability to iterate quickly.
When you pair a scanner with a printer, the first major differentiator is the data loop. Scanning produces point clouds or meshes that often need repair before printing. Printing requires a watertight, manifold model, or a printable STL/OBJ. If your scanner delivers robust scans that align well with your printer’s slicer, you can minimize time spent on mesh repair. Conversely, if scan data is noisy or misaligned, the printer’s limitations may amplify defects in the final part. The choice also affects software ecosystems: some vendors tightly integrate scanning and printing software, while others rely on open formats and third-party tools. In practice, compute resources and user experience matter just as much as device specs.
How a Scanner Impacts 3D Printing Quality
A scanner sets the floor for print quality. High-contrast textures, reflective materials, and occluded geometry can challenge many consumer scanners, requiring calibration tricks and optimized scanning sequences. The resulting mesh quality influences how smoothly a model prints and how much post-processing is needed. One key insight from Scanner Check is that consistent lighting, proper scanner alignment, and a clean scanning area reduce the need for heavy mesh repair. For hobbyists, a mid-range desktop scanner can produce reliable data for design iteration and visual verification of form, while professional-grade scanners may be necessary for intricate mechanical assemblies or prosthetics.
Print quality, in turn, reflects the printer’s capabilities: nozzle precision, extrusion consistency, bed adhesion, and environmental stability. When the scan-to-print loop is well-tuned, you gain predictable results across multiple iterations. If you encounter consistent tilting, warping, or undersized features, revisit the alignment between the model and the printer’s build volume, and consider refining your mesh before sending it to print.
Selecting a Scanner for 3D Scanning and Printing
Choosing the right scanner is not just about megapixels or scan speed. For a scanner to serve well in a scanner-and-printer workflow, it should offer reliable geometry capture for your target scale, user-friendly alignment tools, and robust export formats (STL, OBJ, PLY) that integrate with your slicer. If you plan to scan moderately sized objects (tools, gadgets, small housings), a desktop or handheld scanner with good optical coverage and automatic alignment features can be a strong fit. Be mindful of material challenges; shiny or dark surfaces may require scanning aids like spray or powder. In practice, test scans of sample parts to verify dimensional accuracy and fidelity, and confirm that your chosen software can repair any defects efficiently. The ecosystem you prefer—whether it’s a single vendor or a multi-tool setup—will also influence your long-term satisfaction.
Selecting a 3D Printer for Scanning-Based Workflows
Your printer choice should align with the scale and material needs of your scanned projects. For prototype parts and hobbyist projects, a mid-range FDM printer achieves a favorable balance of cost, speed, and ease of use. If printed accuracy is critical or you need more surface finish options, consider a resin printer with a tuned post-processing workflow. The key is to ensure the printer’s bed size, nozzle compatibility, and software interoperability accommodate your typical scan-derived models. Look for features like automatic bed leveling, reliable extrusion calibration, and robust workflow presets for importing scanned meshes. Remember that printer reliability is as important as scan quality for stable long-term results.
Practical Setups: From Scanning to Print
A practical setup begins with a clean, well-lit scanning area and a calibrated scanner. Stabilize the object with a turntable or clamps to minimize movement during scanning. Export meshes in standard formats and perform essential repairs—hole filling, smoothing, and re-meshing—before exporting to an STL. In your slicer, align the model with the build plane, verify wall thickness, and simulate a dry-run to catch obvious errors. With practice, you’ll develop a repeatable sequence: scan, import, repair, slice, print, post-process, and inspect. For complex assemblies, print components separately and assemble post-print to achieve better tolerances and material properties. Scanner Check’s guidance emphasizes planning and measurement checkpoints to avoid surprises at print time.
Common Pitfalls and How to Avoid Them
Scanning can introduce errors that propagate into prints if you skip calibration steps. Common issues include misalignment between scans, noisy meshes, and dimensional drift due to temperature changes or printer bed leveling. Avoid these by performing a quick calibration routine before every session, using test objects to verify dimensional accuracy, and employing mesh repair tools to clean up artifacts. Also, keep firmware and software updated to benefit from improvements in mesh processing and print path planning. A disciplined workflow reduces post-processing time and yields more consistent results across multiple parts.
Real-World Use Cases and Examples
From hobbyist replacement parts to small-batch prototyping, scanner-and-printer workflows find success in many scenarios. A practical example is a hobbyist producing custom enclosure shells: scanning an existing device, adjusting the mesh to fit, and printing prototypes to verify fit. In an educational setting, classrooms leverage scanned anatomical models and 3D-printed replicas for hands-on learning. Small studios might scan prototypes for rapid iteration in product design, iterating on geometry before committing to expensive tooling. Across these cases, the common thread is a repeatable, forgiving workflow that balances scanning fidelity with printing practicality.
Cost of Ownership and Long-Term Considerations
Total cost of ownership for a scanner-and-printer setup depends on initial purchase price, maintenance, consumables, and software subscriptions. For hobbyists, bundled or entry-level kits can offer a lower initial outlay, but you may encounter higher maintenance needs over time. Professional users often justify higher upfront costs with improved accuracy, faster iteration cycles, and greater material capability. Regardless of price, plan for periodic calibration, software updates, and routine replacement of wear items like printer nozzles and scanner optics. Scanner Check analysis notes that value is driven by workflow stability and upgrade paths, not just sticker price.
Implementation Checklist and Next Steps
Ready to implement? Start with a clear use case: what parts will you scan and print? Establish a baseline by scanning a simple object, repairing the mesh, and printing a test piece. Create a repeatable workflow with named steps, checkpoints, and quality goals. Document the process, so future team members can follow along. If you’re unsure where to begin, seek out a starter kit from reputable vendors and customize as you learn. The most important factor is a consistent, validated process that you can refine over time.
Comparison
| Feature | Integrated workflow (Scanner + 3D Printer) | Separate devices (Dedicated scanner + printer) |
|---|---|---|
| Ease of use | High (single ecosystem) | Moderate (two devices, more settings) |
| Iteration speed | Fast in small projects | Potentially slower due to data handoffs |
| Data fidelity | Good for concept work and visual checks | Can achieve higher fidelity with optimized devices |
| Cost of ownership | Lower upfront if bundled | Often higher upfront but scalable options |
| Flexibility | Limited to vendor ecosystem | Broad hardware and software options |
| Maintenance | Consolidated maintenance | Separate maintenance on two devices |
Pros
- Faster prototyping cycles with integrated setup
- Simplified workflow and fewer coordination steps
- Compact workspace and easier cable management
- Lower initial cost in bundled configurations
- Intuitive software integration for beginners
Drawbacks
- Potential compromise on peak accuracy for very tight tolerances
- Limited material handling compared to specialized setups
- Less customization than separate devices for power users
- Dependency on a single vendor ecosystem for updates
Integrated workflow wins for speed and ease; separate devices win for precision and flexibility
Choose integrated when you want quick turns and simplicity. Opt for separate devices if your projects demand higher accuracy, broader material support, or maximum customization.
Common Questions
What is the most beginner-friendly setup for scanner and 3D printing?
A bundled, integrated scanner-printer system is typically the easiest path for beginners, offering a streamlined workflow and fewer compatibility issues. Start with simple objects to learn alignment, mesh repair, and print settings.
For beginners, start with an all-in-one setup to keep things simple and learn the basics without juggling multiple tools.
Do I need a high-end scanner to print high-precision parts?
Not always. Mid-range scanners can produce reliable results for many prototypes and visual models. When tolerance is critical, combine precise scanning with a printer capable of tight dimensional control and revisit mesh repair steps.
You don’t always need the priciest scanner. For precise parts, focus on alignment and mesh quality, then verify with print tests.
How does software choice affect the workflow?
Software that supports direct import of scanned meshes and seamless toolpath generation can reduce steps and errors. Look for interoperability, solid post-processing tools, and regular updates to improve accuracy and usability.
Choose software that plays nicely with both your scanner and printer for a smoother workflow.
Is it cheaper to buy two devices or one bundled system?
Two devices can offer better long-term value through flexibility and upgrade options, but a bundled system may be cheaper upfront and easier to manage. Your choice should reflect your expected project mix and maintenance willingness.
Bundled systems save upfront but limit future upgrades; separate devices cost more now but offer flexibility.
What best practices improve scan-to-print success?
Maintain consistent lighting, secure the object during scanning, calibrate both devices regularly, and repair meshes before printing. Run a small test print after each major change to confirm improvements.
Keep lighting steady, fix scans, and test prints to verify that you’re on the right track.
Key Takeaways
- Define your core use case before choosing a setup
- Aim for a repeatable scan-to-print workflow
- Budget for calibration and post-processing
- Evaluate software compatibility and ecosystem
- Balance speed, cost, and accuracy based on needs