Why Does My Scanner Have a Line Down the Middle? Fixes
Learn why your scanner shows a vertical line and how to fix it quickly. Practical steps cover cleaning, calibration, drivers, and when to seek professional service.

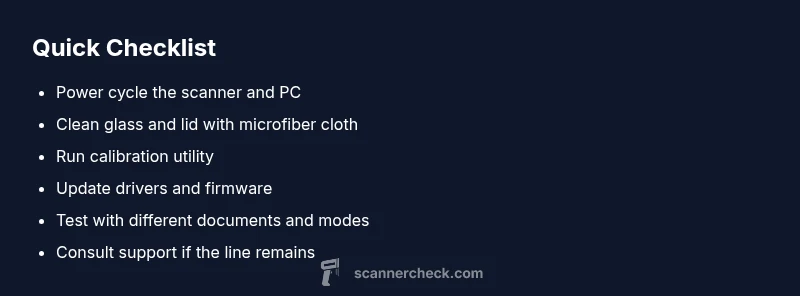
The most likely causes are a dirty scan glass or a miscalibrated scan head. Quick fixes: clean the glass and lid, run the built-in calibration, and update drivers/firmware. Then perform a test scan. If the line persists, it may be a sensor or internal hardware fault that requires professional service.
Understanding the symptom
If you’re asking, why does my scanner have a line down the middle? you’re not alone. That vertical artifact appears when the scan image shows a narrow vertical stripe from top to bottom. It can ruin documents, receipts, or photos. The good news is that many causes are user-serviceable and reversible with a few checks. In most cases, the line isn’t a sign of total failure; it simply means a small subsystem isn’t reading cleanly. Start with the simplest explanations: surface contamination on the glass, dust on the scan head, or a misalignment that crept in after a move or a software update. By following a structured diagnostic approach, you can identify whether the problem is cosmetic or hardware-related.
Quick checks you can perform at home
- Inspect the scan glass for dust, smudges, or fingerprints. Even tiny particles can produce vertical artifacts in high-contrast areas.
- Wipe the glass and lid hinges gently with a microfiber cloth dampened with isopropyl alcohol. Do not spray liquids directly on the glass.
- Check for obvious misalignment of the lid or scan area after moving the device. A tilted lid can create uneven lighting that appears as a line in scans.
- Run a built-in test pattern or a calibration page if your scanner software offers it. Compare results between color and grayscale modes to identify whether the line is mode-specific.
- Try a few different document types (plain paper, glossy photos, coated cards) to see whether the line is consistent or document-dependent.
"## Hardware vs software signs"
There isn’t a strict boundary between hardware and software artifacts, but you can often separate them by the test results:
- If the line shows in all scans and all modes, including the calibration pattern, the issue is likely hardware-related (sensor, optics, or internal alignment).
- If the line appears only after certain software actions (driver updates or color profiles), the culprit could be the software chain (driver, firmware, or color management).
- If the line only appears with specific document types or textures, it might be contamination or a problem with the scan path affecting those materials.
Cleaning, calibration, and driver checks: what to do first
The safest, fastest fixes usually live in cleaning and calibration. Start here before you worry about internal hardware:
- Clean the glass, scanning bed, and the underside of the lid with a microfiber cloth and 70% isopropyl alcohol. Let dry completely before testing again.
- If your model has a maintenance or calibration option in the software, run it. Auto-calibration can realign the read head or sensor and fix line artifacts.
- Update or reinstall the scanner drivers and firmware from the manufacturer’s site. A software glitch can create persistent artifacts that disappear after an update.
Testing across modes and documents: don’t guess
After cleaning and calibration, retest using multiple modes:
- Scan in color, grayscale, and black-and-white modes to see if the line persists across modes.
- Scan different document types (text-heavy, photo, mixed) to check for consistency.
- Use different scan resolutions; some lines appear only at higher DPI due to processing or optics limitations.
- Compare the scanned results to the original on screen to assess whether artifacts look like a sensor issue or a processing artifact.
When software updates aren’t enough: hardware realities
If you have updated drivers and firmware and cleaned thoroughly but still see a line down the middle, the issue is leaning hardware-ward:
- The image sensor (CCD/CIS) may be failing or misaligned.
- An internal optical path could be damaged or misaligned after a drop or impact.
- A defective readout circuit or connector could cause a vertical artifact that software updates cannot fix.
In these cases, you’ll want to plan for professional inspection or service under warranty if applicable. Do not attempt to disassemble complex scanners on your own, as this can void warranties and create further damage.
How to distinguish line artifacts from other issues
A line neatly centered in the middle that stays in every test is a strong sign of a readout or alignment problem. If the line shifts when you change the image alignment or cropping area, it could be a processing or driver issue. If the line is only present at certain brightness levels or with glossy surfaces, lighting or glare may be contributing. Document the conditions under which the line appears to help a technician reproduce the issue.
Final checks and best practices for prevention
To minimize future line artifacts, adopt a simple routine:
- Clean the glass after long scanning sessions or high-use periods.
- Keep the scanner in a stable orientation away from direct sunlight or heat sources.
- Regularly update firmware and drivers when new versions are released.
- If you rely on consumer-grade hardware for critical work, consider a backup scanner or a professional-grade model with better sensor stability.
When to call in professional help
If the line persists after cleaning, calibration, and software updates, contact the manufacturer support or a certified service technician. Hardware faults often require diagnostic tests with specialized equipment that aren’t available to consumers. If your device is under warranty, open a ticket and provide the steps you took to diagnose the issue so the technician can reproduce it quickly.
Steps
Estimated time: 30-45 minutes
- 1
Power cycle devices
Turn off the scanner and the computer. Unplug for 30 seconds, then plug back in and power on. Reopen the scanning software and run a test scan to establish a clean baseline.
Tip: Cooling the internal components briefly can reset minor sensor glitches. - 2
Clean the glass and lid
Wipe the scan glass, lid surface, and the inner edges with a microfiber cloth and a small amount of isopropyl alcohol. Do not spray liquids directly onto the glass. Allow the surface to dry completely before testing.
Tip: Avoid abrasive cleaners that could scratch the glass. - 3
Check for physical misalignment
Inspect the lid and scan path for any signs of warping or misalignment after moving the device. Re-seat any loose cables if you can access them safely and without opening the chassis.
Tip: Ensure the lid closes flat and evenly across the scan area. - 4
Run calibration/cleaning utilities
Use the scanner’s built-in calibration tool or cleaning utility. Follow on-screen prompts to complete the process. Perform a test scan on a plain white page afterward.
Tip: Document the before/after results for comparison. - 5
Update drivers and firmware
Visit the manufacturer’s site and install the latest driver package and firmware. Reboot and test with multiple documents to see if the line persists.
Tip: Back up any custom profiles before updating. - 6
Test with varied documents
Scan plain text, photos, and glossy cards. Compare results to determine if the line is document-dependent or a general readout issue.
Tip: Note変 any patterns: line only with glare or only on dark areas. - 7
Inspect for internal hardware signs
If you can access the interior safely, check for loose connectors or obvious damage. Do not force components or take apart the sensor block.
Tip: If anything looks damaged, stop and seek professional help. - 8
Consult support if unresolved
If the line remains after steps above, contact the manufacturer or a certified service technician. Provide a summary of what you tried and test results.
Tip: Keep your proof of purchase handy for warranty inquiries.
Diagnosis: Vertical line down the middle appears in scans
Possible Causes
- highDirty or smudged scan glass or lid causing artifacts
- highDamaged or misaligned image sensor (CCD/CIS)
- mediumCalibration drift or corrupted calibration data
- lowDriver or firmware incompatibility or glitch
Fixes
- easyClean the glass, scan bed, and lid with a microfiber cloth and isopropyl alcohol; ensure dry before testing
- easyRun the device’s auto-calibration or manual calibration routine
- easyUpdate or reinstall scanner drivers and firmware from the manufacturer
- easyTest scans with multiple documents and modes to confirm persistence
- mediumInspect for visible damage or misalignment; reseat cables if accessible (do not disassemble)
- mediumIf the line remains, seek professional service or contact manufacturer support
Common Questions
What does a line down the middle indicate in a scan?
A vertical line typically points to a readout issue from the sensor or an optical path problem, though it can also be caused by surface contamination. Follow a structured troubleshooting flow to isolate the cause.
A vertical line usually means a readout or optical issue. Start with cleaning and calibration, then check for hardware problems if it persists.
Can cleaning the glass fix the problem?
Yes, cleaning the glass and lid often resolves lines caused by dust or smudges. If the line remains after cleaning and recalibration, the issue may be deeper in the readout hardware.
Cleaning the glass can fix many line artifacts. If it stays, move to calibration and hardware checks.
How do I calibrate my scanner?
Use the scanner software’s calibration feature. Run auto-calibration when available, and re-test with a plain white page to evaluate change in the scan.
Run the built-in calibration tool and test with a white page to see if the line changes.
Will software updates fix hardware problems?
Software updates can fix driver glitches, but persistent lines after updates usually indicate a hardware fault requiring service.
Software updates can help, but a persistent line often means hardware needs attention.
When should I replace my scanner?
If the line persists after all maintenance and it affects essential work, or the cost of repair outweighs replacement, consider a new scanner.
If repairs cost more or don’t fix the issue, it may be time for a new scanner.
Is it safe to open the scanner to clean or inspect?
Only perform external cleaning and safe checks. Do not disassemble internal modules; this can void warranties and create safety hazards.
Don’t open the internals unless you’re trained. Clean the exterior and glass only.
Watch Video
Key Takeaways
- Clean the glass and recalibrate first
- Update drivers/firmware for software fixes
- Test with multiple documents and modes
- If the line persists, hardware service is likely needed