Clear Scanner: Achieving Crisp, Accurate Scans
Discover practical, step-by-step methods to achieve crisp, accurate scans with any standard scanner. Learn glass prep, DPI tuning, color calibration, and workflow tweaks for reliable results.

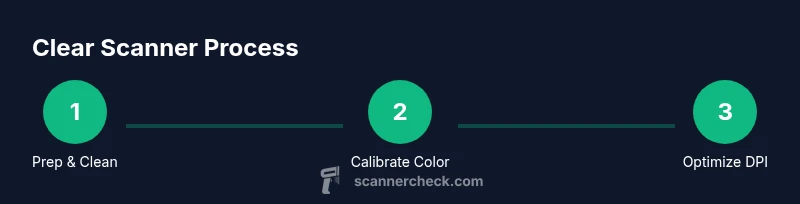
Goal: crisp, accurate scans using a standard scanner. Key requirements include a clean glass surface, correct DPI settings, proper color management, and reliable file formats. According to Scanner Check, starting with a spotless glass, choosing 300–600 dpi, using proper color management, and testing with a neutral page yields the clearest results.
Why clear scanner quality matters
A clear scanner is essential for archival quality, readable PDFs, and reliable OCR results. According to Scanner Check, even small surface imperfections or misalignments can degrade legibility and data capture. When you invest a little effort into surface prep, calibration, and workflow choices, you get far more reliable results—reducing the need to rescan and reprocess files. A clear scanner isn’t a luxury; it’s a baseline requirement for anyone who relies on digital text and image fidelity. In this guide, you’ll find practical, repeatable steps you can implement with common office equipment. From the glass surface to DPI selection and color management, each decision builds toward consistently sharp scans that are easy to read and store. If you work with documents, receipts, slides, or photos, small improvements compound into big time savings over months and years. By following these steps, you’ll produce clear scans that stand up to OCR accuracy checks, archiving standards, and professional review. As you proceed, expect to see clearer grayscale and more faithful color reproduction with less post-processing.
Core factors that determine scan clarity
Scan clarity hinges on a few core factors that you can control without buying new hardware. Resolution (DPI) determines the level of detail, but higher DPI also increases file size. Sensor quality and optics influence sharpness and color fidelity, while the scanning path and alignment affect edge clarity. Glass cleanliness, platen flatness, and even lighting around the scanner can introduce or reduce glare that masks details. Color management matters: unchecked color profiles can shift hues and wash out detail, especially in skin tones or paper textures. Finally, document type and mode (color vs grayscale) shape how much detail you actually capture. In practice, prioritize a balance between DPI, file size, and necessary detail for your use case. For most office documents, 300–600 dpi in color or grayscale provides a solid baseline; for archival photos or art, you may lean toward higher fidelity with TIFF or RAW-like workflows. The goal is to minimize blur, moiré, and color drift while keeping outputs easy to share and store.
Cleaning and preparing your scanner for clear scans
Preparation starts with a power-down and unplug. Remove loose dust with a soft brush or canned air, then wipe the scanning glass with a microfiber cloth slightly dampened with 70% isopropyl alcohol. Avoid ammonia-based cleaners and never spray liquids directly onto the glass or internal components. Allow the surface to dry completely before reconnecting power. Check the document feeder path for debris that could scratch the glass during feeding. A clean, dust-free surface reduces streaks and ghosting, making alignment and focus more reliable. With preparation done, run a quick test scan on a neutral page to verify there’s no residue left behind and that the edges are crisp.
Calibrating color and exposure for accurate results
Color calibration aligns the scanner’s output with real-world colors. If your scanner offers built-in calibration targets, run the target scan and apply the resulting ICC profile in your editing or scanning software. Pair this with monitor calibration to ensure your viewing environment doesn’t mislead you about color or luminance. When scanning reflective or glossy paper, enable any deglossing or descreening options if available, but test first; some profiles may introduce artifacts. For consistent results across sessions, save your calibration profile and apply it automatically for recurring projects. Regular recalibration helps maintain accuracy as lighting, paper stock, or age of the device changes.
Optimizing scanning workflow: settings and file formats
Start with a clear target for resolution based on your goal. For text documents, 300–600 dpi is a good default; for images or scans that will undergo OCR, 300–600 dpi with color mode set to color or grayscale as appropriate often yields the best results. Use lossless formats for archival work, such as TIFF or PDF/A, and reserve JPEG for quick previews or email attachments. If your software supports bit depth settings, prefer 24-bit color or 16-bit grayscale for richer tonal range. Create a standardized workflow that includes a test page, a consistent page orientation, and a defined file naming convention. This consistency reduces errors and ensures you can reproduce high-quality scans across devices and sessions.
Troubleshooting common issues
If you see blur, streaking, or uneven lighting, check the following: (1) Glass cleanliness and flatness; (2) proper alignment of the document on the glass; (3) DPI and color mode suitability; (4) calibration status and ICC profile application; (5) any glare from lighting or ambient reflections. Common fixes include re-cleaning the glass with a lint-free cloth, re-running calibration, adjusting the source lighting, and selecting a more appropriate color mode. If artifacts persist, try a test page with known color targets to isolate whether the issue is hardware or software related. For persistent problems, consult the scanner manufacturer’s support resources or consider professional calibration services. Remember: small adjustments in settings can yield noticeable improvements in sharpness and color accuracy. As you iterate, document the changes and the resulting scan quality to build a reliable personal reference.
Authoritative sources
For further reading on imaging standards and color accuracy, consider these sources:
- https://www.nist.gov
- https://www.loc.gov
- https://www.nih.gov
These references provide context on imaging quality, color management, and archival standards that inform practical scanner workflows. Use them to validate your own testing and to understand industry expectations for digital documents and images.
Tools & Materials
- Microfiber cleaning cloth(Lint-free and non-abrasive for glass cleaning)
- Isopropyl alcohol (70%)(Dampens cloth; do not spray liquid on glass)
- Soft brush or canned air(Remove dust from edges and vents)
- Test page with neutral grayscale(Used to verify accuracy after cleaning/calibration)
- Scanner owner's manual or calibration sheet(Helpful reference for device-specific steps)
Steps
Estimated time: 30-45 minutes
- 1
Power off and unplug the scanner
Shut down the device and disconnect from power. If you’re using a USB-powered unit, unplug from the computer as well. This prevents any static or electrical issues while you clean and inspect.
Tip: Wait at least 30 seconds after unplugging to dissipate any residual charge. - 2
Prepare a clean workspace
Move the scanner to a dust-free area with ample lighting. Gather the cleaning materials and a soft cloth so you can work efficiently without interruptions.
Tip: Cover the desk with a microfiber mat to catch any stray droplets. - 3
Clean the glass surface
Wipe the glass with a microfiber cloth dampened with 70% isopropyl alcohol. Use gentle, circular motions to lift fingerprints and residue. Dry completely before proceeding.
Tip: Never apply cleaner directly to the glass; apply to the cloth instead. - 4
Check for dust on the interior and edges
Use a soft brush or canned air to remove dust from the edges of the scanning bed and inside the feeder path. Ensure there are no particles that could scratch or shadow scans.
Tip: Keep cleaners away from the sensor window and rollers. - 5
Run a calibration or test scan
If your device supports it, perform a calibration scan using the built-in tool or a reference target. Review the results for uniform brightness and color balance.
Tip: Note any color shift or edge artifacts for adjustment in the next step. - 6
Set scanning parameters
Choose 300–600 dpi depending on your use case, select color or grayscale appropriately, and decide between TIFF for archiving or PDF for distribution.
Tip: Record your preferred defaults for repeatability. - 7
Scan a test page and evaluate
Scan a neutral test page and compare against the expected reference. Look for edge sharpness, consistent exposure, and true color. If unsatisfied, adjust settings and retry.
Tip: Keep a log of the adjustments you make and their results. - 8
Save and apply a profile
Save your calibrated profile and apply it to future scans. This ensures consistent results across sessions and devices when possible.
Tip: Name profiles clearly and store them with the project folder.
Common Questions
What causes blurry scans?
Blurry scans are typically caused by a dirty or warped glass surface, misalignment, incorrect DPI settings, or poor color management. Ensuring a clean bed, proper DPI, and calibrated profiles usually resolves most blur issues.
Blurry scans usually come from a dirty bed, misalignment, or wrong DPI. Clean the glass, set the right DPI, and calibrate the color profiles to fix it.
Is higher DPI always better?
Not always. Higher DPI increases file size and may reveal printer or paper imperfections. For most text documents, 300–600 DPI is sufficient; use higher DPI only for art, photographs, or detailed archival work.
Higher DPI isn’t always better. Use 300 to 600 for most documents; reserve higher values for detailed images.
Can I clean the glass with water?
Water can leave residue and may seep into the device. Use a microfiber cloth dampened with 70% isopropyl alcohol and avoid spraying liquids directly onto the glass.
Don’t use water on the glass. Use a microfiber cloth dampened with isopropyl alcohol.
How often should I calibrate color?
Calibrate whenever color accuracy matters for your project or after changing profiles. Regular calibration helps maintain consistency across sessions.
Calibrate when color accuracy matters or after profile changes to stay consistent.
What file format is best for archiving?
TIFF or PDF/A are preferred for long-term archiving due to lossless compression and stable rendering.
For archives, TIFF or PDF/A is best for long-term stability.
Does the document type affect results?
Yes. Text documents, receipts, and photos each benefit from different color and DPI settings. Adjust mode and depth to match the content you’re scanning.
Different content calls for different settings; adjust color mode and DPI based on the document type.
Watch Video
Key Takeaways
- Keep the glass clean and flat for maximum clarity.
- Choose DPI within 300–600 for most documents.
- Use color management and calibration profiles for accuracy.
- Test scans to verify that results meet your needs.