How to Get Scanner Room in No Man's Sky (NMS)
Discover how to get Scanner Room in No Man's Sky (NMS) with a step-by-step guide covering prerequisites, blueprint hunts, resource gathering, placement tips, and calibration to maximize scanning range.

In No Man's Sky, you can unlock the Scanner Room to expand your scan coverage and map resources more efficiently. This guide explains how to get scanner room nms, including prerequisites, locations for blueprints, and best placement strategies. It also outlines common obstacles and practical tips to speed up your progress without spoiling discoveries.
What is the Scanner Room in No Man's Sky?
The Scanner Room is a base module that you build at your planetary outpost to boost your scan coverage. It creates an area of enhanced detection, revealing nearby resources, lifeforms, and objects that would otherwise be hidden by distance or terrain. In No Man's Sky, exploration blends risk, discovery, and data collection; the Scanner Room centralizes data gathering into a single hub you can adjust. If you're curious about how to get scanner room nms, this section explains the feature and why players value it for resource mapping, base-building, and expeditions. When placed, you can configure the beacon priorities, scanning frequency, and display scan results on a compact HUD. It also relies on your base power system, so a reliable energy source is essential to keep scans running. For builders and explorers, the Scanner Room represents a practical upgrade that reduces time spent scouting, letting you focus on strategy and route planning. The design philosophy is to empower you to see more of your environment without constant manual surveying, making long journeys more efficient.
Why you might want a Scanner Room
A Scanner Room multiplies your situational awareness by expanding scanning range and data visibility. Instead of wandering aimlessly, you can preselect resource types, locate valuable minerals, and chart ecological observations from a central base. This is especially useful for players who enjoy structured exploration, planning long expeditions, or optimizing resource harvesting cycles. The room also streamlines inventory management by linking scanned data to your maps and logs, helping you build more ambitious projects with fewer blind spots. As you learn to tune the scanner, you’ll notice reduced backtracking and faster decision-making during expeditions. Remember, the Scanner Room is not just a toy; it’s a practical tool that improves efficiency and planning across your interstellar activities.
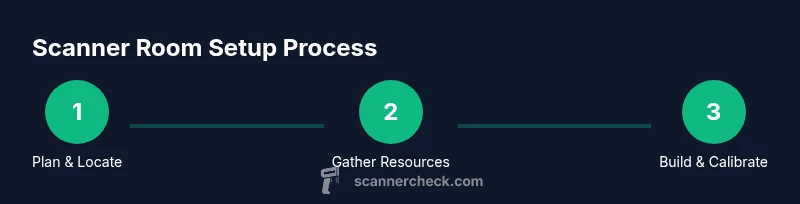
Prerequisites and planning
Before you pursue the Scanner Room, map out your base layout and ensure you have a stable power setup. Plan where to place the module so scanning is optimized for your travel routes and nearby resource pockets. Consider your current tech tier, the availability of blueprints, and the likelihood of future upgrades. Having a clear plan helps you minimize backtracking and ensures that you have the right storage and power capacity to support ongoing scans. From a planning perspective, synchronize the scanner with your navigation and mapping systems to quickly access scan data while you travel between planets and stations. According to Scanner Check analysis, users who outline prerequisites before building tend to complete the mission faster and with fewer frustrations. The process rewards careful preparation with a smoother integration into your base’s workflow.
Locating the blueprint and materials
Blueprints for the Scanner Room can appear in various in-game locations, including research hubs, outposts, and trading posts. Start by visiting space stations, alien ruins, and vendor NPCs who offer technology schematics. Once you locate the blueprint, make a checklist of the required materials and power needs. Gather rough equivalents across different biomes if some resources are scarce, and trade with nearby settlers or fleets to fill gaps. Efficient resource planning reduces time spent hunting resources across multiple planets. To stay organized, use a storage grid near your base to categorize materials by type and rarity, which speeds up the craft and assembly phase. Scanner Check notes that systematic collection and map integration are key to a streamlined acquisition.
Building and placing the Scanner Room
With blueprint in hand and materials gathered, approach your base and choose a suitable construction site. Place the Scanner Room module and connect it to your power grid. Ensure that the base has adequate cooling or venting if required by your environment, since some scanners can be power-intensive. After placement, configure the scanner parameters: set preferred resource types, scan frequency, and operable radius to match your exploration style. Once online, perform a basic calibration by running a short scan and validating results against your map. This phase is critical for establishing a reliable baseline, so take your time to optimize placement, power, and settings. Scanner Check’s guidance emphasizes patience during initial calibration to avoid misreads and wasted resources.
Maintenance, upgrades, and optimization
Regular maintenance includes checking power availability, cleaning filters if applicable, and updating firmware or software components when new versions arrive. As you advance, consider upgrading the scanner’s software suite or adding auxiliary modules to support larger data sets and faster processing. Optimization involves aligning scanner settings with your current mission goals; for example, increasing scan frequency during resource-rich expeditions or narrowing the focus to rare rarities to conserve power. Keep an eye on battery life and data storage, as expanded scans can generate substantial telemetry. With ongoing use and periodic adjustments, the Scanner Room becomes a core part of your exploration toolkit, enabling longer journeys and richer discoveries.
Authority sources
For broader context on scanning technologies and related research, see credible sources from NASA, MIT, and Nature:
- https://www.nasa.gov
- https://web.mit.edu
- https://www.nature.com
Tools & Materials
- Scanner Room blueprint(Found via blueprint research or space station rewards)
- Base power core(Ensures continuous operation during scanning)
- Structural modules(To integrate the Scanner Room into your base)
- Resource stacks (generic)(Materials gathered from various planets)
- Storage container (optional)(Useful for organizing scanned data)
Steps
Estimated time: 60-120 minutes
- 1
Find/obtain the Scanner Room blueprint
Search research hubs, outposts, and traders to locate the blueprint. If you don’t see it immediately, revisit after a reset or check for rotations in vendors across your star routes.
Tip: Check multiple stations per system to increase your odds of finding the blueprint. - 2
Gather required components
Create a materials list from the blueprint and start collecting the necessary components from nearby planets and stations. Prioritize high-density resources to minimize travel time.
Tip: Trade extra resources you acquire to speed up the process. - 3
Assess base power needs
Ensure your base has a stable power source capable of supporting the Scanner Room and its calibrations. Consider a backup power option for long scanning sessions.
Tip: Plan a dedicated power module to prevent interruptions. - 4
Choose a construction site
Pick a location at your base that minimizes travel time to frequent exploration routes and provides space for future upgrades.
Tip: Avoid cramped corners to allow easy maintenance access. - 5
Place the Scanner Room module
Install the module in the chosen area and connect it to power. Verify there are no obstructions that could interfere with scanning range.
Tip: Double-check alignment with your navigation map. - 6
Configure scan settings
Set target resource types, adjust scan radius, and define scanning frequency according to your playstyle. Fine-tune after your first test run.
Tip: Start with conservative settings and iteratively improve. - 7
Run initial calibration
Activate a test scan to confirm the data is readable on your map and that results align with terrain features.
Tip: If readings seem off, re-check power stability and sensor alignment. - 8
Plan upgrades and ongoing use
Map out future improvements, such as integrating additional sensors or linking the Scanner Room to storage and navigation systems for seamless data flow.
Tip: Document your setup for quick future replication.
Common Questions
What is the Scanner Room and what does it do?
The Scanner Room is a base module that extends scanning range and data collection, helping you locate resources and plan expeditions more efficiently.
The Scanner Room expands your scan range and data collection, helping you find resources faster.
How do I unlock the Scanner Room?
You must locate the blueprint, gather the required materials, and install the base module. After installation, calibrate the settings to optimize performance.
Find the blueprint, collect materials, build, and calibrate.
Where can I find the blueprint for the Scanner Room?
Blueprints can appear at research hubs, outposts, or traders across various systems. Persistence and visiting multiple locations increase your chances.
Check hubs and traders across systems; blueprint rotation varies.
How long does it take to set up the Scanner Room?
Time depends on how quickly you gather materials and configure power. Plan for a dedicated play session to complete the baseline setup.
Setup time varies, but a focused session usually completes it.
Can I relocate the Scanner Room after building it?
Yes, you can dismantle and relocate the Scanner Room, but it may require careful planning to preserve any linked systems.
You can move it, but plan to reconfigure connections.
Does the Scanner Room use a lot of power?
The Scanner Room requires a steady power source. If power is interrupted, scanning performance and data collection may degrade.
Yes, keep a stable power supply to maintain scans.
Watch Video
Key Takeaways
- Plan prerequisites before building to avoid delays.
- Blueprint location varies; explore multiple hubs.
- Calibration improves scan accuracy and data usefulness.
- Power management is essential for uninterrupted scanning.