How to Scan for TV Channels
Learn how to scan for TV channels using your TV or tuner. Step-by-step instructions, troubleshooting tips, and best practices for OTA channel scanning and optimization.

To scan for TV channels, use your TV or tuner’s built‑in channel setup. Connect an antenna, start the Auto Scan in the Channel Setup menu, select your region, and run the scan. Save the results and verify a full, clean lineup. If you use streaming devices, initiate the scan there as well.
Why Scanning for TV Channels Matters
According to Scanner Check, a reliable channel scan ensures you access the full lineup and minimize missing stations. In today’s home entertainment setups, a current channel map saves time, improves viewing quality, and reduces frustration whether you rely on an HDTV with a built-in tuner, a dedicated set-top box, or a streaming device that supports live TV. Over-the-air (OTA) broadcasts remain a cost-effective option for local channels, but they require periodic rescans to capture new affiliates or frequency changes caused by repackings or adjustments at the transmitter. A precise scan also helps you avoid ghost channels, duplicate listings, or outdated favorites that can appear when channel data drifts over time. The goal is to perform scans with consistent settings, understand what your tuner can and cannot do, and re-scan after significant events such as moving the antenna, upgrading firmware, or changing your region. While the process may feel technical at first, it remains accessible for beginners and highly valuable for power users who want a dependable, organized viewing experience.
In this section we’ll explore when to scan, how to prepare, the differences between OTA and other sources, and practical troubleshooting steps. You’ll find actionable advice for common TV brands and for generic tuners, plus tips on interpreting the channel map after a scan. By the end, you’ll know how to scan confidently, decide when to merge versus replace channels, and maintain a clean, up-to-date lineup that supports easy navigation and quick access to your favorites.
What You Need Before You Start
Before you begin scanning for TV channels, gather the basic tools and confirm your setup. The core requirement is a working tuner and a reliable antenna suited to your region. If you’re using a cable box or a streaming device with live-TV features, verify that the device has a channel scan option or an integrated guide that can pull a local channel lineup. Assemble these essentials: a coaxial cable with solid connectors, a compatible power supply if your device requires separate power, and the remote control or mobile app for navigating the channel menus. If you plan to scan regularly, label your antenna and cable connections to reduce confusion during future rescans. Keep the device manual or official support pages handy in case a menu path differs across brands. For OTA scanning, also confirm you’re in a region that supports the channels you expect and that the antenna is oriented toward the nearest broadcast towers. A simple orientation check—aim at the strongest signal while avoiding obstructions—will save you time during the actual scan.
Additionally, consider your future needs. If you live in a signal-rich market, a simple indoor antenna may suffice; in fringe areas, you might benefit from a high-gain antenna or a UHF/VHF combination. If your TV’s tuner supports both ATSC 1.0 and ATSC 3.0 (NextGen TV), verify compatibility and readiness to receive the newer standard. Finally, ensure you have a stable power source and that the device is on a clean, static-free surface to prevent signal glitches during the scan.
Understanding Tuner Standards, Regions, and Channel Maps
A channel scan’s success hinges on matching the tuner to the broadcasting standard and region. Most North American TVs use ATSC standards (ATSC 1.0 or ATSC 3.0) and require a region setting that reflects your location. In Europe, DVB-T2 is common, while other regions may have DVB-T or ISDB-T. The scan process uses these standards to determine which frequencies to probe and which channels to expect. Before you start, check your device’s settings to confirm the tuner mode aligns with your local broadcasts. If the region is set incorrectly, the scan may miss stations or report channels that don’t exist in your area.
When you run an Auto Scan, the device will typically display progress and indicate the number of channels found. Some devices offer a “Full Scan” that reexamines every possible channel list, while others perform incremental updates. If your device allows you to view a channel map or an electronic program guide (EPG) while scanning, you can gain insight into signal quality and channel validity. After the scan completes, review the results for duplicates, weak signals, or channels that seem out of place. It’s often helpful to perform a quick manual check by tuning to a few known stations and verifying picture quality, audio clarity, and subtitle availability. Finally, remember that some channels may be in test or informational streams and will not appear in prime-time lineups; treat them as placeholders until you verify their usefulness.
Troubleshooting Common Scan Issues
Channel scans can fail or produce incomplete results for several reasons. Start with signal quality: a weak antenna signal leads to missing channels or a partially populated lineup. Reposition the antenna, or upgrade to a higher-gain model, then re-run the scan. Next, verify that you’re using the correct region and tuner standard; a mismatch here often yields fewer channels than expected. If the scan completes but needs more channels later, consider rescanning after a hardware upgrade or a firmware update, as manufacturers sometimes adjust the channel database. Cable and streaming devices may also require a network check to ensure online guides refresh properly; ensure the device is connected to the internet if required by your setup. Lastly, check for software updates—outdated firmware can cause misinterpretations of the channel map or failure to detect newer stations. If all else fails, reset the tuner to factory defaults and perform a fresh scan, then re-import saved channel lists if your device supports backup.
Optimizing and Maintaining Your Channel List
After a successful scan, take a moment to organize your channels for easier navigation. Rename stations with recognizable names, group them into favorites, and delete any duplicates or unusable test streams. Many devices allow you to reorder channels by personal preference, which helps you reach your favorites in fewer clicks. Consider setting up a quick-access favorites bar or a single “Live” folder that contains your most-watched channels. If you use external recording features, verify that your channel numbers remain stable after rescans; some devices re-number channels, which can disrupt timers and scheduled recordings. Regular maintenance includes periodic rescans—ideally once every few months or after a significant change in your reception. If a region update is released, apply it to avoid missing newly available channels or changes in broadcast formats. Finally, back up your channel list when your device supports it, so you can restore settings after a reset or a move to a new device.
Advanced Tips: OTA vs Cable vs Streaming and Firmware
If you use OTA broadcasting, your goal is a robust antenna setup and firmware that supports the latest ATSC standard in your region. If you rely on cable, your available channels are tied to your service package, and channel scanning may be used to refresh local guides rather than discover new stations. For streaming, you may have access to an on-demand live-TV guide; some devices allow you to import or sync an offline channel list, which can simplify navigation. In all cases, keep firmware up to date; developers periodically refine the channel database, improve device compatibility, and reduce scan time. If your device supports multiple tuners or multiplexes, you can run parallel scans to update separate lists, which speeds up the overall refresh process. Finally, consider environmental factors: interference from nearby electronics or physical obstacles can degrade signal strength and lead to inconsistent results. Use a signal meter if available to quantify the signal-to-noise ratio and target improvements with antenna adjustments.
Tools & Materials
- Antenna (OTA compatible)(Choose indoor or outdoor based on distance to towers; ensure it supports VHF/UHF as needed.)
- Coaxial cable (75-ohm)(Check for quality connectors; avoid damaged cables that introduce noise.)
- TV with built-in tuner or compatible set-top box(Verify ATSC/DVB support for your region.)
- Remote control or device app(Needed to navigate Menu and start scans.)
- Device manual or official support page(Helpful for brand-specific menu paths and options.)
Steps
Estimated time: 5-15 minutes per device
- 1
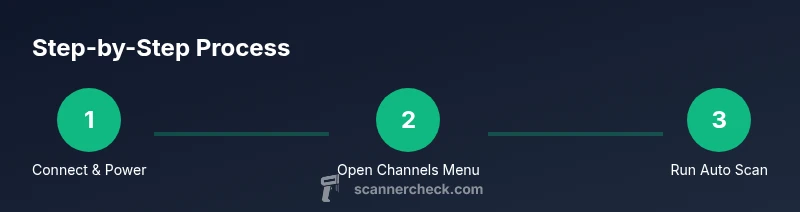
Connect antenna and power
Plug the antenna into the TV or tuner, tighten the coax connection, and power on the device. A secure connection minimizes signal loss and avoids intermittent failures during the scan.
Tip: Check that the antenna is aimed toward the nearest broadcast towers for best signal. - 2
Open the channel setup menu
Use the remote to access the main menu, then navigate to the Channel, Tuning, or Setup section. The path varies by brand but typically appears under Settings > Channels.
Tip: If the menu language is unclear, switch to English for consistency in region settings. - 3
Choose Auto Scan or Channel Scan
Select the Auto Scan (or Channel Scan) option. This initiates the device’s search for available frequencies and adds detected channels to the list.
Tip: Some devices offer 'Full Scan' vs 'Add-on Scan'—choose Full Scan for new-area coverage. - 4
Set region and tuner type
Choose your country/region and ensure the tuner mode matches the broadcast standard (ATSC, DVB-T2, etc.). This alignment reduces false positives and missing channels.
Tip: Incorrect region can cause only a subset of channels to appear. - 5
Run the scan and save
Start the scan and wait for the progress to finish. Save or confirm the new channel list once scanning completes.
Tip: If prompted to keep existing channels, decide whether to merge or replace the list.
Common Questions
What is the difference between analog and digital channel scanning?
Digital scanning is required for modern broadcasts and will detect HD channels; analog scans may apply only to older systems. Most TVs now perform digital scans by default.
Digital scans detect modern broadcasts and HD channels; analog is rarely used today.
Do I need an antenna to scan channels?
Over-the-air channels require a working antenna; if you’re using cable or streaming, a channel scan may be unnecessary or limited to the provided lineup.
If you’re using over-the-air, you need an antenna; for cable or streaming, you may not.
How often should I rescan channels?
If you notice missing stations after storms, during rebranding, or after equipment changes, run a fresh scan. Periodic checks help keep the lineup accurate.
If signals change or you upgrade gear, rescan; otherwise, do it when you notice issues.
Can I export or backup my channel list?
Some devices allow exporting or backing up channels to USB or cloud accounts. Check your device manual for options.
Some TVs let you back up channels to USB; check your manual.
Watch Video
Key Takeaways
- Scan regularly to keep channel lists current
- Use Auto Scan for OTA channels
- Verify region settings to avoid missing stations
- Re-scan after hardware or firmware changes
- Save and organize channels for quick access