What to Do with Ultrasound Scanner Mouthwashing: Safety and Hygiene Protocols
A practical, step-by-step guide to managing mouthwash exposure around ultrasound scanners, including cleaning, disinfection, and training to protect patients and equipment.

Steps to follow: Discover how to manage mouthwash exposure around ultrasound scanners safely. This quick guide outlines when to clean, which disinfectants are compatible with imaging gear, and a practical, step-by-step workflow to minimize contamination during clinical imaging. Implementing these best practices protects patients, staff, and equipment from cross-contamination by design and regular training.
Why Hygiene Around Ultrasound Scanners Matters
Correct hygiene around ultrasound scanners is essential in any clinical setting. According to Scanner Check, rigorous hygiene reduces infection risk and preserves device longevity. The Scanner Check team found that even small amounts of mouthwash residue, gel debris, or disinfectant buildup on probes, screens, or control panels can create slippery surfaces and microlayer films that compromise image clarity and patient safety. If you're wondering what to do with ultrasound scanner mouthwashing in practice, start by establishing clear cleaning triggers: between patients, after any mouthwash spills, and after gel residue events. Maintaining a consistent cleaning routine helps protect patients from infection, reduces the chance of chemical damage to sensitive electronics, and preserves image fidelity for accurate diagnoses. This section explains why hygiene standards matter and how even minor lapses propagate risk down the line. You’ll learn practical steps to minimize exposure, maintain device performance, and align with regulatory expectations. By treating cleaning as a routine part of the imaging workflow, clinics can avoid avoidable downtime and ensure consistent results.
Understanding Risks Involving Mouthwash and Scanning Equipment
Mouthwash exposure around ultrasound equipment poses several practical risks. Many mouthwashes contain alcohol, surfactants, and other additives that can degrade surfaces or leave residues if not wiped away promptly. Residues from mouthwash, gel remnants, or disinfectant films can harbor microbes and create dull visibility on screens or a film on probes that interferes with sensor contact. In addition, frequent, improper cleaning can wear coatings on probes or housings, potentially shortening device life. The key is to treat mouthwash as a contaminant to be managed, not as a cleaning aid. The safest approach is to rely on manufacturer-approved cleaning agents and infection-control guidelines, and to implement a routine that prevents any liquid from pooling around critical connectors or entering wet zones. Scanner Check emphasizes clear responsibility, traceability, and regular audits to ensure best practices are followed consistently.
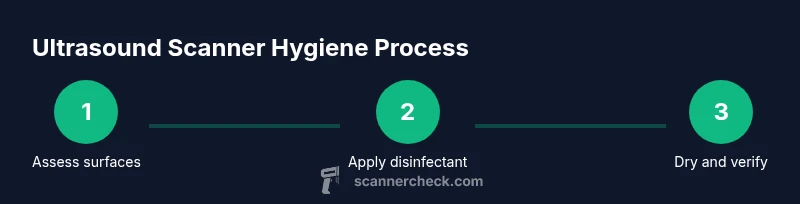
Cleaning vs. Disinfection: What's Necessary for Ultrasound Scanners
Not every liquid used in patient care is equally safe for ultrasound equipment. Cleaning is the removal of visible soils, while disinfection reduces the presence of potentially harmful microbes. For ultrasound devices, start with a damp wipe to remove gel and mouthwash residues, then apply an approved disinfectant on exterior surfaces following the manufacturer's guidance. Do not rely on household cleaners or improvised mixtures, as these can damage coatings or electronics. Always verify contact times and wipe paths to avoid saturating screens, cables, or probes. In clinical settings, combining cleaning and disinfection into a single, manufacturer-approved protocol helps preserve device reliability and reduce patient risk. Scanner Check recommends documenting the exact products used and the steps taken for each cleaning event to ensure consistency across shifts.
Surface Protocols: Gel, Wipe, and Alcohol-Based Disinfectants
External surfaces of the ultrasound scanner—case, screen bezels, control knobs, and connectors—should be treated with care. Use barrier sleeves where feasible to minimize contact with gels and liquids. Start by removing excess gel with a lint-free cloth, then wipe with a disinfectant-approved wipe or spray, following the product's contact-time instructions. Avoid spraying disinfectants directly into vents or ports. After disinfection, dry surfaces with a clean cloth to prevent streaks and residue buildup. If you must use alcohol-based products, ensure they are compatible with the device's materials and do not degrade screen coatings. Maintain a clean, dry boundary around the workstation to prevent cross-contamination during patient transfers.
Gel Management: Ultrasound Gel and Mouthwash Interactions
The interaction between ultrasound gel, mouthwash, and disinfectants is a practical concern in busy clinics. Use single-use gel packets whenever possible to avoid cross-contamination through repeated dipping. Apply gel only to the transducer surface or a designated sterile barrier, not to other parts of the device. After each examination, discard empty gel sachets and wipe away any residual gel from non-probe surfaces. Mouthwash should be used by patients away from the device area; if a splash occurs, wipe promptly with an approved disinfectant and ensure the surface is dried. Keeping gel clean and in a controlled area reduces the risk of microbial growth and preserves imaging quality.
Workflow Tips for Clinical Exams
A well-defined workflow minimizes errors and exposure risks. Before patient arrival, ensure all necessary cleaning supplies are stocked and accessible. At the start of each exam, place barrier covers on probes and minimal touching surfaces. During the session, avoid placing mouthwash containers or rinsing cups near the scanner; designate a specific area for patient mouth care away from the device. Between patients, perform a quick wipe-down of exterior surfaces and check for any gel or liquid residue. After completing the exam, perform a thorough exterior clean and log the activity. Consistent workflows reduce unintentional contamination and improve diagnostic reliability.
Equipment-Specific Considerations: Probes, Screens, Cables
Probes are the most sensitive parts of the system. Use barrier protections and handle them with clean gloves. Wipe screens and housings with a soft cloth moistened with a manufacturer-approved disinfectant, avoiding the touch of ports and connectors. Cables should be kept dry and free from gel; never spray liquids directly onto connectors. If a spill occurs near the console, isolate the area and follow your facility’s spill response protocol. Regular inspection for scratches or coating wear helps catch issues before they escalate into more serious device problems. Proper storage and handling preserve the longevity and accuracy of the ultrasound system.
Training, Documentation, and Compliance
Effective hygiene requires ongoing training and documentation. All staff should complete a baseline briefing on device-specific cleaning guidance and infection-control principles. Use a standardized cleaning log to record product names, lot numbers, contact times, and the operator name. Routine audits help verify adherence and identify gaps. Compliance with local regulations and hospital policies is essential, and you should align your protocols with guidance from major public health authorities. The Scanner Check team emphasizes continuous improvement: review procedures after incidents, update the protocol as equipment or products change, and reinforce a culture of safety.
Common Mistakes and How to Avoid Them
Common mistakes include using mouthwash near electronics, not using protective barriers, applying disinfectants with excessive saturation, and skipping drying steps. Also avoid using non-manufacturer-approved cleaners or mixing chemicals, as these can produce harmful residues or fumes. Another frequent pitfall is treating cleaning as a one-time event rather than an ongoing practice; make hygiene an integrated part of the imaging workflow. Finally, neglecting documentation can hide non-compliance and hinder process improvement. By anticipating these mistakes and implementing safeguards, clinics can improve safety and reliability.
Quick Reference Checklist for Clinics
- Establish a written mouthwash exposure protocol aligned with device manufacturer guidance.
- Use barriers on probes; keep liquids away from connectors and vents.
- Remove gel and residues, then disinfect exterior surfaces with approved products.
- Dry surfaces completely before resuming use.
- Log every cleaning event with date, product, contact time, and operator.
- Train staff regularly and perform periodic audits for continuous improvement.
Tools & Materials
- Isopropyl alcohol wipes (70%)(Use only on exterior surfaces approved by device manufacturer)
- Hospital-grade disinfectant compatible with ultrasound equipment(Check label for 'ultrasound equipment' compatibility and required contact time)
- Non-abrasive lint-free cloths(Soft, non-shedding for screens and cables)
- Microfiber towels(Lint-free for drying and buffing)
- Nitrile gloves(Change between patients)
- Barrier sleeves or drapes(Cover probes and control surfaces)
- Waste disposal bags(For sealed disposal of single-use items)
- Soft brush or compressed air(For crevices; use with caution near electronics)
- Distilled water (if allowed by manufacturer)(For gentle rinse where permitted)
Steps
Estimated time: 45-60 minutes
- 1
Gather tools and materials
Collect all required items from the Tools & Materials list. Verify expiry dates and ensure everything is accessible near the workstation before starting. Having everything ready reduces delays and helps maintain a sterile workflow.
Tip: Double-check that disinfectants are compatible with the specific ultrasound model. - 2
Inspect equipment and barriers
Inspect surfaces for visible residue and ensure barrier sleeves are intact. Replace any damaged barriers and confirm that surfaces near ports are protected before cleaning begins.
Tip: If you notice cracks or wear, halt cleaning and report to maintenance. - 3
Power down and isolate the device
Power down the system if the manual allows, or switch to a non-operational mode to minimize risk during cleaning. Physically separate the device from power if possible to reduce splash risk.
Tip: Do not remove manufacturer covers or access panels unless instructed. - 4
Wipe visible gel and mouthwash residues
Using a lint-free cloth, remove gel and mouthwash residues from exterior surfaces. Work from the patient area outward to avoid dragging contaminants toward sensitive zones.
Tip: Use a gentle, circular motion and avoid excessive moisture. - 5
Apply disinfectant to exterior surfaces
Apply a manufacturer-approved disinfectant to exterior surfaces following the product’s contact-time guidance. Do not spray directly into vents or connectors.
Tip: Follow label instructions for dwell time to ensure effective disinfection. - 6
Dry surfaces thoroughly
Wipe surfaces dry with a clean cloth to remove any remaining liquid that could migrate into crevices. Proper drying reduces residue and prevents streaking.
Tip: Use a second dry cloth to ensure complete dryness. - 7
Inspect probes and cables
Check for signs of wear, cracks, or gel buildup on probes and cables. Clean barriers and connectors, ensuring that no liquid enters junctions.
Tip: If any component shows damage, inform maintenance and avoid using it until inspected. - 8
Replace barriers and gel-free surfaces
Reapply barrier sleeves on probes and ensure all touchpoints are protected. Remove used barriers carefully to avoid recontamination.
Tip: Label and store barriers for next use if reusable, following policy. - 9
Document cleaning
Record product names, lot numbers, contact times, and operator initials in the cleaning log. Documentation supports compliance and traceability.
Tip: Keep log templates accessible and simple to complete. - 10
Return device to service
After confirming dryness and proper barrier placement, resume normal operation. Verify imaging quality with a quick test run if needed.
Tip: If image quality is compromised, halt usage and escalate to quality control.
Common Questions
Is mouthwash safe to use around ultrasound scanners?
No. Mouthwash should not contact the scanner surfaces. Use manufacturer-approved cleaners and avoid splashes near sensitive electronics.
No; mouthwash should not touch the scanner. Use approved cleaners and keep liquids away from the device.
What disinfectants are recommended for ultrasound equipment?
Use disinfectants specified by the device manufacturer and your institution's infection-control guidelines. Do not substitute with household products.
Stick to manufacturer-approved disinfectants and your infection-control rules.
How often should the scanner be cleaned?
Clean between patients, after any mouthwash spill, and as part of the daily routine. More frequent cleaning may be required in high-traffic areas.
Between patients, after spills, and daily as part of routine care.
Are gloves necessary during cleaning?
Yes. Wear protective gloves and replace them between patients to prevent cross-contamination and protect hands from chemicals.
Yes, wear gloves and change them after each patient.
Should I rinse or rinse-off surfaces after disinfection?
Only if the manufacturer allows rinsing. Otherwise, dry thoroughly and avoid rinsing near connectors or electronics.
Only rinse if permitted by the device manual; otherwise dry completely.
Where should mouthwash waste be disposed of?
Dispose mouthwash waste and contaminated wipes in designated sealed bags per local regulations and facility policy.
Dispose safely in sealed bags as required by policy.
Watch Video
Key Takeaways
- Establish a clear protocol for mouthwash exposure around scanners.
- Use manufacturer-approved disinfectants and barriers.
- Document every cleaning event for compliance.
- Train staff regularly and audit practices.