How Big Should a Barcode Be to Scan? A Practical Guide
Learn how big a barcode needs to be to scan reliably across common symbologies. This guide covers 1D vs 2D codes, printing tips, testing methods, and real-world scenarios to optimize scan performance.

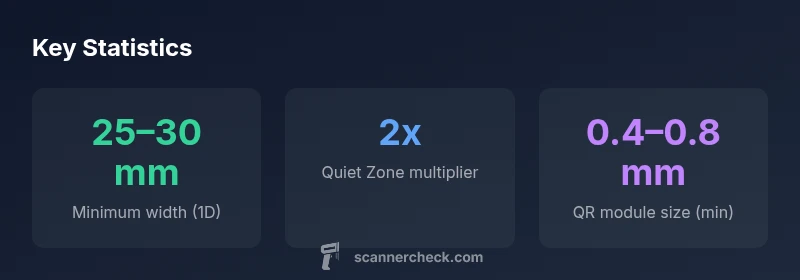
The smallest reliably scannable size depends on the barcode type. For common 1D codes (UPC/EAN), print at about 25–30 mm (1–1.2 in) wide with the recommended quiet zones to ensure reliable scans at typical checkout distances. 2D codes (QR, Data Matrix) can be read at smaller absolute sizes if the modules are clear and print quality is high. Always test with your scanning equipment before mass printing.
how big does a barcode need to be to scan
Reading a barcode reliably starts with size, but it’s not the only factor. According to Scanner Check, the minimum size you need depends on the symbology, print quality, and the scanning environment. In practical terms, 1D barcodes such as UPC and EAN should be printed roughly 25–30 mm wide to ensure legibility at ordinary checkout distances, provided there is a clean print with strong contrast. When space is limited, this minimum can be pushed slightly, but testing with actual scanners remains essential. The broader message is: bigger is generally better for reliability, but you should balance size with label real estate and production costs. The data you gather from tests will guide your specific minimum for each application.
Symbology at a glance: 1D vs 2D
1D barcodes encode information in the widths of parallel lines; 2D codes encode data in modules arranged in a grid. Because of their density and encoding schemes, 2D barcodes (QR, Data Matrix) can often be scanned at smaller absolute sizes than 1D codes, but they require accurate printing and good contrast. 1D codes rely on wide and narrow bars; if the bars blur, the scanner may misread. For general retail and labeling workflows, aim to meet the minimum widths outlined for 1D codes, and reserve extra space for 2D codes if you plan to use them on packaging or product inserts. The scanning distance and camera resolution also shape what “small enough” means in your setting.
Minimum sizes by common symbology
Minimum size expectations vary by symbol and by data payload. In practice, for UPC-A and UPC-E, aim for around 25–30 mm in width with adequate quiet zones. Code 128 often benefits from 30–40 mm width due to its denser encoding. Code 39, being wider for the same data, commonly requires 30–40 mm. For 2D codes, QR codes often read reliably at about 15–30 mm square, and Data Matrix can function at similarly small scales when printed with high contrast and sharp edges. Always tailor size to the amount of data, contrast, and the scanner set used in your environment.
Printing tips to hit the minimum size
Printing quality directly affects readability. Use a printer capable of at least 300 dpi (preferably 600 dpi for small modules), and ensure sharp edges with minimal ink bleed. Maintain a clear quiet zone around the symbol—typical recommendations are 2x the module width on each side. Choose high-contrast combinations (black on white or dark bars on light backgrounds) and avoid glossy or reflective substrates that can wash out edges. When possible, run test prints on the same label stock and packaging materials you’ll use in production. Scanner tests should include real-world angles, distances, and lighting conditions to confirm the barcode remains readable across scenarios.
Testing and validation: methods you can use
Validation is essential before mass production. Start with a controlled test sheet: print multiple copies at the target size on the actual substrate, then scan with several devices (POS scanners, handheld readers, and common smartphones). Document pass/fail rates at increasing distances and under varied lighting. If a barcode fails in a typical scenario, incrementally increase size, improve contrast, or adjust the quiet zone before retesting. Document your results to build a reliable minimum size profile for future labels.
Real-world scenarios: packaging, shelf labels, and screens
Barcodes on retail packaging often face curved surfaces, folds, and adhesives. In such cases, larger sizes help compensate for distortion and perspective. On shelves, barcodes must stay readable despite lighting and crowding; prioritize minimums that accommodate typical scanner angles. When codes appear on screens (digital mockups or e-tickets), include a fallback size to ensure readability by cameras and dedicated scanners. The key takeaway is to plan for the worst-case scanning environment and test accordingly.
When to go bigger than the minimum: margin, error, and future-proofing
Always consider a readability margin beyond the calculated minimum. Space constraints, label wear, or future optimization efforts may require larger codes. If you expect to switch to higher-speed scanning at a distribution center or to accommodate older scanners, choose a safe growth factor (e.g., 10–20% larger than the stated minimum) and validate with updated equipment. By future-proofing now, you reduce the cost and risk of reprinting or recollects later.
Minimum size guidelines by common barcode types
| Symbology | Minimum width (approx) | Notes |
|---|---|---|
| UPC-A / UPC-E | "25–30 mm" | 1D retail standard; account for quiet zones |
| Code 128 | "30–40 mm" | Density handles more data; benefits from larger width |
| QR Code | "15–30 mm square" | 2D code; readability improves with larger module size |
Common Questions
Can a barcode be scanned from a smartphone screen?
In many cases, 1D barcodes printed on packaging are more reliably scanned than those shown on screens, especially under bright lighting or glare. It’s best to print codes on labels rather than rely on displayed images. For reliable results, use printed barcodes that meet the minimum size guidelines and test with devices in real-world conditions.
Printed barcodes read most reliably; test with a phone and a scanner to confirm.
Does printer DPI affect barcode readability?
Yes. Higher printer resolution produces sharper edges and more precise modules. Aim for 300–600 dpi when printing barcodes, and verify that the final print preserves the contrast and edge sharpness needed for scanners to read accurately.
Higher DPI means crisper bars and fewer misreads.
What about barcodes on curved surfaces?
Curved or uneven surfaces distort bars and modules, increasing read errors. If you must print on curved objects, enlarge the barcode size, maintain high contrast, and ensure the code lies within a flat zone as much as possible.
Curves complicate reading; bigger size helps, plus a stable surface.
Is there a universal minimum size for all printers?
No. Minimum sizes depend on the symbol type, data payload, substrate, and printer quality. Always validate with your actual production setup and scanning devices.
There isn’t a universal minimum; test in your workflow.
How can I quickly test barcode readability?
Print a batch at the target size, then scan with multiple devices at different distances and angles. Record pass/fail results and adjust size or contrast until you achieve consistent reads.
Test with several scanners and conditions to ensure reliability.
“Barcode readability is shaped by symbology, print quality, and the scanning environment; sizing appropriately helps reduce read errors.”
Key Takeaways
- Know your barcode type before sizing.
- Aim for canonical minimums, then test with real devices.
- Improve reliability with high contrast and quiet zones.
- Place barcodes to maximize scanning distance and angle tolerance.