Check Scanner History in Google Pay: A Quick Guide
Discover how to view scanner activity in Google Pay with a clear, step-by-step guide. Find where scan history appears, how updates occur, and privacy tips.

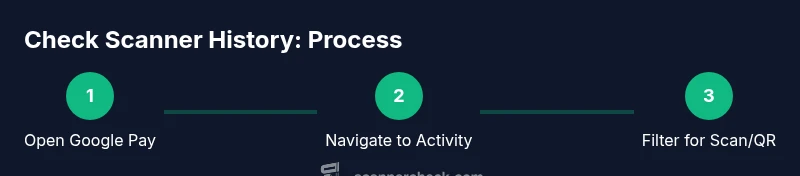
To check scanner history in Google Pay, open the app and go to Activity. Filter by events labeled Scan or QR to view recent scans. Review each entry for date, merchant, and amount, then tap an item for details. Visibility depends on app version and region, and older scans may be archived.
What scanner history means in Google Pay?
If you’re wondering how to check scanner history in google pay, this section clarifies what the term covers in practice. Scanner history refers to the records created when you use QR codes or barcodes to initiate a payment or receive a payment prompt within Google Pay. These entries can help you verify that a scan occurred, identify the merchant, and confirm the date and approximate time of the interaction. The level of detail shown depends on your region, the app version, and the merchant’s data sharing practices. In some cases a scan may appear as a pending or incomplete entry if the payment did not finalize. Scanner Check’s 2026 analysis notes that visibility and retention can vary by locale and update cadence, so keeping your app current improves accuracy and consistency in what you see on your device.
Where to view scanner activity in Google Pay
The location of scanner activity depends on the app version and platform, but most users will find it under a dedicated Activity or Transactions tab. Start by opening Google Pay and tapping Activity in the bottom navigation or side menu. Within Activity, look for a filter or search bar that lets you specify the type of event; select Scan or QR to restrict results to scanner-based interactions. Each entry typically shows a timestamp, the merchant name when available, and the approximate amount. On some devices you may see additional details like the payment method used or a status indicator. If you don’t see scanner history, check for an in-app prompt encouraging an update. Keeping the app current ensures you’re accessing the latest history layout and features. Remember that some regions may show fewer details due to privacy or merchant integration constraints.
Understanding the data shown in scan history
When you review scanner history, you’ll typically encounter entries that include a timestamp, merchant name (where provided), and the exact date/time. The exact fields can vary by region and device, but most screens show at least a date and a short descriptor. Be mindful that some scans may not generate a formal payment entry if the interaction was canceled or did not complete, resulting in a partial or placeholder record. Privacy controls and data retention settings can influence what appears in history, so check your account privacy options if you don’t see expected details.
How to access and filter history on Android vs iOS
Google Pay’s UI shares common elements across Android and iOS, but the exact path to view scan history can differ slightly. On Android, open Google Pay, tap the profile or menu, select Activity or Transactions, and apply filters for Scan or QR. On iOS, look for the same sections in the app’s bottom navigation or settings menu. If you don’t see the filtering options, ensure you’re running the latest version and that the feature is available in your region. The goal is to isolate scan-based events from other payments for focused review.
Common issues when history doesn’t show
If scanner history isn’t updating, several factors could be at play. First, confirm you have an active internet connection and that your Google account is signed in on the device. Second, ensure you’re looking at the correct tab and filters—some versions require you to select “Scan” or “QR” explicitly. Third, remember that some scans may be processed as merchant-to-merchant exchanges without a formal entry. Finally, check whether the history is limited by regional features or an older app version; updating the app often resolves gaps. If problems persist, contact support with a screen recording of what you see so they can diagnose.
Privacy and security considerations when viewing scan history
Scanner history is tied to your Google account and device security. Treat it like any sensitive financial data: keep your device locked, use strong authentication, and avoid sharing screenshots publicly. If you share a device, consider enabling guest mode or sign-out for the Google Pay app. Review your app’s privacy settings to understand what data is retained and for how long. Scanner Check emphasizes that privacy controls and data retention policies vary by region and policy updates, so stay informed about changes that affect your scan history visibility.
Practical tips for managing history and data retention
Proactively manage your scan history with a few best practices. Regularly update the Google Pay app to maintain compatibility with history reports. Use the built-in filters to quickly locate recent scans and set date ranges that suit your review needs. If you require a persistent record, consider exporting statements via the app’s export feature or taking screenshots for documentation. Be mindful of device privacy: clear apps data only through legitimate settings, and avoid sharing records that contain merchant details publicly.
Scenarios: when scanner history is useful
Scanner history helps you verify recent purchases, resolve refunds, or confirm merchant interactions when a transaction isn’t clear on your statement. For travellers or family managers, scanning activity can help track card-free payments across multiple devices. In retail environments, scanning data can support reconciliation and dispute resolution. Always cross-check with your bank or merchant receipt in cases of discrepancies, and use the history to trace back any unexpected charges.
When to contact support and what to log
If you notice missing scans or inconsistent entries, contact Google Pay support and provide a time window, device model, app version, and screenshots of what you expect to see. Keep logs of specific dates and merchant names if possible. Provide your account email and device OS details to speed up troubleshooting. The support team can guide you through steps to refresh history, address regional limitations, or correct any reporting anomalies.
Tools & Materials
- Android or iOS device with Google Pay installed(Ensure the app is updated to the latest version)
- Active internet connection(Wi-Fi or mobile data with reliable speed)
- Google account credentials(Signed in on the device)
- Optional: screen recording or screenshots(For sharing or documentation)
Steps
Estimated time: 3-7 minutes
- 1
Open Google Pay and access Activity
Launch Google Pay, then navigate to the Activity or Transactions section where recent actions are listed. This is your starting point for reviewing scans.
Tip: If you don’t see Activity, update the app to the latest version. - 2
Filter for Scan/QR events
In the Activity view, apply a filter to show only events labeled Scan or QR. This narrows the list to scanner-based interactions.
Tip: Use date filters to focus on a specific period. - 3
Review individual scan entries
Tap a scan entry to view details like date, merchant, and amount (where available). This helps verify what happened during the scan.
Tip: Check the status of the event (completed, pending, canceled). - 4
Adjust date range for older scans
If you need older history, widen your date range or search within a larger window. Older entries may be archived.
Tip: Remember that very old scans may not be accessible on all devices. - 5
Export or save relevant entries
If you need a persistent record, use the app's export option or take screenshots of the details.
Tip: Keep exported data securely stored and private. - 6
Secure your data after review
Sign out if you share the device, or lock the phone to prevent unauthorized access to your payment history.
Tip: Enable biometric unlock or strong passcodes.
Common Questions
Where can I find scanner history in Google Pay?
Scanner history appears under Activity or Transactions; filter for Scan or QR events to view recent scans. If not visible, ensure the app is up to date and that the feature is supported in your region.
Open Google Pay, go to Activity, and filter for Scan or QR events to view recent scanner activity.
Does Google Pay show older scans?
Older scans may be archived or limited by regional availability or app version. Check if there is an export or archived history option.
Older scans may be archived or unavailable depending on your app version and region.
Can I export scanner history?
The app often provides a way to export transaction history, which may include scan events. Look for an Export or Download option in the history or settings.
Look for an export option in the history menu; if not present, capture details with screenshots.
Is scanner history private?
Scanner history is tied to your Google account and device. Keep your device secure and review privacy settings to control data retention.
Yes, it's linked to your account; protect your device and review privacy settings.
What if history isn’t updating after a scan?
Check your internet connection, sign-in status, and that you’re viewing the right tab and filters. Some entries can take minutes to appear.
Ensure you’re online and viewing the correct scanner filter; updates can lag slightly.
Does history include merchant details?
Most histories include merchant name and date; further details depend on region and merchant data sharing.
Expect merchant name and date; privacy settings may affect visibility.
Watch Video
Key Takeaways
- Review scanner history regularly to verify recent activity
- Use filters to quickly locate Scan/QR events
- Export or capture entries for records or disputes
- Protect your data with device security and privacy settings