How to Check Scanner Payment History in Google Pay (GPay)
Learn to view and interpret scanner-based payments in Google Pay (GPay): access activity, filter by date and merchant, interpret entries, and export receipts for records.

Quick answer: You can view scanner-related payments in Google Pay by opening the app, navigating to Activity, and selecting Payments or Scan receipts. You’ll learn to filter by date, merchant, and device, then interpret each entry. Prerequisites: Google Pay installed, account access, and a stable internet connection. This guide also covers common issues and how to export receipts for records.
What is a Scanner Payment in Google Pay?
A scanner payment refers to a payment initiated at a merchant by scanning a QR code or by using a POS scanner that reads a customer's QR code or device. In Google Pay (GPay), these transactions typically appear under the Activity or Transactions history as a 'Payment' entry with merchant details, date, and amount. The data captured includes the merchant name, the time of payment, the amount, the method (card, UPI, etc.), and the transaction status. According to Scanner Check, scanner-based payments are often consolidated under the 'Payments' category within Activity, making it possible to audit sales alongside other digital payments. Understanding this entry format helps merchants reconcile sales and helps users verify that expected charges posted correctly.
Why this matters
For individuals and small businesses, being able to review scanner payments avoids surprises, detects duplicate charges, and aids in expense tracking. Regular checks can also help identify any unauthorized transactions early. Scanner Pay entries can be particularly helpful when reconciling offline and online sales that use QR codes or mobile-scanner devices. Scanner Check’s analysis shows that a clear history reduces end-of-month closing stress and improves financial accuracy.
Prerequisites You Need
Before you start, ensure you have: (1) a Google Pay account properly set up on a supported Android or iOS device, (2) an active internet connection, and (3) access to the device used for the payments you want to review. If you are managing a merchant account, confirm you’re signed into the correct Google account tied to that merchant’s GPay activity. Having the merchant’s receipt or order number handy can speed up cross-checking if a transaction looks ambiguous. Finally, ensure your app version is up to date for the smoothest filtering experience.
How to Access Your Google Pay Activity
Open the Google Pay app on your mobile device. Tap the Activity tab at the bottom to view recent transactions. Use the filter options (funnel icon) to narrow results by type (Payment), status, or date range. If you don’t immediately see scanner payments, switch to a broader view such as 'All activity' or 'Payments' to include entries generated by QR scans or POS devices. On some devices, you may also find a dedicated 'Scanner payments' segment within the Activity view. Regularly refreshing and ensuring you’re logged into the correct account helps maintain an accurate history.
Filtering by Date, Merchant, and Device
To reduce noise and locate specific scanner payments, use filters: set a start and end date to bound your search window; filter by merchant name or location to target a particular store; and narrow by payment method if your app supports it (for example, QR-based payments vs. card-on-file). You can combine filters to pinpoint entries quickly. Note the time zone of your device, as discrepancies can occur if you travel between regions. When you filter, exportable receipts should reflect the same date range.
Interpreting Each Entry: Codes, Status, and Amounts
Each payment entry shows a timestamp, merchant, amount, and status (e.g., Completed, Pending, Failed). Scanner-based payments may include a scan code reference or transaction ID. Cross-check the merchant name and transaction time with your receipts or inventory records. If an entry shows a Pending status for an unusual length of time, investigate the payment flow and confirm whether the merchant’s system or the network caused the delay. Payment method icons (e.g., card, wallet) help distinguish how the payment was processed.
Troubleshooting Missing History or Incomplete Records
If scanner payments aren’t appearing, verify you are signed into the correct Google account and that your device has a stable connection. Check the app version and update if needed. Some entries may be hidden due to regional restrictions or partial data syncing; in such cases, retry after a short wait or re-login. If problems persist, consider clearing cache or reinstalling the app, then sign back in. For merchants, ensure scanner configurations are correctly linked to the GPay merchant profile.
Exporting Receipts and Keeping Records
Google Pay may offer a built-in option to share or save a receipt from within a transaction entry. If available, use the Share or Save as PDF/Print option to create a persistent record. If the app lacks a direct export, take screenshots of the transaction details or copy the essential information (date, merchant, amount, status). For reconciliation, save a consolidated list in a spreadsheet, including the transaction ID and notes. Retain receipts for tax or auditing purposes and periodically back up your device data.
Security, Privacy, and Keeping Your Data Safe
Treat Google Pay history as sensitive financial data. Use device security features such as screen lock, biometrics, and a strong passcode. Avoid sharing screenshots containing full card numbers or other private details. When exporting receipts, redact sensitive fields as needed and store files in encrypted folders if possible. Be mindful of phishing attempts that mimic transaction confirmations; verify any added entries directly in the app, not via emails with suspicious links.
Best Practices for Reconciliation and Auditing
Set a weekly cadence to review scanner-related payments alongside your bank or merchant statements. Create a simple checklist: verify dates, compare merchant names, ensure amounts match receipts, and note any discrepancies for investigation. Use filters to quickly isolate test payments or refunds. Annotate entries with notes such as order numbers or inventory SKUs to ease future audits. Scanner Check recommends building a reproducible workflow so multiple team members can verify data consistently.
Common Pitfalls to Avoid and How to Fix Them
Common mistakes include reviewing the wrong account, neglecting time zone differences, and skipping filters that cause noisy results. Avoid assuming that all scanner payments will appear immediately; syncing can take a few minutes or longer in some cases. If you notice duplicate entries, check for multiple devices or repeated scans at the same merchant. Always cross-check with physical receipts and the merchant portal when possible.
Tools & Materials
- Google Pay app (Android or iOS)(Installed and signed in to the correct account)
- Active Google account and internet connection(Ensure stable connectivity for syncing history)
- Access to merchant receipts or order numbers(Helpful for cross-checks and reconciliation)
- Screen capture capability(Use screenshots if export options aren’t available)
Steps
Estimated time: 10-20 minutes
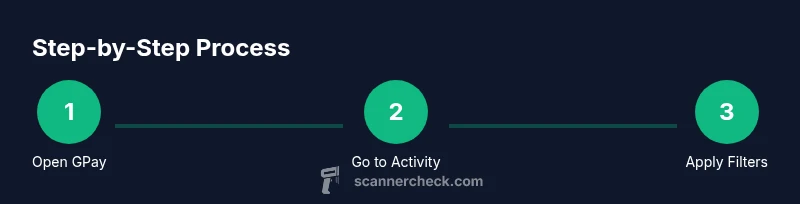
- 1
Open Google Pay app
Launch Google Pay from your home screen and ensure you are signed into the correct account associated with your scanner payments. This establishes the data source for your activity history.
Tip: Verify you are on the primary merchant or personal account used for scanner payments. - 2
Access the Activity tab
Tap the Activity tab at the bottom to view recent transactions. Switch to the 'All activity' view if needed to see every type of entry, including scanner payments.
Tip: If you don’t see Activity, try signing out and back in or updating the app. - 3
Use filters to locate scanner payments
Tap the Filter icon and select the Payment type, then set a date range. If available, choose QR or Scanner payments to narrow results.
Tip: Combine merchant name and date filters to quickly pinpoint entries. - 4
Open a transaction for details
Select a specific entry to view the merchant, time, amount, and status. This is essential for verification against receipts.
Tip: Note the transaction ID for future reference. - 5
Export or save receipts
If your app supports it, use 'Share receipt' or 'Save as PDF' to preserve a record. Otherwise, capture screenshots of the entry.
Tip: Store receipts in a secure location and back up periodically. - 6
Cross-check with other records
Compare Google Pay entries with merchant records or bank statements to confirm accuracy and identify discrepancies.
Tip: Log any mismatches with notes and dates for follow-up.
Common Questions
What qualifies as a scanner payment in Google Pay?
Scanner payments are those initiated by scanning a QR code or using a POS scanner. In Google Pay, these transactions appear in the Activity tab as Payments with merchant details and a timestamp.
Scanner payments are payments started by scanning a QR code or using a point-of-sale scanner. You can find them in Google Pay under Activity with the merchant name and time.
How do I filter Google Pay history by date?
Open the Activity tab, tap Filter, and set a date range to show only entries within that period. You can combine with merchant or type filters for precision.
Open Activity, tap Filter, and choose a date range to see only the entries you want.
Can I export Google Pay transaction history?
Some versions of Google Pay allow sharing or saving a receipt from within a transaction. If export isn’t available, use screenshots or copy essential details for your records.
You may be able to share a receipt from the entry; otherwise, take a screenshot to keep a record.
Why aren’t scanner transactions showing up in my history?
Check that you are signed into the correct account, have a stable internet connection, and that the app is up to date. Some entries may sync later or be region-restricted.
If you don’t see entries, confirm you’re using the right account and that the app is current.
Is my Google Pay history secure and private?
Yes, Google Pay history is stored on your device and linked account with encryption at rest. Use device locks and avoid sharing sensitive details in screenshots.
Your history is secured on your device; use a lock screen and be careful with shared screenshots.
Watch Video
Key Takeaways
- Review scanner payments in Google Pay Activity regularly.
- Use filters to quickly locate specific entries.
- Cross-check with receipts and merchant records for accuracy.
- Export receipts when possible or capture screenshots for records.
- Maintain data privacy and secure handling of transaction details.