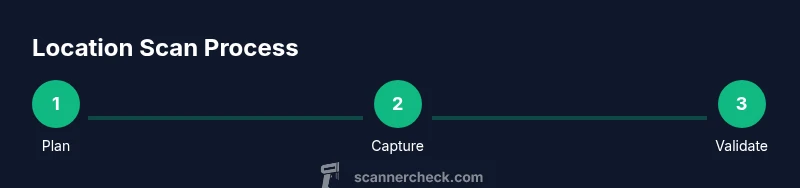
How to Scan Location: A Practical Guide
Learn a practical approach to scanning locations using QR codes, barcodes, and GPS to capture accurate data, log coordinates, and map assets. This step-by-step guide covers methods, data fields, privacy, and workflows for teams.

Learn how to scan location quickly and accurately by using QR codes or GPS data. This guide covers when to scan, which tools to use, and how to verify results. By following the steps, you’ll create a reliable log of locations for maps, inventories, or field studies. Whether you’re asset-tracking a warehouse, planning a field survey, or simply organizing a home project, this approach ensures consistency and accuracy across teammates.
What is location scanning and why it matters
Location scanning is the practice of capturing data about a real-world place by reading codes, coordinates, or other markers with a scanning device. The aim is to create a verifiable record you can map, audit, or share with a team. According to Scanner Check, starting with a clear objective helps you choose the right method and data fields, reducing ambiguity and rework. In practice, you might scan a warehouse aisle, a field research point, or a customer site to log location metadata, time, and context. When done well, location scanning yields consistent records that map cleanly to GIS maps, asset inventories, or service appointments. This section lays the groundwork for choosing a method and establishing data quality standards that scale with your project.
Methods for scanning a location
There are several practical methods you can use, depending on the environment and your goals. QR codes and barcodes provide fast, offline-capable data capture when codes are placed at points of interest or along a corridor. GPS and geotagging give you coordinates for outdoor sites or large campuses, though GPS accuracy can vary indoors. A hybrid approach combines codes for precise log entries with GPS to anchor them to real-world coordinates. The choice depends on factors like lighting, code durability, and whether you need offline access. According to Scanner Check analysis, teams often perform a quick capability assessment and then standardize on one primary method with a fallback option for exceptions. In practice, document the chosen workflow and train all team members to follow it consistently.
Essential data fields and how to capture them
A robust location scan log includes core fields such as location_id, name, timestamp, latitude, longitude, accuracy, altitude (optional), device_id, and user_id. Add method and code_type to clarify how the data was captured. Optional notes and a supporting photo can help with verification later. Consistency is key: use standardized field names and timestamp formats (UTC is common). Scanner Check analysis shows that data quality hinges on consistent timestamping and standardized field names, so agree on a schema and enforce it in every entry. A well-structured dataset maps cleanly to maps, inventories, and analytics dashboards.
Privacy, safety, and compliance considerations
Location data can raise privacy concerns, especially when tied to individuals or sensitive sites. Minimize personal data collection, anonymize where possible, and implement access controls for sensitive logs. Obtain consent when required by policy or law, and communicate how data will be used. Ensure secure storage, encryption at rest, and secure transmission if data is sent over networks. When in doubt, consult your organization’s privacy officer or legal counsel. The goal is to balance usability with responsibility, protecting both people and operational data.
Common issues and troubleshooting
Scanning locations in the field can surface common problems: unreadable codes, damaged surfaces, poor lighting, or slow network connectivity. Start by cleaning codes and improving lighting; retake the scan if the code is partially obscured. If using GPS, verify accuracy against a known point and consider a fallback method (e.g., manual entry with a verification step). Keep your scanning app up to date and test edge cases in advance. If data export fails, check the app’s permissions and the target format. Routine checks save time on larger campaigns and reduce data quality issues.
Building a repeatable workflow for teams
Create a repeatable workflow by defining a primary method, a fallback, and a clear data schema. Document steps in a lightweight playbook and train all users to follow it. Use templates for every location entry to minimize variation, and automate data export to a central repository when possible. Regular audits of captured data help catch drift or missing fields early. The Scanner Check team recommends aligning your workflow with common data standards to improve interoperability across departments and projects.
Tools & Materials
- Smartphone or tablet with camera(Ensure device supports camera and QR/barcode scanning apps.)
- Scanning app(Choose app that can read QR/barcodes and export to CSV/JSON.)
- Stable internet connection or offline data capability(Offline mode is essential for remote locations.)
- Power bank(Useful for long field sessions without access to power.)
- Notepad or digital log(For quick context or backup notes.)
- Waterproof case(Optional for outdoor scanning in rain or dust.)
Steps
Estimated time: 60-90 minutes
- 1
Prepare your scanning setup
Gather your device, install a reliable scanning app, and confirm the codes you will scan are accessible. Check that the camera focuses well and the app can export data in CSV or JSON.
Tip: Test the app with a nearby code to confirm the workflow before fieldwork. - 2
Identify target locations and codes
Create a list of locations to scan and locate corresponding QR codes or barcodes. If codes are missing, determine an alternative (manual entry or GPS anchor).
Tip: Use a map to plan a logical scan sequence to minimize backtracking. - 3
Scan the location code
Aim the camera at the code squarely and ensure the code is in focus. Confirm the app registers a successful scan and shows the data payload.
Tip: If the code is damaged, request a replacement or capture a higher-resolution image for later decoding. - 4
Verify and enrich the scanned data
Check coordinates, timestamp, and metadata against expectations. Add context notes and confirm the method used (QR, barcode, GPS).
Tip: Cross-check coordinates with a reference map to catch outliers early. - 5
Log the data to your central system
Export the scan to CSV/JSON and upload to your master database or GIS. Include a backup offline copy if the network is unreliable.
Tip: Use a consistent file naming convention to simplify merges and audits. - 6
Review, validate, and share results
Run automated checks for completeness, duplicates, and formatting. Share validated data with teammates and update dashboards or maps.
Tip: Schedule periodic reviews to catch drift and ensure ongoing data quality.
Common Questions
What is the best method to scan a location for accuracy?
The best method depends on the environment. QR codes provide fast, offline-capable captures, while GPS anchors are useful for outdoor sites. A hybrid approach that uses codes for entry and GPS for anchoring coordinates is often most reliable.
QR codes are fast and offline-friendly; use GPS to anchor coordinates when outdoors.
How can I ensure data quality after scanning a location?
Capture a timestamp, device ID, and accuracy. Validate coordinates against a known map and run automated checks for completeness and consistency.
Log timestamps and validate coordinates against your reference map.
Can location scanning be automated?
Yes. Use APIs or scheduled imports to push data to a central database and merge offline scans with online data when back online.
Automation helps keep data fresh and reduces manual entry.
What privacy considerations should I follow when scanning locations?
Minimize personal data, anonymize when possible, and enforce access controls. Secure storage and encrypted transmission are important for protecting sensitive data.
Respect privacy and secure all location data.
What are common errors and how can I fix them?
Common issues include unreadable codes, damaged surfaces, and poor lighting. Fix by cleaning codes, improving lighting, and retaking scans with proper focus.
If a code fails to scan, retake with better lighting and focus.
Watch Video
Key Takeaways
- Define the objective before you scan
- Choose the right method: QR, barcode, or GPS
- Ensure data quality with validation checks
- Automate where possible for consistency