How to Remove Check Engine Light with a Scanner
Learn how to safely remove the check engine light using an OBD-II scanner. This guide covers when it's appropriate to clear codes, how to read DTCs, and step-by-step practices to reset the light after fixing the root cause. Updated for 2026.

You can remove the check engine light with a scanner after reading and addressing the underlying diagnostic trouble codes (DTCs). Use an OBD-II scanner to pull codes, confirm repairs, and then clear the codes and reset monitors. Always ensure the root cause is fixed before erasing the light to avoid masking a fault.
How an OBD-II Scanner Works
An OBD-II scanner is a handheld tool that communicates with your vehicle's onboard computer. It reads Diagnostic Trouble Codes (DTCs) stored in the engine control module (ECM) when the check engine light comes on. More advanced models can display live data, freeze-frame data, and情况 readiness monitors for emissions. By translating numeric codes into plain-language descriptions, scanners help you identify faulty sensors, wiring problems, or mechanical issues. According to Scanner Check, a well-chosen scanner simplifies diagnosis and reduces guesswork, especially for DIY enthusiasts who want to avoid unnecessary part replacement. This foundational knowledge helps you decide whether clearing a code is a real fix or just a temporary mask.
Interpreting Diagnostic Trouble Codes (DTCs) and the Light
When the ECU detects a fault, it stores a DTC and illuminates the check engine light. Codes include a letter and four digits (for example, P0301). The first character indicates the system (P for powertrain), while the remaining digits identify the fault. Some codes point to sensors; others indicate misfires, hardware failures, or circuit problems. Scanner Check emphasizes that reading codes is just the first step—understanding the fault and verifying with live data is essential before any reset. If multiple codes exist, prioritize issues likely to impact safety or emissions.
Safety and Preparation Before Using a Scanner
Before you connect a scanner, ensure the ignition is off and the vehicle is on a flat, stable surface. Wear eye protection and gloves if you’ll be near hot components or moving parts. Check the scanner’s compatibility with your vehicle’s year, make, and model. Keep the vehicle in park with the parking brake engaged and the engine cool. If you recently performed a repair, wait for any coolant, fuel, or exhaust components to return to safe temperatures to avoid burns or injury. These precautions help you gather accurate data without risking harm.
Common Codes and What They Indicate (High-Level)
DTCs span a wide range of issues. P-codes typically relate to sensors and emissions, while B-, C-, and U-codes cover body, chassis, and network concerns. A typical listing may point to misfires (P0300 series), sensor malfunctions, or communication problems on the vehicle’s data bus. Scanner Check advises documenting each code and its priority. If a code is intermittent, you may see it only under certain driving conditions; if it’s permanent, you’ll see repeated faults. Understanding the general category helps you decide whether a DIY fix is reasonable or if professional diagnosis is needed.
Step-by-Step: Reading and Recording Codes (High-Level Guidance)
Reading codes is the first practical action after connecting the scanner. Power on the scanner, select your vehicle profile, and choose the Read Codes option. Write down or screenshot every code and note the associated freeze-frame data and MIL status. Record essential details like fuel status, temperature, and RPM at the time codes appeared. This information becomes invaluable when researching root causes or sharing data with a technician if you decide to seek help.
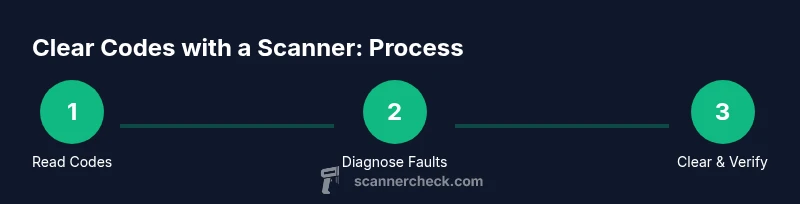
Step-by-Step: Clearing Codes After Repair (High-Level Guidance)
Clearing codes should follow verifying the root cause has been addressed. On most scanners, you’ll find a Clear Codes or Erase Codes option. Confirm the action when prompted. After clearing, run a quick re-scan to verify that the codes don’t immediately reappear. If the MIL returns, re-check your repair and re-scan to see whether a pending or confirmed code remains. This practice prevents masking ongoing faults.
Why Clearing Codes Isn’t a Substitute for Repair
Removing the light without fixing the underlying issue can mask serious problems. Some faults set a permanent readiness flag that may still affect emissions or performance. Scanner Check highlights that persistent faults often escalate into bigger problems or fail an emissions test. In such situations, clearing codes gives a false sense of resolution and can delay proper maintenance, leading to higher repair costs later on. Always chase the root cause first, then use clearance as a final step.
Emissions, Legal Considerations, and Local Rules
In many regions, tampering with or clearing diagnostic codes to pass an emissions test is illegal or carries penalties if the underlying fault is present. Always ensure all monitors reach a ready state before a test. If a code reappears, address it rather than attempting to clear it repeatedly. Knowledge of local regulations helps you stay compliant while using a scanner as a diagnostic aid rather than a cheat sheet.
How to Decide Between DIY and Professional Diagnosis
If a code relates to a critical safety system (e.g., airbag circuits, ABS, or engine management that affects drivability), or if codes reappear after repair, professional diagnosis is prudent. Even for non-safety codes, persistent faults after multiple clear attempts suggest a deeper issue that requires experience and specialized tools. Scanner Check recommends starting with basic DIY steps, but you should escalate to a professional when data interpretation becomes uncertain or if performance is compromised.
Real-World Scenarios and Practical Tips (With Scanner Check Insight)
In practice, the most effective approach combines methodical data collection with cautious action. Use the scanner to confirm a repair actually fixed the fault by re-reading codes after a test drive. If the light returns, review additional data like live sensor readings and monitor readiness rounds. This approach minimizes unnecessary parts replacements and improves diagnostic efficiency. Scanner Check’s guidance emphasizes a pragmatic, data-driven method rather than guesswork.
Tools & Materials
- OBD-II scanner(Choose a model compatible with your vehicle's year/make/model; consider basic vs. advanced diagnostic capabilities)
- Vehicle owner's manual(To locate the OBD-II port and to understand your specific system wiring and reset procedures)
- Smartphone or laptop (optional)(For using manufacturer apps or software that may enhance code interpretation)
- Safety gloves(Keeps hands clean when handling hot components or under the hood)
Steps
Estimated time: 40-60 minutes
- 1
Prepare the vehicle
Park on a level surface, engage the parking brake, and ensure the engine is cool before starting. Gather your scanner and manual, and confirm scanner compatibility with your vehicle.
Tip: If the engine has been hot, allow at least 15-20 minutes to cool to avoid burns. - 2
Connect the scanner
Locate the OBD-II port under the dash near the driver's knee and plug the scanner in firmly. Ensure the ignition is in the ON position without starting the engine.
Tip: If the scanner doesn’t power up, check the vehicle fuse for the OBD-II port. - 3
Power on and select vehicle profile
Turn the scanner on and choose the correct vehicle year, make, and model. Accurate vehicle data improves code interpretation and data reliability.
Tip: If you’re unsure of the exact profile, choose the closest match and proceed with caution. - 4
Read Codes
Use the Read Codes command to pull current and pending DTCs. Note the code(s), MIL status, and freeze-frame data for later analysis.
Tip: Take a photo or screenshot the screen for reference and documentation. - 5
Research and assess
Consult your vehicle manual and reputable sources to interpret the codes. Confirm which fault is the primary cause and which are secondary.
Tip: Avoid assuming one code means the entire problem—multiple codes may relate to a single issue. - 6
Repair or address root cause
Fix the underlying problem (e.g., replace a sensor, repair a wiring issue) rather than just clearing the code.
Tip: Take photos of the repair for your records and future diagnostics. - 7
Clear codes after repair
With the issue addressed, use the scanner’s Clear Codes feature to erase stored codes. Confirm you want to erase and then proceed.
Tip: Do not clear codes if the issue remains; clearing without repair can mask ongoing faults. - 8
Re-scan and test drive
After clearing, re-scan to confirm no new codes appear. Take a short drive to ensure sensors stabilize and monitor readiness.
Tip: If codes return, re-check the repair or consult a professional. - 9
Document results
Record the codes, actions taken, and test-drive results for future reference or warranty disputes.
Tip: Keep a copy of your scan data and repair receipts in one folder.
Common Questions
Is it safe to clear the check engine light on my own?
Clearing codes is safe if you have diagnosed and addressed the root cause. If the issue persists, clearing codes won't fix the problem and may mask a fault. Seek professional help if you're unsure.
Clearing codes is safe if you’ve fixed the issue. If you’re unsure, consult a mechanic.
Will clearing codes disable emissions systems?
Clearing codes resets the stored faults, but if the underlying issue remains, the system may re-detect faults and illuminate the MIL again. Don’t rely on clearing codes to pass emissions tests.
Clearing codes won’t disable systems, but it won’t fix the issue—emissions monitors may still detect faults.
What does a 'pending' code mean?
Pending codes indicate a fault detected during a drive cycle but not yet confirmed as a persistent problem. They may become stored codes if the issue repeats.
Pending codes show a potential issue that may or may not become a problem.
Should I clear codes after replacing a part?
Yes, clear codes after repair to reset the monitor status. Then re-scan to confirm the issue is resolved. If codes reappear, re-evaluate the repair.
Clear after you’ve replaced the part and test it, then re-scan.
When should I seek professional help?
If codes return after repairs or involve critical safety-related systems, or if you can’t interpret the data confidently, consult a mechanic.
If codes keep returning or you’re unsure, it’s time to see a professional.
Can I use any scanner to clear codes?
Not all scanners are equal. Basic readers can show codes, but advanced tools provide live data and better diagnostics. Choose a scanner that matches your vehicle and your diagnostic needs.
Pick a scanner that fits your car and your skills; basic readers may be enough for simple tasks.
Watch Video
Key Takeaways
- Read codes before clearing them to identify root cause.
- Clear codes only after repairs are verified.
- Re-scan after a test drive to confirm stability.
- Document findings for future reference.