How to Use a Car Scanner: A Practical Guide
Learn how to use a car scanner to read OBD-II codes, view live data, and perform safe DIY diagnostics. Step-by-step guidance for beginners and pros with practical tips, workflows, and safety best practices.

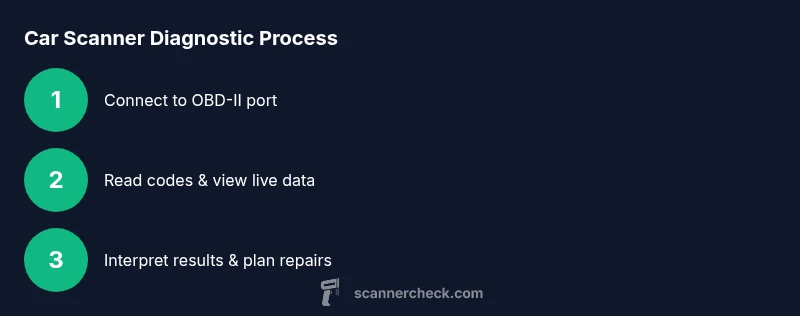
In this how-to, you’ll learn how to use a car scanner to read OBD-II codes, view live data, and run basic diagnostic checks. You’ll know which scanner to buy, how to connect it safely, and how to interpret results without expert help. This guide covers beginner to advanced tips.
What a car scanner does and why you should use one
A car scanner, also called an OBD-II scanner, plugs into the vehicle's OBD-II port and translates diagnostic trouble codes into plain language and live sensor data. According to Scanner Check, these devices empower drivers to identify issues early, verify repairs, and monitor emission readiness. For DIYers, a scanner reduces guesswork and protects against unnecessary part replacements. Many modern vehicles support real-time streams for sensors such as fuel trim, oxygen sensors, coolant temperature, RPM, and manifold pressure. Beyond fault codes, scanners can run readiness tests, show heater circuit status, and help you track trends over time. With the right tool, you can diagnose symptoms, compare current readings against manufacturer specs, and decide whether a repair is minor or requires a pro. This section outlines the core benefits and what you should expect from a typical entry-level device.
Choosing the right car scanner
Not all scanners are created equal. Start with compatibility: confirm the scanner supports your vehicle’s year and make, and whether it uses standard OBD-II or CAN protocol. Look for essential features: code reading and clearing, live data streams, freeze-frame data, and a robust database of generic and manufacturer-specific codes. Consider your preferred interface: a handheld unit, a Bluetooth/Wi‑Fi adapter, or a laptop-based solution. App ecosystem matters, too—reliable apps will offer definitions, troubleshooting tips, and the ability to export logs. Battery life, build quality, and firmware update policy are practical considerations. If you’re a beginner, a budget model with clear code definitions and a friendly UI is usually enough; more advanced users may want specialized scanners with bidirectional control, advanced bidirectional tests, and service procedures. In all cases, choose a scanner from a reputable brand with regular updates.
Wired vs wireless scanners and compatibility
Many scanners connect via Bluetooth or Wi‑Fi, which makes it easy to use from a phone or tablet, but wired USB connections can be more reliable in noisy environments. Bluetooth/wireless models rely on a stable pairing and battery life; ensure the scanner supports your device's OS version and the app is actively maintained. Check that the scanner uses standard OBD-II protocols (CAN, KWP2000, ISO 9141-2), which affect what your car’s ECU can transmit. Some vehicles require additional adapters for certain ports or higher-speed data. For professional settings, bidirectional scanners can perform tests that push commands to the ECU; for hobbyists, basic read/clear functions are often sufficient. In general, wireless setups offer convenience, while wired connections tend to be more stable during extended diagnostic sessions.
How to connect and set up
Power on the ignition to the accessory or run position so the OBD port has power, then connect the scanner. If you’re using a wireless model, pair the device to your phone or tablet and open the companion app. For wired scanners, plug the USB-C or micro-USB cable into the scanner and your computer or tablet. In the app, select the vehicle make, model, and year, then let the app establish a data link. Allow any prompts to access vehicle data and confirm you want to enable live data streaming. Once connected, perform a quick self-check to verify the scanner communicates with the ECU and can fetch the current readiness status.
Reading codes and live data
With the scanner connected, choose Read Codes to pull the Diagnostic Trouble Codes (DTCs). The scanner will display a list of codes (generic or manufacturer-specific) along with a brief definition. It’s important to note whether the codes are generic or manufacturer-specific, as the latter may require a dealer-level interpretation. Then switch to Live Data to monitor real-time engine parameters such as RPM, coolant temperature, fuel trim, MAF, and O2 sensor voltages. Compare observed values against typical ranges and the vehicle’s service information. Take screenshots or export logs for reference when you begin repairs or consult a professional.
Interpreting results and prioritizing repairs
Not every code requires immediate action. Start by noting the most severe codes or those that illuminate the check engine light. Look at freeze-frame data to see the exact conditions when the fault occurred (rpm, speed, temperature). Cross-check codes from multiple detected requests; if several related codes point to a single subsystem, focus there first. Use live data to confirm suspicions—for example, a faulty O2 sensor may show abnormal readings while the car is running. Create a prioritized repair plan: immediate attention for safety-critical issues, moderate issues affecting efficiency, and deferrable fixes for wear-and-tear items. Verify the fix by clearing the codes and running a test drive to ensure monitors reset.
Diagnostic workflows for common scenarios
Scenario A: check engine light with misfire codes. Start by scanning for misfire codes, then inspect ignition coils, spark plugs, and fuel delivery. Scenario B: emission-related issues. Check catalyst efficiency codes and oxygen sensor trends; verify the fuel system and air intake. Scenario C: transmission-related codes. Some scanners can read transmission data but more advanced tools are needed for full diagnostics. In all cases, capture the relevant data, note any patterns, and only proceed with repairs that align with your skill level and vehicle warranty terms.
Using apps and smartphone integration
Smartphone-connected scanners put diagnostic power in your pocket. Use apps to view and log DTCs, plot live data graphs, and export data for future reference. Take advantage of cloud-based knowledge bases and community forums where similar codes are discussed. Always ensure the app is from a reputable developer and keep your device up to date. For privacy and security, disable features you don’t need and review app permissions. If you own multiple vehicles, create profiles so the app can fetch the correct codes and adapt the definitions accordingly.
Safety, legality, and best practices
Always follow basic safety guidelines when working on a vehicle; never perform high-risk diagnostics while the car is in motion. Use the parking brake and wheel chocks as needed. Remember that a scanner is a diagnostic aid, not a definitive repair manual. Do not reset codes without repairing the underlying issue; monitor data to confirm the fault is resolved. Finally, respect vehicle warranties and disclosure terms; some manufacturers may have restrictions on certain scanning features and services.
Maintenance and care of the scanner
Keep your scanner firmware up to date to access new features and codes for newer vehicles. Store the device away from extreme heat, moisture, and direct sunlight. Clean connectors regularly and avoid yanking cables. If you use a Bluetooth scanner, periodically check battery health and replace batteries as needed. Back up saved logs to a computer or cloud storage to prevent data loss. Regular checks help ensure long-term reliability and accurate readings.
Advanced tips for DIYers
Learn common manufacturer-specific codes for vehicles you own, so you won’t rely solely on generic definitions. Use live data to verify suspected issues before replacing parts. Practice safe testing: disconnect the battery ground before wiring changes, and never exceed service procedures in the vehicle manual. Keep a repair log with dates, readings, and actions taken. For efficiency, use dashboards and testing sequences to avoid unnecessary repairs.
When to seek professional help
While a car scanner is a powerful first step, some problems require professional diagnostics: high-pressure fuel systems, transmission-specific codes, or wiring harness faults. If codes point to multiple subsystems or the vehicle has ongoing drivability issues, contact a certified technician. Share your scan logs and data with the shop to speed up troubleshooting and verify that your tests align with their findings. A scanner can guide you, but a pro should verify the repair in many cases.
Tools & Materials
- OBD-II scanner(Choose CAN-enabled and compatible with your vehicle year/model)
- Smartphone or tablet with compatible app(Android or iOS; verify app support for your scanner)
- Vehicle with OBD-II port(Typically located under the dash near the steering column)
- USB-C or micro-USB cable(Only if using a wired connection)
- Owner's manual for the scanner(Helpful for advanced features and updates)
- Notebook or digital log(Record codes, readings, and actions taken)
Steps
Estimated time: 25-40 minutes
- 1
Locate the OBD-II port
Find the 16-pin port under the dash on the driver's side. It’s typically near the steering column and labeled OBD. If in doubt, consult the owner’s manual or a repair guide for your specific model.
Tip: Have a flashlight ready and verify the port shape before plugging in. - 2
Connect the scanner to the port
Plug the scanner into the OBD-II socket firmly to ensure a good electrical and data connection. If using a wireless scanner, skip this step and proceed to pairing.
Tip: If resistance is felt, remove and reinsert to avoid bent pins. - 3
Power the vehicle and turn on the scanner
Turn the ignition to the accessory or ON position so power is supplied to the OBD port. Powering the vehicle is not required for some basic checks, but it is for complete data access.
Tip: Don’t start the engine during the initial connection to prevent data noise. - 4
Pair or connect the scanner app
If your scanner is wireless, pair it with your phone or tablet and open the companion app. For wired devices, ensure the USB connection is active.
Tip: Allow the app to access vehicle data and enable live data streaming. - 5
Select vehicle profile
In the app, input the vehicle’s make, model, and year, and choose the correct profile. The ECU varies by model, so accuracy here saves time later.
Tip: If you’re not sure, pick the closest year and update if a mismatch occurs. - 6
Read codes
Run a full code read to pull all current DTCs. The device will list codes with brief definitions. Note whether codes are generic or manufacturer-specific.
Tip: Screenshot or export the codes for your records. - 7
View live data
Switch to Live Data and observe key parameters while the engine runs or while the ignition is on. Look for readings outside normal ranges.
Tip: Capture a baseline snapshot before you begin repairs. - 8
Interpret results and plan repairs
Cross-check codes with live data and freeze-frame data to identify likely faults. Prioritize repairs by safety impact and repair difficulty.
Tip: Avoid replacing parts solely on a single code; use corroborating data. - 9
Clear codes and verify
After performing the repair, clear the codes and run the test drive to verify the fault doesn’t return. Monitor monitors until they reset.
Tip: If codes reappear, revisit the root cause instead of assuming a new fault.
Common Questions
What is an OBD-II car scanner and what does it do?
An OBD-II scanner reads diagnostic trouble codes from the vehicle’s onboard computer, displays live data, and helps diagnose engine and emission issues. It does not fix problems by itself.
An OBD-II scanner reads car codes and live data to help diagnose issues; it doesn’t fix them but guides you to solutions.
Do I need internet access to use a scanner?
Most basic scanning tasks do not require internet access; the device reads codes locally and uses built-in definitions. Internet access may help update code definitions or access online repair databases.
No internet is usually required for reading codes, but updates or extra data might need online access.
Can I clear codes after repairing the issue?
Yes, you can clear codes with the scanner after repair. If the fault remains, the code will reappear during subsequent scans.
You can clear codes after repairs, but if the problem isn’t fixed, the codes may reappear.
Will a cheap scanner work on all cars?
Budget scanners cover common formats and generic codes; some manufacturer-specific codes may require a more capable model. For newer or premium cars, upgrade may be necessary.
Budget scanners cover basics, but some cars require a more capable device.
Why are some codes manufacturer-specific?
Manufacturers use proprietary definitions for certain sensors and procedures. Generic scanners may read the code, but interpretation and repairs can differ by maker.
Some codes are manufacturer-specific, so definitions and fixes vary by brand.
Is it safe to drive after clearing codes?
If you cleared codes without repairing the underlying issue, the warning may return or the car may run poorly. Address the fault first and recheck.
Clearing codes without fixing the cause can hide problems; drive cautiously and recheck.
Watch Video
Key Takeaways
- Choose a compatible scanner first to match your vehicle.
- Read codes before attempting any clears to avoid masking issues.
- Use live data alongside codes for accurate diagnosis.
- Document findings and plan repairs before acting.
- Follow safety and warranty guidelines at all times.