Best Way to Scan Documents: A Practical Guide for 2026
Learn the best way to scan documents with a practical, step-by-step approach. From choosing a scanner to file formats and OCR, Scanner Check guides you to reliable, searchable digital copies with solid organization and privacy.

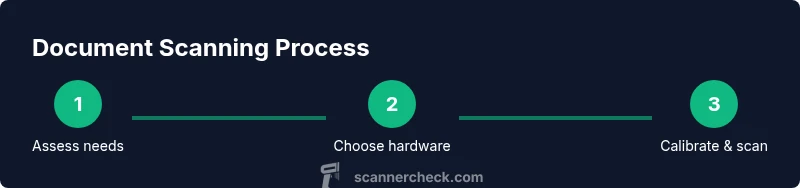
By following the best way to scan documents, you will convert physical pages into clean, searchable digital copies with reliable quality. This approach covers choosing a suitable scanner and software, preparing documents, selecting the right file formats, and applying OCR for text-searchability. You’ll achieve consistent results across batches and long-term accessibility, while preserving privacy and file integrity.
Why the best way to scan documents matters
A consistent, high-quality scanning workflow matters because it turns physical pages into reliable digital records that are easy to search, share, and store. According to Scanner Check, adopting a disciplined, repeatable scanning approach reduces errors during digitization, speeds up downstream tasks like indexing and retrieval, and improves long-term readability. When you scan with care—employing the right hardware, selecting sensible settings, and organizing files with a clear naming system—you’ll save hours over many projects and ensure documents remain accessible for years to come. A strong process also helps teams collaborate more efficiently: everyone benefits from uniform files, predictable folders, and OCR-ready text that can be searched in seconds. In this section, you’ll learn why investing time upfront in setup and standards pays off in day-to-day operations and archival projects alike.
Choosing the right scanner and software
The first choice in a best practice scanning workflow is hardware and software. Sheet-fed scanners excel for multi-page documents, while flatbed models handle delicate materials better. Look for reliable drivers (TWAIN/ICA), good dynamic range, and the ability to scan to a specific folder or cloud service. Software matters too: OCR-enabled apps let you turn scanned pages into searchable text, auto-correct skew, and automatically name files. Scanner Check analysis shows that for most office tasks, a mid-range model with solid duty cycle, tested reliability, and strong software integration delivers the best balance between cost and results. Avoid gimmicks like bells and whistles you won't use; focus on software features you actually need, such as batch scanning, straightening tools, and PDF export with text layers.
Preparation and setup
Before you begin, clear your workspace and ensure the scanner is on a stable surface. Remove staples or paper clips from documents to prevent jams, and clean the glass with a lint-free cloth. Prepare a test page to calibrate colors and alignment. If your model has an automatic document feeder, run a quick test with a few pages to check for misfeeds and curl. Organize documents into batches with similar sizes and thickness to keep the feed consistent. Finally, check that your computer has enough disk space and that your scanning software is configured to the preferred DPI, color mode, and output folder.
The scanning workflow: from physical to digital
Place the document face down on the glass or into the feeder, align edges, and select the batch in your scanning software. Start with a small sample to verify orientation, skew, and color. Run the scan, review the preview, and adjust settings as needed. If you’re scanning many pages, enable automatic duplexing and page detection to speed up the process. Save each page to the chosen folder, then reassemble batches if necessary. After scanning, run OCR if you need searchable text, and verify that metadata like date and author is captured correctly. Finally, back up the digital copies to your preferred storage location and enforce consistency in file naming.
Image quality and document handling tips
Quality starts with clean glass and steady hands. Use grayscale or black-and-white mode for text-only documents to reduce file size while maintaining legibility. For photographs or color documents, choose color or grayscale with higher DPI. Keep pages flat, avoid warps, and monitor lighting to prevent glare. If pages curl, consider using a light-weight weight clamp or a flatbed for the worst cases. Calibrate periodically and test with varied documents to ensure your chosen settings meet your needs. Always preview results before processing a full batch to catch misfeeds, skew, or color errors early.
File formats, compression, and naming conventions
Choose a primary format that balances accessibility and fidelity. PDF/A is a common archival choice for long-term preservation, while TIFF and high-quality JPEGs are suitable for image-heavy documents. Use consistent compression and avoid destructive changes that degrade readability. Create a predictable naming convention that includes date, document source, and a short descriptor (e.g., 2026-03-20_ClientReport_v1). Maintain a separate folder structure for originals and processed versions, and include a simple index or inventory file to track batches. If you work with sensitive information, consider encrypting PDFs or using secure storage and access controls.
Accessibility and OCR benefits
OCR converts scanned images into searchable text, dramatically improving findability across thousands of pages. Ensure your OCR language setting matches the document language, and consider training simple templates for common layouts (forms, invoices). After processing, run a quick quality check on text accuracy and correct obvious misreadings. Accessible documents benefit not only users with disabilities but also teams that rely on fast information retrieval, compliance audits, and automated workflows. Scanner Check notes that OCR accuracy improves when source documents are clean, properly oriented, and scanned at a consistent resolution.
Security and privacy considerations
Digitizing documents can introduce privacy risks if sensitive materials are saved in insecure locations. Always store scans on encrypted drives or secure cloud storage with access controls. Avoid leaving devices unattended with active sessions, and shred or securely delete originals when appropriate. Create a documented retention policy to determine when you can discard physical copies and what digital retention period to apply. When sharing documents, use secure channels and redact personally identifiable information where possible. Finally, review software updates for your scanner and OCR tools to guard against newly discovered vulnerabilities.
Tools & Materials
- Scanner (sheet-fed or flatbed)(Choose based on batch size and document types)
- Power adapter and USB cable(If not powered via USB, ensure the adapter is included)
- Computer or tablet with scanning software(TWAIN/ICA compatible; ensure enough storage)
- Cleaning supplies (lint-free cloth, glass cleaner)(Keep the glass clean for sharp images)
- Blank sheets for calibration and test pages(Use clean white pages for accurate color calibration)
- External storage or cloud storage account(For backups)
Steps
Estimated time: 40-60 minutes
- 1
Prepare your workspace and materials
Clear a large, flat area and lay out documents in batches by type. Gather the scanner, power, and the computer with your scanning software. Check that you have clean test pages for calibration and a reliable way to name files as you go.
Tip: Keep a dedicated batch tray to avoid mixing distinct document sets. - 2
Install and configure your scanner
Connect the device, install the latest drivers, and verify the software can access the scanner. Set a default output folder, enable TWAIN/ICA if available, and choose a baseline DPI for text documents.
Tip: Use a stable USB cable and avoid hubs that could cause intermittent drops. - 3
Calibrate the scanner and test a page
Run a color and alignment test on a blank page to ensure accurate tones and straight text. Make small adjustments to brightness or contrast if the preview looks off.
Tip: Keep notes of your calibration settings for future batches. - 4
Set up batch scanning and run a dry run
In batch mode, group pages with similar size and thickness. Do a short dry run with 5–10 pages to confirm feeds, skew, and orientation before processing the full batch.
Tip: Enable deskew if available to reduce manual corrections later. - 5
Scan the batch and review results
Proceed with the full batch. Use the preview pane to catch misfeeds, skew, or color issues and re-scan any problematic pages as needed.
Tip: Keep a running log of any pages needing re-scan for traceability. - 6
Save, compress, and organize files
Save to your chosen formats and apply consistent naming. Separate originals from processed copies and maintain a simple index for quick retrieval.
Tip: Adopt a naming convention that includes date, source, and version. - 7
Back up and secure your scans
Back up to an external drive or encrypted cloud storage. Apply access controls and consider encryption for sensitive documents.
Tip: Test a restore to verify your backups work as expected.
Common Questions
What is OCR and why does it matter when scanning documents?
OCR stands for optical character recognition. It converts scanned images into editable and searchable text, making large document collections easy to search and index. Proper setup and clean source material improve OCR accuracy.
OCR converts scanned pages into searchable text, helping you locate information quickly.
Which file format is best for archival documents?
PDF/A is widely used for long-term preservation because it embeds text and preserves layout. For image-focused documents, TIFF can be a good archival option, while PDFs are convenient for everyday use.
PDF/A is a solid choice for archiving.
How can I fix skewed or tilted pages after scanning?
Most scanning software offers deskew and alignment tools. Apply them in post-processing or re-scan with the document held straight and snug against the edges of the feeder or glass.
Deskew tools can fix tilt after scanning.
Is cloud storage secure enough for scanned documents?
Cloud storage can be secure when you enable encryption, strong access controls, and regular software updates. For highly sensitive material, local encrypted storage or on-premises backups may be safer.
Security in the cloud depends on your protections; local encryption is safest for sensitive data.
How do I handle large batches without slowing down?
Plan batches with identical settings, use auto-feeder if possible, and scan in manageable chunks. Keep a log of each batch to track quality and adjustments.
Plan batches and use auto-feeder to keep things moving smoothly.
Watch Video
Key Takeaways
- Follow a repeatable scanning workflow.
- Choose archival-friendly formats for long-term access.
- Enable OCR to improve searchability.
- Securely back up and manage access to scans.