Difference Between a Scan and a Photo: Practical Guide
Explore the difference between a scan and a photo, including quality, workflows, formats, and best-use scenarios to help you choose the right method for documents and images.

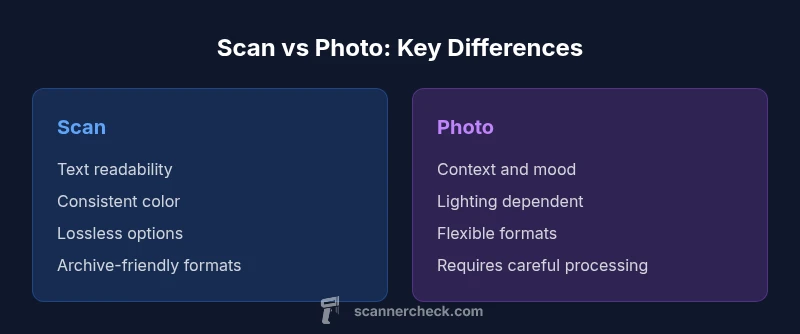
The difference between a scan and a photo lies in how light, optics, and processing shape the final image. Scans deliver consistent, legible text and predictable color suitable for archiving and OCR, while photos capture context, mood, and texture with flexible lighting and composition. Understanding this distinction helps you optimize workflows for documents and images.
Overview: the difference between a scan and a photo
In the context of digitizing documents and capturing scenes, two fundamental methods exist: scanning and photographing. The phrase "difference between a scan and a photo" is not just semantic; it highlights how each method controls light, optics, and processing to yield distinct results. For many professionals at Scanner Check, the choice between scanning or taking a photo hinges on the goal: legibility, archiving, or creative presentation. Scanning traditionally uses a flat surface and a light source to capture every line of text cleanly, with color guided by ICC profiles. Photography relies on a camera, lens, and ambient lighting to create an image that reflects mood, texture, and context, often with dynamic range and depth.
Throughout this article we will examine the practical implications of the difference between a scan and a photo, with concrete guidance for workflows, retention, and accessibility. By keeping the distinction front of mind, you can tailor your approach to each task and avoid common pitfalls like misinterpreted color, distorted text, or unnecessary post-processing.
Core technical differences: resolution, color, and compression
The core differences between a scan and a photo emerge from how light is captured and processed. A scan uses a structured light source and a sensor to record a flat, two‑dimensional image, which yields highly reproducible results ideal for documents and forms. A photo captures a scene through a camera lens, where focal length, perspective, and lighting influence sharpness and color in ways that are not always perfectly repeatable. When you ask what is better for legibility, a scan generally wins because text edges are crisper and color planes are uniform, while a photo can introduce subtle shadows, highlight clipping, or lens distortion. If you routinely digitize receipts, contracts, or product manuals, scanning is typically the safer choice for long‑term readability and searchable text.
In both cases, color management is essential. Scanners rely on calibration profiles and ICC workflows to standardize colors across devices, making archival color more predictable. Cameras depend on white balance, exposure, and post‑processing to achieve the intended mood or true color under different lighting conditions. The difference between a scan and a photo thus extends well beyond resolution: it touches color fidelity, tonal range, and the way the image will be processed downstream.
Optical vs sensor-based realities: what determines the result
The practical differences between a scan and a photo come down to optics and sensor behavior. A flatbed scanner uses a fixed, uniform light source and a linear sensor array designed to capture every pixel with consistent illumination. This setup minimizes perspective distortion and helps maintain edge sharpness. A camera, by contrast, depends on sensor size, lens quality, aperture, and focal length, all of which influence depth of field, perspective, and image sharpness. The result is a photo that can convey texture and context, but may require meticulous setup to minimize distortion when capturing documents.
Lighting plays a major role in both workflows. Scans are less sensitive to ambient light because the light path is internal and controlled within the device. Photos, however, depend heavily on how light falls on the subject; shadows and glare can obscure text or blur details. When the goal is pure legibility or archival fidelity, scanning’s predictability generally makes it the preferred method. When the goal is storytelling or product presentation, photography’s flexibility and atmosphere can be valuable, provided you manage light and color carefully.
Document scanning workflows and use cases
Document scanning workflows prioritize legibility, searchability, and long‑term preservation. Scanners produce high‑contrast images with crisp character edges, which are essential for OCR accuracy and indexing. For multi‑page documents, sheet‑fed scanners with automatic document feeders streamline throughput, while flatbed scanners handle fragile or bound materials more safely. The main use cases for scans include legal documents, contracts, invoices, and archival records where fidelity and consistency matter. For digitization projects, scanning often involves choosing the right color profile, setting the appropriate resolution, and selecting lossless formats such as TIFF or PDF with embedded OCR. Files created by scanning are typically easier to archive, preserve, and retrieve over decades, making scanning a strong default for document-centric tasks.
In practice, you’ll want to standardize on a workflow that emphasizes document integrity, consistent file naming, and metadata tagging to support future discovery and accessibility. Scanner Check’s guidance emphasizes the critical role of calibration, color management, and reliable storage strategies when building a digital repository of documents.
Photography workflows for documents and objects
Photography workflows emphasize speed, flexibility, and the ability to capture context and texture. A photo can document how a document looks in a real environment, show stapled pages, folds, or wear that affects readability, and capture associated artifacts such as stamps or margins. For object photography, lighting setup, background choice, and macro ability open up details that scans cannot easily replicate. When you need to illustrate a contract with annotations, or demonstrate how a form looks in practice, a photo can be the right choice, provided you control glare, shadows, and perspective distortion. In many workflows, photographers use RAW capture to retain maximum dynamic range, followed by careful post‑processing to render accurate color and clarity.
Despite the benefits, photos are more susceptible to post‑production variability. Lighting changes between shots can affect color balance, and lens distortions may introduce perspective shifts that complicate later OCR or text extraction. If your primary objective is reading text or ensuring consistent archival quality, photography should be paired with strict lighting and calibration protocols to minimize variation and maximize readability. Scanner Check’s experience shows that the right balance between scans and photos depends on your specific task and documentation requirements.
Color management and calibration across devices
Color management is a cornerstone of both scanning and photographing, yet the approach differs. Scanning workflows rely on controlled light sources inside the device and standardized color profiles to reproduce colors consistently. When you scan a document, you can embed ICC profiles and use color spaces tailored for archival quality. In contrast, photography relies on camera calibration, white balance, and monitor profiling to ensure colors look the same from capture to display. The difference between a scan and a photo becomes most apparent when comparing digital outputs across devices: a scan may look identical on a different scanner or viewer, while a photograph might shift subtly because of lighting or display characteristics.
A robust color management strategy includes calibrated displays, color‑accurate printing tests, and, where possible, standardized profiles for both scans and photos. For archival projects, aim to produce scans in lossless formats with embedded color profiles, and when photography is used, shoot in RAW with careful calibration and consistent post‑processing workflows. This disciplined approach helps preserve color integrity across time and devices.
Metadata, storage, and file formats
Metadata and file formats influence how searchable and durable a digital asset remains. Scans often use TIFF, PDF/A, or PDF with embedded text layers to support long‑term preservation, archiving, and OCR. The metadata embedded in these files—date, device, color profile, and keyword tags—facilitates retrieval and compliance. Photos, especially from consumer cameras, carry extensive EXIF data and may rely on JPEG or RAW formats. While JPEGs are convenient, they compress image data and may lose detail in compression. RAW files preserve maximum detail but require more storage and specialized software to render.
A practical rule is to align file formats with the archival goals. If long‑term retrieval and text search are priorities, prefer TIFF or PDF/A with embedded OCR. If speed and flexibility drive the project, high‑quality JPEGs or RAWs with a clear naming convention and metadata strategy can be appropriate. Scanner Check recommends documenting the chosen formats and metadata standards at the outset of any digitization effort.
Practical decision framework: when to choose scanning vs photographing
Making a disciplined decision involves asking a few targeted questions. Do you need legible text and reliable OCR? Does your workflow require long‑term archival or strict metadata? Is there a need to capture contextual details or mood beyond the text? If the answer to OCR and archival is yes, a scan is the most prudent choice. If you must capture a scene quickly, show texture, or preserve the ambient context around a document, photography is advantageous. A hybrid approach often serves best: scan primary documents for legibility and archiving, then supplement with photos for context, annotations, or proof of appearance. In all cases, establish a consistent workflow, monitor color accuracy, and maintain clear file naming and metadata practices. Scanner Check emphasizes starting with the task objective and then selecting the capture method that aligns with your goals and retention strategy.
Edge cases and hybrid approaches
There are many situations where a hybrid approach makes the most sense. Fragile or bound materials may require a careful photo to capture details that scanning cannot safely access. Oversized documents or items that don’t fit on a scanner bed may be photographed and then cropped or stitched in post‑processing to approximate a scan. If a document contains both structured text and complex visuals, a hybrid workflow—scanning the textual pages and photographing illustrative pages—can maximize readability while preserving context. Always consider accessibility requirements, as scans with OCR‑ready text are essential for searchable archives and assistive technologies. By recognizing edge cases early, you can design a flexible process that yields accurate, durable digital records.
Real-world examples and checklists
To illustrate, imagine digitizing a contract packet: scan the pages with OCR settings for a clean, indexable text layer, and photograph the cover page or signatures for verification of authenticity. Create a simple checklist: verify lighting, calibrate color profiles, enable OCR, store in a standardized archive format, and back up copies in a separate location. For an asset catalog that includes product brochures, take photos to capture textures and color accuracy, then attach metadata to support searchability. In a research lab, scan manuscripts for their legibility while photographing figures and diagrams to preserve detail and scale. Each scenario benefits from a well-documented, repeatable process that clearly defines when to scan and when to shoot.
Workflow integration: indexing, backups, and security
Effective workflow integration requires consistent indexing and safe storage. Scanned documents with OCR text should be indexed by keywords, dates, authors, and document types. Backups should follow a defined policy, with at least one off‑site or cloud copy in addition to local storage. Security considerations include access controls, encryption for transit and at rest, and versioning to protect against corruption or accidental deletion. Photos also benefit from organized metadata and backups, though their larger file sizes may affect storage costs. The key is to align capture methods with your information governance policies and ensure that both scans and photos can be discovered, retrieved, and restored efficiently.
Future trends: AI-assisted scanning and hybrid capture
Emerging trends in AI-assisted scanning promise to automate quality checks, auto‑detect pages, and enhance OCR accuracy with smarter document understanding. Hybrid capture workflows may leverage computer vision to identify which pages should be scanned and which should be photographed, depending on content quality and context. Cloud-based services enable centralized indexing, automated tagging, and seamless backups across devices. As technology evolves, the line between scan and photo may blur in helpful ways, offering hybrid solutions that maximize readability, fidelity, and speed. Scanner Check anticipates continued improvements in color fidelity, document structure recognition, and user-friendly automation that simplify choosing between scan and photo for diverse tasks.
Conclusion: navigating the difference between a scan and a photo
The difference between a scan and a photo is not merely technical jargon; it defines the result you get and how you will use it. Scans excel at legibility, consistency, and archival reliability, making them the preferred method for long‑term storage and OCR‑driven workflows. Photos offer speed, context, and expressive detail, making them valuable when mood, texture, or real‑world context matters. By understanding the core distinctions and applying a structured decision framework, you can optimize your document digitization strategy and choose the capture method that best fits your goal, environment, and audience. Scanner Check’s analysis reinforces that the best practice is often a thoughtful blend of both approaches, tailored to the task at hand.
Comparison
| Feature | Scan | Photo |
|---|---|---|
| Resolution quality | High optical resolution with controlled capture | Highly variable depending on camera and lens |
| Color management | ICC profiles and consistent color for documents | Lighting and white balance drive color; more variability |
| File formats | TIFF, PDF with embedded OCR for archives | JPEG or RAW; flexible post‑processing |
| Compression | Lossless options common (TIFF, PNG) | Lossy JPEG is typical; RAW is lossless but larger |
| Metadata & searchability | Rich metadata and OCR-ready for indexing | EXIF data; metadata relies on manual tagging |
| Best use case | Documents, forms, long‑term archiving; OCR‑ready | Creative captures, context gathering, quick documentation |
Pros
- Consistent legibility and reliable OCR output
- Strong archival formats with long-term stability
- Predictable color reproduction for documents
- Easy integration into searchable workflows
Drawbacks
- Requires equipment and a controlled setup
- Less flexible for scene photography or mood
- Larger file sizes when using lossless formats (scans)
Scanning is generally better for documents and archiving; photography is better for context and mood
Choose scan for legibility and long-term storage. Choose photo for quick captures or when color and texture matter. In many workflows, a hybrid approach yields the best balance.
Common Questions
What is the main difference between scanning and photographing a document?
Scanning produces consistent, legible text and predictable color suitable for archival work and OCR. Photography captures context, lighting, and texture, which can vary and require careful post-processing.
Scanning gives you consistent text for easy OCR, while photographs capture context and texture, though lighting and perspective can vary.
When should I use a scan versus a photo for documents?
Use scanning when the priority is readability, searchability, and long‑term storage. Use photography when you need to show context, color, or identification details not easily captured by a flat scan.
Choose scan for readability and archiving; choose photo for context and color details.
Can photos be used for OCR like scans?
Photos can be OCR‑enabled, but results depend on lighting, focus, and angle. Scans generally produce more reliable OCR results due to controlled capture and alignment.
Yes, photos can be OCR’d, but scans usually yield more reliable text recognition.
Which formats are better for archival storage?
For archives, prefer lossless formats like TIFF or PDF/A with embedded text. Photos are often stored as JPEG or RAW but may require more storage and management.
Archival storage favors TIFF or PDF/A with embedded text; photos use JPEG or RAW with metadata.
Can mixed media be scanned and photographed together?
Yes. Scan the text pages for readability and archive quality, then photograph illustrations, textures, or pages where color or mood matters.
Yes—scan the text pages and photograph illustrations when needed.
What should I consider for color accuracy across devices?
Calibrate monitors, use ICC profiles for scans, and maintain consistent lighting for photographs. Regularly test prints to verify fidelity.
Calibrate displays and profiles; test prints to ensure color accuracy.
Key Takeaways
- Prioritize scans for legibility and archiving
- Use photos when context and mood matter
- Leverage color management for accuracy
- Archive scans with standardized formats and metadata
- Consider a hybrid workflow to cover all needs