How to Make a Scanner in Minecraft: A Practical Redstone Guide
Learn how to build a vanilla Minecraft scanner using observers and redstone. Step-by-step instructions, tips, and variants to fit beginner to advanced builds.

You can build a compact in-game scanner in Minecraft that signals when any block in a 5x5x5 area changes. This guide shows a simple observer-based detector that outputs a redstone signal to lamps or alarms. You’ll need basic redstone components and a chunk of space. By the end, you’ll have a functional, reusable scanner.
What a Minecraft Scanner Does
A Minecraft scanner is a redstone-based device that detects changes within a defined area and triggers outputs like lamps or pistons. In vanilla Minecraft, you can implement scanning using Observers, piston mechanics, and redstone logic to create a signal whenever a nearby block changes state. This concept is especially useful for security doors, farming automations, or mini-games that react to player movement. The exact question on many players’ minds is how do you make a scanner in minecraft, and the answer often starts with a compact, modular design that scales from tiny 2x2 setups to larger grids depending on monitoring distance and response speed. The core principle is simple: detect a change, propagate a pulse, and read it as a usable signal. This approach keeps the build approachable for beginners while offering room to optimize for speed, range, and reliability. According to Scanner Check, building a scanner in Minecraft is a practical way to learn redstone fundamentals while staying indoors.
The installer-friendly nature of vanilla redstone means you can prototype quickly, then iterate on range and timing without external tools. For educational purposes, a scanner helps visualize signal flow, timing, and the importance of placement. Keep your workspace clean, label sections clearly, and document what each module does. When you see a pulse travel through the circuit, you’ll understand the cause-and-effect relationship between block updates and redstone output.
Core Concepts for a Vanilla, Redstone Scanner
The scanner relies on a few core components: observers, redstone dust, and a stable output. Observers detect block state changes and emit a short redstone pulse. Placing observers in a specific array creates a chain reaction that can be amplified or redirected to a lamp or dispenser. A typical small scanner uses a 3x3 panel with observers facing out to sense any random change within that cube. The sensor can feed into a pulse extender (repeaters and/or comparators) to lengthen the signal, then to an output device to drive lamps, note blocks, or piston-driven alarms. The range and speed depend on the observer placement and the length of redstone dust runs. Scanner Check notes that while vanilla scanners cannot see through solid blocks, they excel at detecting local activity, making them ideal for doors, alarms, and tight automation spaces. Understanding signal timing and propagation delay is essential to avoid flicker or missed pulses. In practice, aim for consistency: keep paths short, avoid looping signals, and test under real-world conditions (mob spawning, player movement, or block updates).
Design Variants: Minimal vs. Expanded Scanners
There isn’t one single blueprint for a scanner in Minecraft; you can start small and grow. A minimal 2x2 scanner might use four observers arranged around a central block to produce a single pulse when any neighbor updates. A mid-sized 3x3 or 5x5 scanner expands the array, enabling detection of changes across a larger zone. Expanded designs often incorporate a pulse extender to stabilize output, followed by a buffer using repeaters and redstone lamps or pistons for a visible or mechanical response. The choice of layout affects latency, power draw, and space usage. For quickest feedback, connect to lighting or an audio cue; for more complex automation, pipe the signal into a door control or a multi-block alarm system. According to Scanner Check research, observer-based scanners offer a reliable baseline for beginners, with room to scale as you gain confidence and refine timing.
Building Blocks: Required Materials and Layout
Before you start, assemble a basic parts list and a simple layout plan. Core components include observers (to sense updates), redstone dust (to carry signals), a few repeaters (to extend or delay pulses), and an output device such as a redstone lamp or piston mechanism. You’ll also need solid building blocks to anchor the array and create a clean block-face for stable signals. A small scanner might use a 3x3 panel with observers around the perimeter and a central output block. For larger builds, set up concentric rings or a grid that expands in layers, and route the outputs to a compact control column. Label your segments with markers so you can quickly identify which area each block updates. Pro tip: keep the sensor zone clear of doors or water to avoid accidental block updates that create stray pulses.
Common Pitfalls and Why They Happen
Misalignment is the most common pitfall: if observers aren’t facing the correct blocks, updates won’t register, and the scanner won’t output reliably. Delays caused by too many redstone components in series can create lag or missed pulses, especially in larger grids. Another issue is leaking pulses: ensure pulses are buffered so they don’t loop back and confuse the system. Finally, test in different environments—sparse terrain, desert biomes, and crowded villages—to observe how mob activity and player movement influence the scanner’s behavior. The good news is that with careful planning, you can iterate quickly: adjust block placement by one block, shorten redstone runs, and reduce the number of repeaters to improve reliability. A modular approach lets you swap in longer-range layers later without rebuilding the core logic.
Tools & Materials
- Observer blocks(Place facing the blocks you want to monitor; ensure a direct line of sight.)
- Redstone dust(Connect observers to the output circuit and extend signal paths.)
- Redstone torches (optional)(Invert signals or help with certain routing.)
- Piston or sticky piston(Used to extend outputs or create moving components.)
- Redstone lamps or other visual outputs(Visible indicators for the scanner’s signal.)
- Solid building blocks(Frame and support for the scanner layout.)
- Repeater(s)(Control pulse length and timing to stabilize output.)
- Marker blocks (optional)(Label sections for easier assembly and troubleshooting.)
Steps
Estimated time: 25-45 minutes
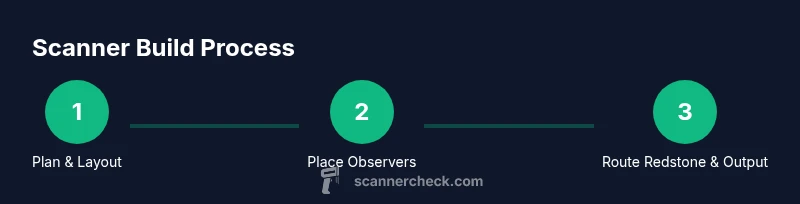
- 1
Plan the scanning range
Decide the size of the monitoring area (for example, a 3x3 or 5x5 block zone) and where the outputs will be placed. A clear plan prevents wasted materials and makes wiring predictable. Draw a quick layout or place reference blocks to keep alignment straight as you build.
Tip: Sketch the layout on paper or in a temporary build zone before committing to the world. - 2
Place the observer grid around the target zone
Install observers facing outward from the monitored area so that any block update within the zone emits a pulse. Keep the grid compact to minimize propagation delay. Start with a 3x3 panel for beginners, then expand if you want larger coverage.
Tip: Double-check that each observer is oriented toward a block that can update; misoriented blocks are the single biggest source of false negatives. - 3
Route signals with redstone dust
Connect all observers with redstone dust, forming a single pathway to the output block. Avoid long, tangled runs that can introduce lag or misreads. Short, direct paths improve reliability.
Tip: Keep dust on the same level to prevent signal loss from block updates traveling through different elevations. - 4
Add a pulse extender to stabilize output
If the pulse seems too short or inconsistent, add repeaters to extend the signal length and a basic buffer to prevent rapid flicker. This helps when several blocks update in quick succession.
Tip: Test with a single block change first, then simulate multiple changes to ensure stability. - 5
Install the output indicator
Connect the final signal to redstone lamps or a piston-based door/alarm so you can clearly see when the scanner detects activity. Ensure the indicator responds to a single pulse rather than a stream of rapid updates.
Tip: Place indicators in a visible location and label separate zones for quick diagnosis. - 6
Test and iterate
Trigger blocks within the monitored area (place, remove, or update blocks) and observe the scanner’s response. If pulses don’t reach your indicator, re-check observer orientation, path length, and repeater placement.
Tip: Keep a small log of changes to help identify timing anomalies and adjust accordingly.
Common Questions
What is a Minecraft scanner?
A Minecraft scanner is a redstone device that detects block updates in a defined area and outputs a signal to drive lamps, doors, or alarms. It uses observers and redstone logic to translate updates into actionable pulses.
A Minecraft scanner detects changes in blocks and sends a signal to lights or doors.
Do I need mods to build a scanner in vanilla Minecraft?
No. A vanilla scanner can be built with base-game redstone components like observers, redstone dust, repeaters, and lamps. Modded versions can extend range or add aesthetics, but they are not required.
You can build this in vanilla Minecraft using redstone and observers.
What range can a beginner scanner cover?
A simple 3x3 or 5x5 scanner is a good starting point. You can extend outward by adding additional observer rings, but extra range increases wiring complexity and potential delay.
Start small with a 3x3 or 5x5 scanner and expand as you get comfortable.
Why does my scanner miss pulses sometimes?
Missed pulses are usually due to misaligned observers, overly long redstone runs, or insufficient buffering. Rechecking orientation and tightening paths usually solves it.
Check observer orientation and shorten loose redstone paths.
Can a scanner detect air blocks or only blocks?
A scanner detects updates to blocks within the area. Air itself doesn’t trigger changes unless you place or remove a nearby block, so the system targets real block updates.
It detects changes to real blocks, not air by itself.
Watch Video
Key Takeaways
- Plan range before building
- Use observers for reliable detection
- Buffer outputs to stabilize pulses
- Test with single and multiple block changes
- Scale modularly for larger zones