How to Build a Google Form Scanner: A Practical Guide
Learn how to make a scanner for Google Forms, from data mapping and OCR to Apps Script automation. A practical, step-by-step guide by Scanner Check to digitize paper forms.

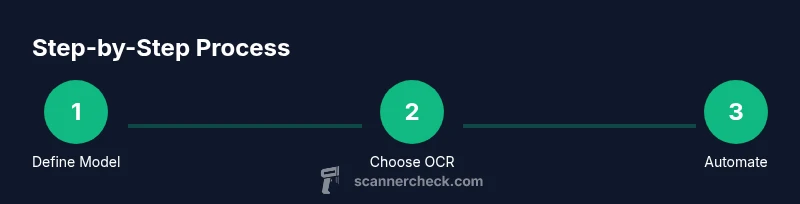
You can build a scanner that converts paper forms into Google Forms data by following a clear, step-by-step process. Start with a goal and data mapping, choose OCR tooling, and automate data entry with Apps Script or a cloud integration. This approach reduces manual entry and speeds form digitization for teams and individuals.
How to make scanner of google form: Core concept and approach
The idea behind a Google Form scanner is to bridge the gap between physical forms and digital data entry. By clearly defining what data matters, choosing reliable OCR, and then wiring automated data transfer into Google Forms, you create a repeatable workflow rather than a one-off hack. According to Scanner Check, the most important early step is to map each field on the paper form to a corresponding Google Form question and establish a consistent data model. This ensures OCR outputs land in predictable places and reduces post-processing. In practice, you’ll start with a hypothetical form, chart each field (name, date, email, yes/no toggles), and design a small schema that will drive your automation. With a solid map, you can pick OCR options that fit your symbols, handwriting legibility, and ink colors, then choose a scripting route that moves results into Google Sheets and on to the Form. The goal is to minimize manual re-entry and maintain data consistency as you scale.
As you plan, consider the types of paper you’ll scan (single-page forms vs multi-page) and whether you’ll batch-process or scan individually. A well-defined scope reduces complexity and makes testing easier. The Scanner Check team emphasizes starting with a minimal viable pipeline—one form type, a single field set, and a basic transfer rule—then expanding after validation. This staged approach also helps you gauge OCR accuracy and refine field mappings before adding more form variants.
Step 1: Define the data model and mapping
Before you touch OCR tools or scripts, create a data model that mirrors how you want data to look in Google Forms and Sheets. Start with a master sheet that lists each field from the paper form alongside a target Form question, a field type (text, number, date, boolean), and any validation rules (required fields, email format, date range). Use a simple mapping table so the OCR engine knows which recognized strings correspond to which form fields. This is where you design the bridge between physical data and digital structure. In this stage you’ll also decide how you’ll handle inconsistent spellings or duplicated responses, and you’ll define a fallback when OCR confidence is low. Document the mapping rules and keep a changelog as you iterate.
A clean mapping ensures your later automation steps stay robust. It also makes it easier to train staff or users on the process, because there’s a single source of truth for how each paper field becomes a form field. For teams, a shared mapping document is invaluable for onboarding and audits. The goal here is clarity and repeatability—not clever hacks.
Step 2: Choose OCR strategy and input workflow
OCR quality drives the entire scanner workflow, so selecting the right OCR approach is critical. You have three broad options: offline engines (like Tesseract), cloud-based OCR services (such as Google Cloud Vision or AWS Textract), and hybrid approaches that run OCR locally but post-process results in the cloud. Your choice depends on handwriting legibility, form complexity, privacy considerations, and the volume of forms you expect. If you scan lightly written forms with clear printed fields, a good OCR service with pre-built form-field detection can deliver solid results. For handwriting or unusual layouts, you’ll want an OCR with layout analysis and field-level confidence scoring. Make a short list of test forms and run side-by-side comparisons to measure accuracy in key fields.
Decide how you’ll handle OCR output: which fields land in Sheets, how you’ll attach confidence scores, and what to do when confidence falls below a threshold. You’ll also map OCR outputs to your data model, so consider writing a small post-processing layer that cleans up common misreads (e.g., misread characters, swapped digits) before pushing data forward. From a privacy perspective, evaluate where scanned images are stored, how long they’re retained, and who can access the data.
Step 3: Build the capture pipeline: paper → OCR → Google Forms
Now you assemble the workflow that moves from a scanned page to a digital Google Form. The pipeline typically consists of three stages: image capture, OCR processing, and data routing into the Google Form. Start by testing a simple scan-to-image step, ensuring you maintain consistent scan quality (dpi, lighting, and alignment). Next, pass the image through your OCR engine and extract structured fields according to your mapping. Finally, implement a data transfer step that fills the Google Form or its linked Sheet with the OCR results. If you prefer real-time entry, you can push data to a Sheet and trigger a form submission via Apps Script; for batch processing, you may render each form entry as a single submission after a batch OCR run.
Keep a log of each scan, OCR results, and any errors. This audit trail is essential for debugging and for improving your model. If you detect recurring misreads in specific fields, fine-tune the OCR settings or the field mapping to improve reliability. Maintain a fallback path for pages that OCR cannot confidently read, such as routing them to manual review instead of auto-submitting incomplete data.
Step 4: Create a Google Form and corresponding sheet structure
With your data model and capture pipeline defined, create a Google Form that mirrors your paper form fields. Establish corresponding Google Sheets with one tab per form submission and a clean header row that matches your form fields. Enable form responses to be collected in your sheet, then set up data validation rules to catch anomalies (e.g., invalid emails, out-of-range dates). The coupling between the Sheet and the Form is critical for automating re-entry: you can programmatically submit responses to the Form using Apps Script, or you can push data directly into the Form’s linked response sheet and trigger validations.
Design consistency matters: ensure question titles correspond to your paper field labels, and define clear input types (text, date, number, checkbox). Consider using sections in the Form if some paper fields are conditional or if you need to group related questions. This alignment reduces confusion during data review and makes downstream analytics easier.
Step 5: Automate data transfer with Apps Script
Apps Script is the most flexible way to connect Google Sheets, Forms, and external OCR results. Start by writing a small script that reads a row from the OCR output sheet and fills a pre-built Form using FormApp APIs or by submitting to the Form’s response endpoint. Implement error handling to catch invalid fields, and log successes and failures to a separate log sheet. Build in a retry mechanism for transient network issues and a simple notification (email or chat) when a batch finishes. If you’re comfortable with triggers, set up a time-driven trigger to process new OCR outputs at regular intervals.
A practical pattern is to separate concerns: one script handles data normalization (clean-up of OCR output), another handles form submission, and a third manages error reporting. This modular approach makes maintenance easier and allows you to swap in a different OCR service later without rewriting the entire pipeline. As you expand, you can add unit tests for the normalization logic and integration tests for the end-to-end flow.
Step 6: Validate data quality and error handling
Quality control is essential in any scanner workflow. Create a validation layer that checks each field against its expected type, length, and format. For example, ensure date fields follow your chosen format and that required fields are not empty. Use confidence scores from OCR to route low-confidence responses to a manual review queue rather than risking incorrect data in your Form. Maintain a clear log of errors and provide feedback to operators so that scan quality improves over time.
Designate a human review step for borderline cases and implement a name-normalization rule to catch common variants (e.g., “Jon” vs. “Jonathan”). For privacy and security, ensure that sensitive fields are masked or restricted in reporting. This phase is where you translate OCR imperfections into a robust, auditable process. Tracking metrics like error rate and review time helps you measure improvement as you iterate.
Step 7: Testing and iteration with real forms
Begin with a small pilot using a handful of representative paper forms. Collect feedback from actual users who scan and review results. Use the pilot to identify bottlenecks in scanning speed, OCR accuracy, and data mapping compatibility. Update your data model and scripts based on findings, then run additional rounds of testing with new form variants. This iterative cycle is critical for achieving reliability at scale. Document each test — what changed, why, and the observed impact — so lessons are preserved for future enhancements.
A practical tip is to run blinded tests where the reviewer doesn’t know the expected values and then compare results to the ground truth. This helps reveal subtle OCR failure modes you might miss otherwise. As you expand, keep your scope bounded and gradually introduce more form types to preserve maintainable growth.
Step 8: Security, privacy, and compliance considerations
Handling paper forms that may contain sensitive information requires cautious handling. Establish access controls on Google Drive, Forms, and Sheets, and implement data retention policies that match your organization’s privacy requirements. If you digitize personally identifiable information (PII), consider redacting or encrypting data at rest and in transit, and review compliance guidelines relevant to your region or sector. Train staff on secure handling practices and maintain an audit trail of who accessed the data and when. When sharing results with teammates, minimize exposure by using role-based access and secure sharing links.
This stage is often overlooked but is essential for trust and long-term viability. Regularly review permissions, monitor for unusual access patterns, and stay current with Google’s evolving security settings. The goal is to protect data without creating friction in the workflow.
Authoritative sources and further reading
- Google Forms documentation: https://developers.google.com/forms
- Google Apps Script documentation: https://developers.google.com/apps-script
- OCR and form processing overview: https://cloud.google.com/vision/docs/ocr
These sources provide deeper technical details on the tools you’ll use and best practices for building reliable, scalable form scanning pipelines.
Tools & Materials
- Flatbed or ADF scanner(Prefer 300-600 dpi for legibility; color helps recognition, grayscale can speed processing)
- OCR engine or service(Tesseract for offline needs; Google Cloud Vision or AWS Textract for cloud-based accuracy)
- Google Form(Create a form that mirrors the paper fields and supports programmatic submissions)
- Google Sheets linked to the Form(Used as intermediate data store and staging before Form submission)
- Automation platform (Apps Script or Zapier/Make)(Choosing Apps Script keeps things in the Google ecosystem; third-party tools offer broader integrations)
- Data mapping document(A living document mapping each paper field to a Form question)
- Quality control checklist(Optional, for ongoing audits and improvement)
Steps
Estimated time: 6-10 hours
- 1
Define data model and mapping
Create a master mapping that links paper fields to Form questions, including data types and validation rules. Establish where to store OCR outputs and how to route data into the Form. Document decisions for onboarding and audits.
Tip: Keep the mapping table simple at first; you can complicate it later as you add form variants. - 2
Choose OCR strategy
Select an OCR approach compatible with your form layouts and handwriting. Run a small benchmark with representative forms to compare accuracy and processing time. Decide how to handle low-confidence reads.
Tip: For handwriting-heavy forms, cloud-based OCR with layout analysis often outperforms offline engines. - 3
Build capture pipeline
Set up the end-to-end flow: scan image → OCR → map → insert into Sheets/Form. Keep logs for each step and handle errors gracefully.
Tip: Add a retry mechanism and a manual review branch for failed scans. - 4
Create Form and sheet structure
Mirror paper fields in the Google Form and link to a clean Sheet. Set input validation to catch obvious errors before submission.
Tip: Use consistent question titles to simplify mapping and review. - 5
Automate data transfer
Write Apps Script to submit responses or to populate a linked sheet and trigger submissions. Separate normalization from submission logic.
Tip: Modularize code to ease maintenance and future OCR swaps. - 6
Validate data quality
Implement checks for field formats, enforce required fields, and route low-confidence results to manual review. Maintain an audit log.
Tip: Keep a simple dashboard of error rates and review times to guide improvements. - 7
Test and iterate
Run pilots with real forms, collect feedback, and update the mapping and scripts accordingly. Repeat until reliability meets your standards.
Tip: Document changes and rationale to build a knowledge base for future forms. - 8
Security and compliance
Review access controls, data retention, and privacy requirements. Implement encryption and role-based access as needed.
Tip: Regularly audit permissions and update security settings in response to policy changes.
Common Questions
What is the first step to create a Google Form scanner?
Start by defining a data mapping from paper fields to Form questions and document the desired data flow. This ensures every scanned field knows where its value should land.
Begin by mapping each paper field to a form question and set up a data flow that records where values should go.
Which OCR option should I choose?
Choose based on your form complexity. Cloud-based OCR with layout analysis works well for diverse layouts; offline engines can be faster for simple forms.
Pick an OCR option based on form complexity; cloud-based services work well for varied layouts, while offline engines suit simple forms.
How do I automate data entry into Google Forms?
Use Google Apps Script to programmatically submit responses or populate the linked sheet and trigger submissions. Keep the logic modular for maintainability.
Automate using Apps Script to submit responses or fill the linked sheet, keeping the code modular.
What about data privacy and security?
Implement access controls, limit who can view data, and consider encryption for sensitive fields. Regularly audit permissions and retention policies.
Protect data with proper access controls and regular audits; consider encryption for sensitive fields.
Can I scale this to many form types?
Yes, but plan a staged rollout: start with one form type, then expand mappings and OCR rules incrementally while preserving data quality.
Scale gradually by validating each new form type one at a time and updating mappings as you go.
Watch Video
Key Takeaways
- Define a clear data model before automation.
- Choose OCR suited to your form complexity and handwriting.
- Use Apps Script to keep Google tools in a tight loop.
- Validate data early to reduce downstream errors.
- Iterate with real forms and document learnings.