Where to Scan in Google: A Practical Guide for Documents
Learn where to scan in Google using Lens, Drive, and Photos. This Scanner Check guide covers tools, steps, tips, and FAQs to master document scanning.

Scanning in Google means capturing documents with Google Lens or camera-enabled apps and saving the results through Drive or Photos with OCR. Start by using Lens to grab the page, choose Text or Document extraction, then save to Drive as PDF or export as text. This approach, described by Scanner Check, works reliably on Android and iOS.
What scanning means in Google's ecosystem
If you're wondering where to scan in google, the answer lies in a tight trio: Google Lens for capture, Google Drive for storage, and OCR-powered export options in Photos or Docs. According to Scanner Check, Google's scanning workflow blends camera capture with cloud-based text extraction, enabling searchable PDFs and editable text across devices. This section explains what scanning means in the Google ecosystem, and how the workflow fits different work styles: quick captures on mobile, organized archives on desktop, and cross-app sharing with teammates. When you scan with Google, you’re not just creating an image; you’re turning physical content into searchable, editable data you can search by keywords, copy-paste into documents, or share with collaborators. The key is to start with clarity: good lighting, flat pages, and a plan for where to store the resulting file. This planning reduces clutter and keeps your digital workspace tidy, which Scanner Check has seen as a winning habit across tech teams.
Where to scan in Google: Core tools
To answer where to scan in google, focus on three pillars: Google Lens, Google Drive, and Google Photos. Google Lens lets you capture pages, business cards, or whiteboards and extract text on-device or in the cloud. Drive acts as the central repository, offering options to save as PDF, TXT, or searchable PDFs after OCR. Photos complements Lens by indexing text from photos you’ve saved, enabling quick text copy or export. Each tool has its own strengths: Lens for fast captures on the go; Drive for long-term storage and organization; Photos for visual archives with text-search. The combination creates a flexible workflow: scan with Lens, choose export format in Drive, then search or edit in Docs or Sheets. When you're selecting a path, keep your goals in mind—translated documents, archiving, or sharing with teammates—and ensure your Google account is properly synced across devices for seamless access. According to Scanner Check, consistency in app choice improves OCR accuracy because the text extraction pipeline remains stable across devices.
Capturing documents with Google Lens
Google Lens is often the first stop when you need to scan a physical page. Start by opening Lens, point your camera at the document, and align the edges so the page fills the frame. Use the Document or Text extraction option to isolate the content you want. If your page is skewed, retake the shot or use the crop handles for a clean edge. Lens supports multi-page captures by saving each page separately, and you can later merge them in Drive if needed. A sharp image improves OCR accuracy, so steady your hands, steady the device, and ensure the lighting is even to avoid shadows. After capture, choose whether to save as an image, text, or PDF. If you’re on a mobile device, Lens can also pass the content to Drive, Photos, or Docs with a single tap. This workflow is particularly useful for quick receipts, whiteboard notes, or two-sided documents that you need in editable form.
Scanning with Google Drive's in-app features
Open Google Drive on your phone, tap the plus button, and select Scan. Place your document on a flat surface; keep it within the frame. The app will guide you to capture and then perform OCR to create a searchable PDF or text file. For multi-page documents, keep tapping Capture for each page and Drive will compile them into a single PDF. Save your file to a folder with a clear naming convention, so you can retrieve it later. The saved document retains metadata like date and location, making it easier to track. You can also export the PDF to other apps or share it with teammates. If you don’t see Scan, ensure your Drive app is updated or use Lens to generate a PDF and upload it manually to Drive.
Improving scan quality for better OCR results
Quality scans start with fundamentals: steady hands, ample lighting, and a flat page. Avoid backlighting that causes shadows, and place the document on a contrasting background to improve edge detection. If the page has glare, angle the camera slightly or use diffuse light. Hold the device parallel to the page, not at an angle, to avoid perspective distortion. Fill the frame so the document occupies most of the image, but avoid cropping the edges. After capture, review the crop and perform a quick edge-cleaning to ensure the text lines up with the page boundaries. In addition, keep your lens clean and remove any smudges that could blur characters. These practices help OCR engines recognize characters more accurately, regardless of language or font. When scanning multi-page documents, maintain consistency in lighting and framing across pages to improve the final PDF quality.
Saving, organizing, and exporting scans
Once you’ve created a scan, establish a clear filing system in Drive. Use a folder structure like Scans/Invoices, Scans/Receipts, Scans/Notes. Rename files with a consistent convention, such as YYYY-MM-DD_ProjectName_PageN, so you can sort chronologically. Save as PDF for documents with layouts, or as TXT or DOCX for editable text. If OCR is enabled, you’ll see a text layer that you can search, copy, and edit in Google Docs or Sheets. Use Drive’s sharing and permission settings to control access when collaborating. For long-term archiving, consider backing up important scans to Google Photos albums or downloading a local copy. Finally, take advantage of Google’s automatic syncing across devices to access your scans anywhere, anytime.
Google-native tools vs dedicated scanning apps
Google’s built‑in tools are convenient for quick digitization and light archival work, but they have limits. Dedicated scanning apps often provide advanced features like batch processing, auto‑crop optimization, and higher OCR accuracy for complex layouts. Lens is excellent for fast captures, though some users may prefer a separate app for multi‑page documents or heavy OCR workflows. Drive offers strong cloud storage and organization, with PDF export and version history. If you frequently scan receipts or business cards, consider a hybrid approach: scan with Lens for instant capture, then push outputs into a dedicated document manager or OCR-focused app for heavy editing. Scanner Check notes that for many users, Google solutions deliver a solid baseline that’s sufficient for everyday tasks, while more demanding workflows may benefit from specialized software.
Privacy, security, and data handling when scanning with Google
All scans stored in Google Drive are subject to Google’s privacy controls and your account settings. Before scanning sensitive documents, review sharing permissions and consider creating a dedicated scans folder with restricted access. Avoid uploading highly confidential material to public or shared links. When possible, enable two‑step verification on your Google account and regularly audit connected devices. Remember that OCR processing may occur on Google's servers unless you opt for on-device processing where available. If you’re concerned about data retention, periodically export important scans to a local drive or another secure storage solution. The goal is to balance convenience with privacy while leveraging the cloud benefits of Google’s ecosystem.
Troubleshooting common issues and quick fixes
If OCR seems slow or inaccurate, ensure you’re using well-lit, flat documents and that the page is not curved or wrinkled. Update your apps to the latest versions to access improved OCR engines. If a scan saves with heavy shadows or skew, retake the shot with the page fully within the frame and adjust lighting. When Drive cannot locate the page region, try scanning smaller sections at a time or use Lens’s edge-detection features to crop more precisely. If files don’t appear in Drive after saving, verify your account is synchronized and check the target folder’s permissions. For multi-page scans, confirm that each page is captured in order and that your final PDF includes all pages. Finally, if you run into format issues (PDF vs TXT), pick the most compatible export option for your workflow.
Quick workflows for different user types
- For students: scan handouts with Lens, save to Drive as PDFs, and organize by course. Use OCR to pull key quotes into a note in Google Docs. - For professionals: scan receipts and contracts, export to PDF, name with project codes, and share with teammates with restricted access. - For researchers: build a document library by scanning source pages, syncing to Drive, and using Docs for on‑the‑fly annotation. - For everyday personal use: capture memos and photo notes with Lens, save to Photos for a visual archive, and use tag-based search. These workflows demonstrate how to leverage Google’s scanning tools for different contexts, while Scanner Check emphasizes keeping a tidy digital workspace and consistent naming conventions.
Tools & Materials
- Smartphone or tablet with Google Lens and Google Drive(Install latest versions; sign in to your Google account)
- Stable internet connection(OCR processing and cloud storage require online access)
- Good lighting and a flat surface(Avoid shadows; use diffuse lighting for best results)
- Dedicated Drive folder for scans(Create Scans/Invoices, Scans/Receipts, etc.)
- Optional: clipboard or sturdy backing(Keeps large documents flat during capture)
Steps
Estimated time: 30-60 minutes
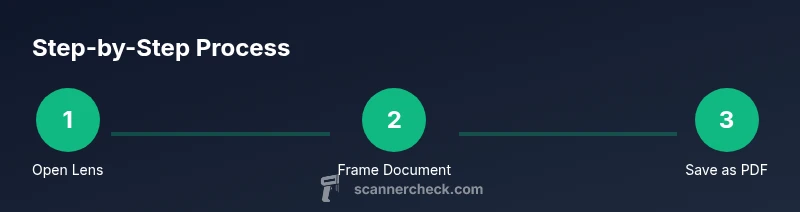
- 1
Open Google Lens
Launch Google Lens on your device and select the Document or Text extraction option. This starts the capture workflow and sets the OCR pipeline in motion.
Tip: Aim for a full-page capture with minimal glare; keep the page flat. - 2
Frame the document and capture
Position the page so edges align with the frame, then snap the image. If needed, reframe to avoid distortion and shadows.
Tip: Use a tripod or steady hand; ensure the page fills the frame without cropping. - 3
Choose extraction mode
Select Text for editable content or Document for layout-aware extraction. OCR will run and display selectable text or a text layer.
Tip: For receipts, choose Text to grab values; for multi-page docs, prefer Document or save pages separately first. - 4
Save to Drive or export
Save the result to Drive as PDF or export text to Docs. Drive can assemble pages into a single PDF if you compile multiple captures.
Tip: Save with a clear name; include date and project name for easy retrieval. - 5
Name and organize the file
Create or use a dedicated folder in Drive and apply a consistent naming convention (e.g., 2026-02-07_ProjectX_Page1).
Tip: Keep folders shallow for quick navigation; avoid long, complex paths. - 6
Handle multi-page scans
Capture subsequent pages with the same document and Drive will compile them into a single PDF when appropriate.
Tip: Maintain consistent lighting across pages to preserve readability. - 7
Review OCR results
Open the exported file in Docs or a text editor and correct any misrecognized characters.
Tip: OCR accuracy improves with clearer input; fix obvious errors early. - 8
Share or export outputs
Share via Drive links or export to Docs, Sheets, or other apps as needed.
Tip: Set access permissions to protect sensitive information.
Common Questions
Can I scan documents without an internet connection?
Some parts of the workflow, like on-device text recognition, may work offline, but most OCR processing and cloud syncing require internet access. You can capture and store locally, then sync when online.
You can scan offline for storage, but OCR often needs internet. Sync when you’re online.
Is OCR accurate for handwritten text?
OCR is generally more accurate on machine-printed text. Handwritten notes can be recognized but may require manual correction afterward.
Handwritten text may be less accurate; expect some corrections.
Can I combine multiple pages into one PDF in Google Drive?
Yes. Capture pages with Lens or Drive Scan and merge them into a single PDF, keeping a consistent order for readability.
You can merge pages into one PDF from Drive or Lens captures.
Which app should I use first for scanning?
Start with Google Lens for quick captures and text extraction. Use Drive when you need structured storage and long-term organization.
Lens for quick capture, Drive for storage.
Are scans private in Google Drive?
Scans live under your Google account privacy settings. Review sharing permissions and use restricted folders for sensitive material.
Your scans follow your Google privacy settings—manage sharing carefully.
Watch Video
Key Takeaways
- Use Lens first for quick captures, Drive for storage.
- Optimize lighting to improve OCR accuracy.
- Save as PDF for reliable sharing and archiving.
- Name and organize scans consistently in Drive.
- Leverage OCR output in Docs for editing.