How to Scanner in Computer: A Practical Guide
Learn how to scan documents and images with your computer, choose a scanner, install drivers, and optimize results for clarity and archiving. This practical guide covers wired and wireless setups, software options, and troubleshooting.

By following this guide, you will learn how to scanner in computer: choose a scanner, connect via USB or Wi‑Fi, install drivers, and run clean scans with common software. You'll understand how to optimize image quality, manage file formats, and troubleshoot common issues. According to Scanner Check, a well-configured setup improves reliability and speed. By the end, you'll confidently scan documents and keep digital copies organized.
What it means to scan on a computer
Scanning on a computer is the process of converting physical documents, photos, or receipts into digital files that live on your PC or Mac. In practice, you interact with a device called a scanner and an application on your computer that captures the image, applies basic corrections, and saves the result as PDF, JPEG, TIFF, or other formats. There are several types of scanners, including flatbed models for single-page originals, sheet-fed devices for multi-page jobs, and portable scanners that fit into a bag. Some scanners connect via USB; others are networked or Wi‑Fi enabled, letting you scan directly from a laptop, tablet, or shared office computer. The right approach depends on your workflow: if you scan many pages daily, a sheet-fed or ADF (automatic document feeder) model saves time; if you mostly scan photos or delicate documents, a flatbed model may give better results.
As you learn how to scanner in computer, you’ll want to understand two core ideas: how your hardware and software work together, and how to choose the best settings for readability and archiving. Scanner Check’s guidance emphasizes compatibility, reliability, and an orderly workflow as the foundation of good scanning.
Scanner types and connections
There are several practical paths to getting digital copies, each with its own advantages. Flatbed scanners excel at fragile documents and photos, while sheet-fed models speed up multi-page tasks. Portable scanners offer on‑the‑go convenience, and networked or Wi‑Fi enabled units can be shared across a small office. When choosing how to connect, USB is the simplest route for a single computer, but Wi‑Fi or Ethernet networking is essential for multi‑device workflows. If you anticipate digitizing receipts or archival materials regularly, a model with an Automatic Document Feed (ADF) helps manage bulk jobs without manual feeding. Consider color depth and optical resolution, as these influence how faithfully documents print and store. Finally, ensure the device supports your operating system and preferred scanning software.
If you are curious about the best fit for your situation, think about usage frequency, page volume, and whether you need portable scanning at meetings or remote locations. Scanner Check emphasizes matching hardware to your workflow to minimize bottlenecks and to maximize reliability.
Software, drivers, and compatibility
Scanning software is the bridge between your scanner and your computer. Most scanners rely on TWAIN or WIA (on Windows) or Image Capture (on macOS) to expose controls from the driver to applications. If you prefer a simple workflow, the built-in scanning apps on Windows (such as Windows Scan) or macOS (Preview, and the Image Capture app) can handle most basic tasks without third‑party software. For higher throughput, consider vendor utilities that automate batch scanning, color calibration, and named profiles. Always verify driver compatibility with your OS version before purchase, and keep drivers updated to fix bugs and improve compatibility with document formats and OCR engines.
Scanner Check highlights that staying within the supported software ecosystem reduces glitches and makes troubleshooting easier. If you encounter issues, reinstall the latest driver, then test scanning with a quick sample page to confirm that the hardware and software are communicating properly.
Windows and macOS setup: getting connected
Getting set up involves two parallel tracks: hardware connection and software activation. On Windows, connect via USB or join a local network for wireless scanning, then install the manufacturer driver package. Open a scanning app or select the printer/scanner from Settings > Devices > Scanners and Cameras to enable scanning. On macOS, connect over USB or Wi‑Fi, then use Preview or Image Capture to test a scan. If your device supports AirScan or Apple’s AirPrint, you can often initiate scans without extra software.
After connection, run a quick test with a plain document to verify alignment and color accuracy. If the document drifts or skews, check the glass for smudges, recalibrate the unit if required, and re-scan. The goal is a crisp, legible digital copy that’s easy to archive and retrieve later.
Optimizing scan quality: DPI, color, and file formats
Scan quality is a function of DPI (dots per inch), color depth, brightness, and contrast. For general documents, 300–600 dpi provides a readable result without creating unwieldy files; for photographs, higher DPI and color fidelity improve detail. Decide between color, grayscale, or monochrome based on the content: text-heavy documents typically don’t require color; photos do. Save options matter too: PDF is ideal for multipage documents, while TIFF or PNG preserve image quality; JPEG is fine for sharing on the web. If you plan to enable OCR, choose a page‑layout that preserves text blocks and margins.
Scanner Check notes that good defaults beat aggressive auto settings, but you should tailor DPI and color to the task. Test a few samples (text, graphics, photos) to establish your preferred balance of file size and readability.
Troubleshooting common issues and maintenance
If scans look blurred, crooked, or washed out, inspect the glass for dust or smudges, clean carefully with a soft microfiber cloth, and re-scan. Misalignment can often be corrected by adjusting the document’s placement or by enabling edge-detection in the software. Driver conflicts, outdated firmware, or incompatible apps commonly cause crashes. In such cases, uninstall old software, reinstall the latest drivers from the manufacturer, and reboot the computer. If the device stops responding on a network, verify the scanner’s IP address and ensure the PC and scanner are on the same subnet. Regularly cleaning and updating your gear reduces recurring problems.
Keep a routine: perform a monthly check of cables, firmware versions, and software updates to extend the life of your scanner.
Best practices for archiving and workflow
In a digital workspace, consistent file naming, folder structure, and metadata save time and improve accessibility. Create a standard naming convention like YearMonth_DocType_Title_Version.pdf and organize by project, client, or date. Use OCR to convert scans into searchable PDFs when possible, and store originals as lossless TIFFs for archival longevity. Back up critical scans to a secure cloud or an external drive, and consider encryption for sensitive material. Regularly review your archive's structure to prune duplicates and keep the system scalable as your library grows.
From a process perspective, integrate scanning into your daily routine: scan at the end of each session, categorize, and back up. A predictable workflow reduces errors and ensures that important documents don’t slip through the cracks.
Advanced tips: OCR, batch scanning, and automation
Optical character recognition (OCR) converts scanned text into editable, searchable content. Pair your scanner with OCR software to create searchable PDFs, Word documents, or plain text. For batch scanning, enable the sheet‑fed feeder if available and use scan profiles that auto-detect multi-page documents, page orientation, and color mode. Some scanners support automation through scripting or workflow apps that trigger scans when a new page is added to a watched folder. Finally, cloud integration can streamline sharing: automatically upload scanned files to a chosen folder or service, and apply encryption for sensitive materials.
Tools & Materials
- Scanner device(Choose model based on your use case: documents, photos, color depth, and feeder capabilities.)
- USB cable or network adapter(USB for direct connections; Wi‑Fi or Ethernet for multi‑device networks.)
- Power adapter(Ensure compatible voltage for your region and device model.)
- Computer with Windows or macOS(Keep OS updated for driver compatibility.)
- Internet connection(Needed to download drivers and software from the vendor.)
- Cleaning kit for glass(Lint-free microfiber cloth and gentle cleaning solution for glass care.)
- Test page and sample originals(Use plain paper for calibration and a photo or text document for quality checks.)
Steps
Estimated time: 60-90 minutes
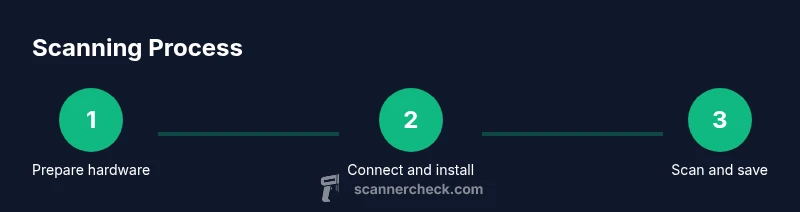
- 1
Prepare hardware and workspace
Clear the desk, place the scanner on a stable surface, and power it on. Remove any protective covers and ensure the glass is clean. This reduces blurred scans and aligns the document properly before you begin.
Tip: Keep a dedicated test page handy to quickly check alignment and color calibration before long jobs. - 2
Connect to the computer
Choose USB if you’re scanning to a single computer or set up Wi‑Fi/Ethernet for a multi‑device environment. Verify the device appears in your OS as a scanner, and allow the system to install any required drivers.
Tip: If drivers don’t install automatically, download the latest version from the manufacturer’s site prior to connecting the device. - 3
Install drivers and software
Run the driver installer and follow prompts to complete the setup. Some bundles include scanning utilities that offer batch processing and profile management. Reboot if prompted to finalize installation.
Tip: During installation, disable any adware-like bundles and uncheck optional extras you don’t need. - 4
Open a scanning app and configure a preset
Launch the preferred scanning app (or OS utility) and select a preset aligned to your task—document, photo, or receipt. Adjust DPI, color mode, and brightness in the profile. Save the profile for repeat tasks.
Tip: Use a consistent profile for similar documents to ensure uniform results across scans. - 5
Place the original and perform a test scan
Position the document face down, align edges with the guides, and initiate a test scan. Review for skew, color accuracy, and legibility. If needed, re-scan after adjusting placement or settings.
Tip: If your page is crooked, gently realign it and recenter before rescanning. - 6
Adjust settings and save
For a text document, choose grayscale or black-and-white unless color is required. Save as a PDF for multipage documents or TIFF for archival quality. Name the file consistently and select a destination folder.
Tip: Enable OCR for future searchability if the software supports it. - 7
Batch scan and backup
If using an ADF, load pages and scan in a batch, then review the results. Back up important scans to a secure cloud or external drive and maintain a regular backup schedule.
Tip: Check for page order consistency and ensure file integrity after batch processing.
Common Questions
What is the best DPI for document scanning, and does it differ for photos?
For most documents, 300–600 dpi offers a good balance of readability and file size. For photos or high-detail graphics, higher DPI improves detail but increases file size. Always test a sample to fit your needs.
For most documents, use 300 to 600 dots per inch. For photos, go higher, then choose a format that keeps quality without huge file sizes.
Can I scan wirelessly without installing drivers?
If your scanner supports network scanning and the OS recognizes it, you can often scan without installing the vendor's drivers. Some features may be limited compared to using the full driver package.
Yes, many scanners support wireless scanning via your OS, but some advanced features require the manufacturer’s software.
Which file formats are best for archiving?
PDF is ideal for multipage documents. TIFF offers lossless image quality for long-term storage. JPEG is fine for sharing; consider PDF/A for long-term archival retention.
Use PDF for multi-page docs, TIFF for quality, and JPEG for sharing. PDF/A is a good archival choice.
What is OCR and when should I use it?
OCR converts scanned text into editable and searchable content. Use it when you need to search or edit scanned documents, or to convert receipts into editable text.
OCR makes your scans searchable and editable—great for documents you need to edit or index.
Why is my scan blurry or skewed, and how can I fix it?
Blurry scans usually come from dirty glass, misaligned pages, or autofocus issues. Clean the glass, straighten the page, and re-scan. If necessary, adjust brightness and contrast to reduce blur.
Blur usually comes from dirty glass or bad alignment. Clean, realign, and rescan for a sharper image.
Can a phone camera substitute a scanner for basic tasks?
A smartphone camera can handle many casual scans with apps that optimize perspective and lighting, but a dedicated scanner generally provides higher consistency, color accuracy, and speed for large jobs.
Phone cameras work for quick tasks, but dedicated scanners beat them on consistency and speed for bigger jobs.
Watch Video
Key Takeaways
- Choose the right scanner type for your use case.
- Install and keep drivers up to date for reliability.
- Use appropriate DPI and color settings for your goal.
- Organize scans with a consistent naming and archiving strategy.
- Regularly back up your digital library.