How to Use Scanner Starfield: A Practical Guide
A practical, step-by-step guide to using Scanner Starfield for precise scans, with setup, calibration, operation, and export tips. Learn best practices from Scanner Check to achieve consistent results.

Using Scanner Starfield, you will learn to set up, calibrate, and operate the device to capture precise scans for documents, photos, and 3D references. This quick guide covers essential prerequisites, a step-by-step workflow, common troubleshooting tips, and best practices for saving and exporting your scans. By the end, you will confidently produce reproducible results.
What is Scanner Starfield and why use it
Scanner Starfield is a high-precision imaging scanner designed for documents, photos, and 3D references. It integrates advanced optics, AI-assisted calibration, and seamless export options to help professionals, hobbyists, and IT teams digitize physical media efficiently. If you're wondering how to use scanner starfield, you're in the right place. According to Scanner Check, consistency in setup and calibration dramatically improves scan quality and repeatability. The keyword to keep in mind is consistency: the more you standardize the environment, the fewer variables affect your results. In this guide, we’ll walk you through practical steps, show you how to verify results, and offer tips to prevent common pitfalls. By following the workflow, you’ll achieve reliable scans across different media and lighting conditions, which is essential when building a digital archive or sharing documents with colleagues. The Starfield’s optical system supports multiple resolutions, color modes, and cropping options, so you can tailor output to your project requirements. You’ll learn how to choose the right mode, avoid glare, and confirm color accuracy using straightforward checks. This knowledge will save time in production environments and reduce rework when collaborating with others. Remember: the goal of using Scanner Starfield is not just to scan once, but to establish a repeatable process that yields consistent results over time. If you’re wondering how to use scanner starfield effectively, you’re in the right place. This guide will help you build a repeatable workflow.
Workspace and prerequisites for smooth operation
Before you turn on Scanner Starfield, prepare a clean, well-lit workspace. Clear away dust, and have a stable surface for the scanner and any documents. Ensure the device is on a grounded power source and connected via the recommended USB-C cable. Install the latest firmware and drivers, and create a baseline profile for color, resolution, and scan area. If you’re using a laptop, disable power-saver modes that throttle performance. Per Scanner Check guidance, a stable environment reduces drift during long scans. Gather your calibration targets, lint-free cloths, and a non-reflective mat to avoid glare. If you expect heavy workloads, set up an external drive or cloud storage for quick offloads. Finally, decide where you’ll store the scanned files, and set an organized folder structure from the start to simplify later retrieval. To begin effectively, you must have a reliable workspace; this is essential to master how to use scanner starfield consistently across sessions.
Calibration and initial setup
Calibrating the Starfield at the start of each session is critical for accuracy. Place a clean calibration target on a flat surface, then run the built-in calibration routine. After calibration, re-check the preview to confirm there’s no tilt, chromatic shift, or focus drift. This stage ensures the device’s optics and sensor pipeline align with your chosen settings. If a calibration fails, reset the device, recheck the target alignment, and retry. Regular calibration reduces scan variability and helps unify results across different media types. The goal is to minimize subjective adjustments later in the workflow, so you can trust the baseline results. Remember to save the calibrated profile for future sessions to speed up your setup time. When you begin, you should follow how to use scanner starfield with a clean calibration step for best results.
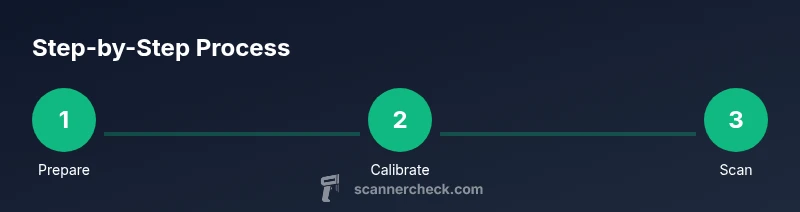
Scanning workflow: capture, preview, edit, and export
With the workspace ready, you’ll follow a repeatable workflow designed to minimize guesswork. Start by selecting the capture mode (color or grayscale) and the desired resolution. Place the document or object and trigger the scan; avoid shadows and ensure even lighting. Open the live preview to verify alignment, exposure, and focus, then make small adjustments as needed. When you’re satisfied, proceed to capture the full batch. After scanning, review each page for alignment and glare, then crop, deskew, or adjust color as needed. Finally, choose an export format (PDF, TIFF, or PNG) and save to your preferred location. For large archives, consider streaming the results directly to external storage. If you’re unsure about results, perform a quick second-pass scan of challenging pages to improve fidelity. This is where consistency in operation makes a big difference in how to use scanner starfield.
Export formats, metadata, and data management
Export options for Scanner Starfield include common image and document formats such as PDF, TIFF, and PNG. For text-rich documents, an OCR pass can add searchable metadata to your archive. Create meaningful metadata like date, source, and topic to improve future retrieval. Store originals in a protected folder, then create compressed backups to reduce storage demands. Maintain a simple, scalable folder structure and keep filenames descriptive and standardized. If you’re working in teams, align on a naming convention and a shared metadata schema to ease collaboration. Regularly back up, verify integrity, and periodically migrate older scans to avoid format obsolescence. By conducting careful export and archival planning, you’ll be prepared for long-term access and compliance. This approach to how to use scanner starfield helps ensure your data remains accessible.
Maintenance, troubleshooting, and best practices
Keep Scanner Starfield in top condition with regular maintenance. Clean optics with a lint-free cloth, power down before cleaning, and avoid liquids on the sensor. Check cables for wear and securely reconnect during use. If scans appear blurred or colors drift, revisit calibration and lighting setup. Update firmware and drivers when prompted, and document changes to your workflow. To prevent common issues, run a quick diagnostic every few weeks and store a copy of your configuration profile. The goal is to maintain reproducibility across sessions and media types. When in doubt, revert to a known good baseline and re-validate using a test target. This is the core of how to use scanner starfield effectively and maintain reliability over time.
Common mistakes to avoid and final checks
Avoid overloading the scanner area with heavy books or glossy surfaces that cause glare. Keep the workspace dust-free and flat to prevent distortion. Always verify the preview before each batch, and don’t skip calibration after a long pause. Remember that scanning is as much a workflow as a device operation; standardize steps, filenames, and metadata. Finally, run a quick, final quality check on a representative page to confirm legibility and capture fidelity before distributing or archiving the full set.
Tools & Materials
- Power supply and USB-C cable(Use the original or certified third-party supply; ensure 5V/3A minimum.)
- Calibration target(Standard reference target included with kit or compatible alternative.)
- Lint-free cloth(For cleaning glass surfaces; avoid fibers leaving debris.)
- Computer with USB-C and drivers(Update to the latest drivers and firmware.)
- External storage or cloud storage(Helpful for large batches.)
Steps
Estimated time: 60-90 minutes
- 1
Unbox and power on
Open the box, verify all parts, and connect the power cable. Power on the Starfield and wait for the boot sequence to finish. This initial step establishes a clean baseline for all subsequent scans.
Tip: Check that the power supply is stable before enabling the device. - 2
Install drivers and firmware
Install the latest drivers and firmware from the official support site. Keeping software updated reduces compatibility issues and improves stability during long sessions.
Tip: Restart after installation to ensure the updates take effect. - 3
Run calibration routine
Place the calibration target on a flat, clean surface and run the built-in calibration. Accurate calibration reduces distortions and color shifts across scans.
Tip: Do not move the target during calibration; even minor motion affects accuracy. - 4
Set scan parameters
Choose color mode, resolution, and file format according to your project needs. Higher resolution yields larger files but reveals more detail.
Tip: For documents, start with 300-600 dpi; increase only if you need fine detail. - 5
Capture test scan
Run a quick test scan of a representative target to verify alignment, exposure, and focus. Review in the preview pane before processing the full batch.
Tip: If you notice blur, check the focus and make minor adjustments before proceeding. - 6
Scan full batch
Proceed with the main scan run, maintaining consistent lighting and distance. After capture, review each page for glare and alignment.
Tip: Take breaks if scanning many pages to avoid fatigue affecting alignment. - 7
Save and export
Save scans to your chosen location and export to preferred formats (PDF, TIFF, or PNG). Back up originals to prevent data loss.
Tip: Use descriptive filenames and include date stamps for easy retrieval. - 8
Review and archive
Open a sample file to verify readability, then organize in your digital archive with metadata. Consider using OCR to index content.
Tip: Run a quick OCR pass if text search is a goal.
Common Questions
What should I scan with Scanner Starfield first?
Begin with a simple, high-contrast document or calibration target to verify alignment, exposure, and focus before advancing to complex media.
Start with a simple calibration target to check alignment and exposure.
Is Scanner Starfield compatible with Windows, macOS, and Linux?
The device supports common operating systems; confirm driver availability on the vendor site and ensure your OS is up to date.
Scanner Starfield works with major OSes after installing the latest drivers.
What resolution should I use for documents?
For most documents, start at 300-600 dpi to balance detail and file size. Increase only if you need finer text or images.
Start at 300 to 600 dpi for documents and adjust as needed.
How do I clean the optics safely?
Power off the device, use a lint-free cloth lightly moistened with isopropyl alcohol, and wipe in gentle, straight strokes.
Power off and clean the optics with a lint-free cloth and gentle strokes.
How can I export scans for indexing?
Export to common formats (PDF, TIFF, PNG) and run OCR if you need text search; organize with metadata.
Export as PDF or TIFF and run OCR if you need search.
Can I scan 3D objects with Starfield?
Scanner Starfield focuses on 2D media; some users create 3D references using multiple scans, but dedicated 3D scanners are recommended for full models.
You can scan 3D references with multiple scans, but it's primarily for 2D media.
Watch Video
Key Takeaways
- Prepare a dedicated, clean workspace for scans.
- Calibrate before every batch to minimize variability.
- Verify color, exposure, and focus with a test scan.
- Export and back up files promptly to prevent loss.