Scanner Document to PDF: A Practical How-To
Step-by-step guide to convert scanned documents into high-quality PDFs with OCR, compression, and secure sharing. Learn best practices for DPI, color, naming, and batch scanning.

This guide shows you how to reliably convert a scanner document to PDF with OCR-friendly settings, clear scans, and well-organized output. You’ll learn the essential steps, from choosing DPI and color to saving a searchable PDF and backing up securely. According to Scanner Check, OCR-enabled PDFs improve accessibility and retrieval, making this workflow ideal for archives, contracts, and project documents. By the end, you’ll be able to produce clean, searchable PDFs ready for sharing and long-term storage.
What is a scan-to-PDF workflow and why it matters
A scan-to-PDF workflow describes the process of capturing physical documents with a scanner (flatbed or automatic document feeder) and saving the results as a portable, accessible PDF. The PDF format preserves layout, fonts, and images across devices, making it ideal for archival storage and legal or business workflows. When you enable optical character recognition (OCR), the text becomes searchable, copyable, and indexable, which dramatically improves document retrieval. For many teams, this means faster onboarding, easier compliance checks, and smoother collaboration. In this article you’ll learn practical steps to convert a scanned document to PDF that maintains readability, reduces file size, and preserves privacy—without overwhelming complexity. The Scanner Check team emphasizes that a well-structured PDF with OCR aligns with modern digital workflows and accessibility standards, especially for large multi-page documents.
Benefits of PDFs from scans and common use cases
PDFs created from scans are platform-agnostic and retain formatting, making them reliable for contracts, invoices, and records. OCR-enabled PDFs unlock searchable text, which is invaluable for audits, research, and team collaboration. For field work, scanning makes paper forms digital and easier to back up to cloud storage. In education and government settings, PDFs serve as a consistent deliverable that can be annotated, indexed, and archived. When planning your project, consider whether you need a simple image PDF or a fully searchable, text-enabled document. Scanner Check analysis shows that searchable PDFs significantly improve workflow efficiency and information retrieval in organizations handling large document libraries.
Key terminology you’ll encounter
- DPI: dots per inch, a measure of scan resolution. Higher DPI yields crisper text but larger file sizes. 300–600 DPI is a common sweet spot for text documents.
- OCR: optical character recognition, the technology that converts images of text into searchable, editable content.
- Deskew: correction of tilted scans so text lines read as straight.
- Metadata: embedded data such as author, date, and document title that helps with organization and search.
- PDF/A: a PDF variant designed for long-term archive compliance. Understanding these terms helps you pick the right settings for your scanner document to PDF workflow.
Choosing the right scanning approach: flatbed vs. ADF
A flatbed scanner provides flexibility for fragile or irregularly sized documents, but it can be slower for many pages. An Automatic Document Feeder (ADF) speeds up batch scanning, especially for multi-page papers. When selecting between the two, consider document length, material type (stapled, folded, or fragile), and the need for color accuracy. In both cases, ensure your scanner supports PDF output and has drivers that work with your operating system. A reliable setup lays the groundwork for a smooth scanner document to PDF workflow and minimizes post-scan corrections.
Prep and prerequisites: hardware, drivers, and software
Before you begin, update scanner firmware and verify that your computer has the latest drivers (TWAIN/WIA) or a modern scanning app. Install the scanning software you’ll use to save PDFs and apply OCR. Confirm that you have sufficient storage space for high-resolution scans and that your network or USB connection is stable. If you’re using mobile devices, choose an app that offers direct PDF export with OCR. Proper prep reduces errors, speeds up processing, and yields higher-quality PDFs from your scans.
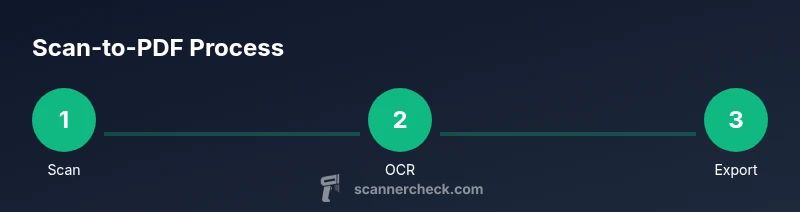
Step-by-step: scanning a multi-page document
- Load the pages in the correct order, aligning edges to avoid skew. 2) Choose a scan preset that balances quality and size (300–600 DPI, color for photos, grayscale for text). 3) Run a test scan of the first page and preview for clarity and alignment. 4) Scan the remaining pages and verify that all pages are captured in the intended order. 5) If your scanner offers automatic deskew or background cleanup, enable these features to improve readability. 6) Save the raw image stack to a temporary folder for processing into PDF. This approach reduces rework and ensures a consistent starting point for the final PDF.
Step-by-step: saving, naming, and organizing scanned images and PDFs
Use a consistent naming convention for quick retrieval, such as 2026-03-06_ProjectName_Page01.pdf, then increment for subsequent pages or versions. Create a dedicated folder structure (e.g., Inbox/Scans/ProjectName/Originals and Processed). Back up originals to a secure location before performing any enhancements. Metadata such as document title, date, and source scanner can be embedded in the PDF, aiding subsequent indexing and search. Consistent naming and organization save time during file recovery and audits.
Step-by-step: converting to PDF with OCR, compression, and optimization
Convert the scanned images into a single PDF file, selecting the option to apply OCR if text search is required. Choose a compression setting that preserves legibility while minimizing file size (e.g., JPEG 2000 or ZIP for text-heavy documents). If your workflow demands accessibility, enable tag structure and ensure that reading order is preserved across pages. For long documents, consider splitting into logical sections or chapters to improve navigation. Finally, review the PDF to confirm text is searchable and pages render correctly on different devices.
Working with PDFs: color management, bookmarks, and accessibility
Color management affects readability and file size. If your scans include color photos or diagrams, keep color but use compression to keep the file manageable. Add bookmarks and a table of contents for multi-page PDFs to improve navigation. Ensure text remains searchable and readable—OCR accuracy depends on scan quality. If you plan to share the PDF broadly, verify compatibility with common readers, including mobile apps, and consider creating a text layer for accessibility.
OCR accuracy tips and common errors to watch for
OCR works best on clean scans with good contrast. Avoid skewed pages, shadows, or background patterns that confuse recognition. If the document contains tables or column layouts, consider specialized OCR features or manual correction after recognition. Always perform a final human check to correct misinterpreted characters, especially numbers and dates. For languages with accents or non-Latin scripts, verify the font recognition in your OCR tool and adjust settings accordingly. Scanner Check notes that investing time in OCR optimization yields long-term dividends in searchability and data extraction.
Batch scanning and long documents: strategies for efficiency
When handling long documents, batch scanning with an ADF can dramatically reduce total time. Break documents into logical chunks (cover pages, sections, annexes) to minimize rework and facilitate page reordering if needed. Use consistent scan settings across runs to maintain uniform quality. If possible, process batches through OCR and PDF conversion in parallel threads or separate devices to speed up turnaround. Regularly back up intermediate files to prevent loss during processing.
Security, privacy, and compliance considerations when scanning
Treat scanned documents as sensitive data. Use encrypted storage for PDFs and limit access to authorized users. If the documents contain personally identifiable information (PII) or financial data, apply redaction when necessary and ensure that OCR text does not reveal sensitive content unintentionally. When sharing PDFs, disable editing features if not required and consider setting password protection for highly confidential materials. Remember to delete temporary files after processing to minimize exposure, and align with organizational data-retention policies.
Choosing the right tools and evaluating scanners for a document-to-PDF workflow
Evaluate scanners based on resolution, speed, and reliability, as well as software that supports direct PDF export with OCR. Look for features like automatic document feeders, document edge detection, deskew, and color fidelity. For budget-aware buyers, compare total cost of ownership, including driver compatibility with your operating system and ongoing software updates. Reading reviews and testing devices with your typical document mix (text, diagrams, mixed media) helps ensure the scanner document to PDF workflow meets your needs. The Scanner Check team recommends focusing on end-to-end reliability—delivery of readable, searchable PDFs with minimal post-processing.
Authority sources and further reading
- National Institute of Standards and Technology (NIST) PDF/A standards overview.
- U.S. National Archives and Records Administration (NARA) guidance on document preservation and PDF/A.
- Library of Congress resources on digitization workflows and OCR best practices.
Note: These sources provide authoritative context about long-term accessibility, accessibility compliance, and archival standards for scanned documents converted to PDF.
Tools & Materials
- Scanner (flatbed or ADF) with PDF export(Supports at least 300 DPI and TWAIN/WIA drivers)
- Computer or mobile device(Windows/macOS/Linux or iOS/Android with scanning app)
- Scanning software(Should offer PDF export, OCR, deskew, and compression options)
- Connectivity: USB or network(Stable connection for transfers and backups)
- External storage or cloud storage(Backup originals and processed PDFs)
- PDF viewer/editor(For quick checks and edits after export)
Steps
Estimated time: 60-90 minutes for a standard multi-page document
- 1
Prepare workspace and hardware
Set up the scanner, connect to your computer, and clear the scan area. Ensure documents are clean, flat, and free of staples or paper clips that could jam the feeder. This step reduces skew and improves edge detection during OCR.
Tip: Use a clean surface and a well-lit area to minimize shadows on scans. - 2
Select scan settings
Choose 300–600 DPI depending on content (text typically at 300–400; images may require 600 or higher). Opt grayscale for text and color for charts or photos. Enable deskew and save to a temporary folder if your workflow requires post-processing before PDF creation.
Tip: Preview the first page to confirm readability before scanning the entire batch. - 3
Scan the pages
Load pages in correct order and perform the scan. Verify that all pages captured correctly and that there are no blank or duplicate pages. If using ADF, ensure the stack remains aligned to avoid misordered pages.
Tip: If a page jams, stop and reinsert after clearing the feeder to maintain order. - 4
Open and prepare images for PDF
Open the scanned images in your chosen software and check for skew, brightness, and contrast. Crop margins if necessary and reorder pages to match the intended sequence before export.
Tip: Despeckle minor specks that might hinder OCR accuracy. - 5
Convert to PDF with OCR
Export to PDF and enable OCR so text becomes searchable. Choose a suitable compression to balance readability and file size. Add bookmarks or a table of contents for multi-page documents.
Tip: Save a non-OCR version as a fallback in case OCR needs correction later. - 6
Name, save, and back up
Use a consistent naming convention (e.g., YYYY-MM-DD_Project_Page01.pdf) and store the PDF in a well-organized folder. Back up the originals and final PDF to a secure location to prevent data loss.
Tip: Document the scanning session in the file metadata for easier retrieval later.
Common Questions
What is the recommended DPI for scanning documents intended for PDF?
For most text documents, 300 DPI provides good readability with manageable file sizes. If you’re dealing with small fonts or fine print, 400–600 DPI improves legibility, especially after OCR. Always preview a page to confirm clarity before committing to the full batch.
For most texts, start at 300 DPI; increase to 400 or 600 if the text is tiny or prints faintly.
Can I OCR a scan after saving as PDF?
Yes. Many scanners and apps support OCR directly during export or as a post-processing step. OCR makes the text searchable and selectable, which is essential for archiving and quick retrieval.
Absolutely. Enable OCR during export or run OCR afterward to create a searchable PDF.
Are there free tools to convert scanned docs to PDF with OCR?
There are free apps and desktop software that perform scanning to PDF with OCR. Look for reputable options that offer OCR, basic compression, and reliable output. For professional needs, consider paid options with advanced features and better accuracy.
Yes, there are free tools, but compare OCR accuracy and features before relying on them for important documents.
Is OCR always accurate?
OCR accuracy depends on scan quality, font, and page layout. Clean scans with high contrast yield better results. Some manual correction after OCR is often needed for numbers, tables, or unusual fonts.
OCR is usually good with clean scans, but you’ll still want to check and correct tricky sections.
How do I share PDFs securely?
Use password protection, restrict editing, and share via secure channels or encrypted links. If the content is sensitive, avoid cloud links without access controls and consider redaction of sensitive data before sharing.
Protect PDFs with passwords and only share via secure channels when needed.
What naming convention should I use for scanned PDFs?
Adopt a consistent scheme like YYYY-MM-DD_ProjectName_Ver_Page01.pdf and increment for subsequent pages. Consistent naming speeds up search, archiving, and backups.
Use a date-project-page scheme to keep scans organized.
Watch Video
Key Takeaways
- Scan with consistent DPI and clean edges.
- Use OCR to create searchable PDFs.
- Organize files with a clear naming convention.
- Back up originals and processed PDFs securely.
- Check accessibility and readability on multiple devices.