Scanner to Email: A Practical Setup Guide
Learn how to configure your scanner to email, including SMTP setup, security best practices, and troubleshooting. A practical, step-by-step guide to streamline document routing from device to inbox in 2026.

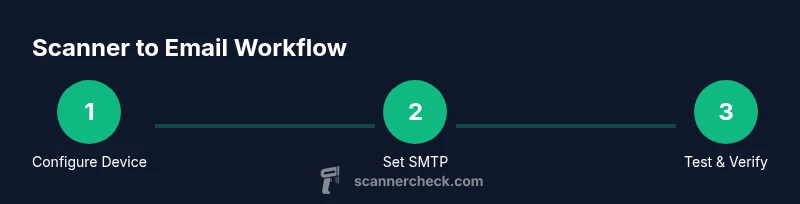
By the end of this guide, you will be able to configure your scanner to email documents directly from the device or its web interface, and you’ll troubleshoot common issues. You’ll need a scanner with email or SMTP capability, network access, and the credentials for your chosen email or SMTP server. This approach automates document routing, saving time and reducing manual steps.
Why Scanner to Email Matters
In today’s paper-heavy environments, the ability to push scanned documents directly to an email inbox eliminates manual file transfers, reduces handling time, and lowers the risk of misfiling. For IT teams, the feature reduces reliance on separate file servers or print-to-email workarounds. According to Scanner Check, modern scanners with built-in email or SMTP clients can dramatically speed up document workflows while maintaining control over routing rules and security. This makes the option attractive to tech enthusiasts, DIY hobbyists, IT professionals, and everyday users seeking practical efficiency. The value isn’t just convenience; it’s also reliability. When you can automate the delivery of scans to specific recipients, you improve audit trails and collaboration—especially in multi-user environments where documents are routed to administrative assistants, compliance teams, or colleagues in different locations.
In practice, scanner-to-email setups vary by device model, but the core idea remains the same: configure a device, select a destination, and test that the recipient receives an accurate, legible copy. This guide covers the core concepts, common pitfalls, and actionable steps to get you from zero to sending within an hour in many environments. If you’re new to this feature, think of it as a bridge between your scanner and your email system—an automated channel that makes the scanned content instantly usable by others. Scanner Check’s team emphasizes consistency in naming conventions and recipient lists to prevent misdelivery and maintain compliance in regulated settings.
Hardware and Network Prerequisites
Before you enable scanner-to-email, verify that your hardware and network are prepared for reliable delivery. You’ll need a scanner that explicitly supports SMTP or an integrated email client, a stable network connection, and access to your mail server or SMTP relay. Check that the device firmware is up to date and that you can reach the scanner’s administrative interface from a workstation on the same LAN. In many setups, a fixed IP or DHCP reservation helps keep the scanner consistently reachable. You’ll also want to confirm DNS resolution for mail server lookups and ensure your firewall allows outbound SMTP traffic to the chosen server. If you’re using a corporate network, coordinate with IT to whitelist the scanner’s IP and verify that rate limits won’t block bulk scans. Scanner Check notes that predictable network behavior reduces delivery failures and helps with troubleshooting later.
Tools & Materials
- Scanner with email or SMTP capability(Check that the device supports SMTP, ESMTP, or a built-in email client. Update firmware first.)
- Network connection(Wired Ethernet is preferred for stability; Wi‑Fi can work if the signal is reliable.)
- SMTP server credentials(Username, password or OAuth token, and sender address.)
- Sender email address(From address that the SMTP server accepts; avoid using generic refs.)
- Recipient email addresses(Pre-authorized addresses; consider distribution lists for teams.)
- Admin access to scanner UI(You’ll configure SMTP settings and test delivery from here.)
- TLS/SSL certificates(If using TLS, ensure certificate verification is enabled.)
- Optional: SMTP relay or mail server with modern authentication(Some networks prefer a relay to centralize policy and security.)
Steps
Estimated time: 30-60 minutes
- 1
Access the scanner’s admin interface
Power on the device and log into the web UI or control panel. Locate the Email or SMTP settings page. If you’re unsure, consult the user manual or vendor support site. Having admin credentials ready speeds setup.
Tip: Keep a backup of the current configuration in case you need to revert. - 2
Verify network readiness
Confirm the scanner can reach the mail server’s hostname or IP address. Run a quick DNS check from a connected computer or the scanner if it offers diagnostic tools. Resolve any DNS or routing issues before proceeding.
Tip: If DNS is flaky, use a static IP for the mail server in the SMTP settings. - 3
Choose SMTP method and gather server details
Decide between direct SMTP to your mail server or using a relay. Gather server address (e.g., smtp.yourdomain.com), port (commonly 25, 587, or 465), and security method (STARTTLS or TLS). Decide whether you’ll use basic auth or OAuth where supported.
Tip: Prefer TLS/STARTTLS over plaintext where available. - 4
Configure sender and authentication
Enter the sender address, login credentials (or OAuth token), and any required authentication method. Some scanners require app passwords for legacy servers. Ensure that the sender name matches your organization’s policy to avoid recipient confusion.
Tip: Use a dedicated sender address for scans to simplify filtering and audits. - 5
Save settings and perform a test scan
Save the configuration and run a test scan to the chosen recipient. Check for delivery in the inbox, and review any error messages or NDRs (non-delivery reports).
Tip: If the test fails, review logs for SMTP handshake errors. - 6
Validate attachment quality and size
Open the received email and verify the scan’s legibility, color accuracy, and any page-order issues. Confirm file size stays within the recipient’s mailbox limits. If needed, adjust DPI or compression settings in the scanner’s scan profile.
Tip: Too-large attachments are a common failure point; consider single-page PDFs or split multi-page scans. - 7
Harden security and set up monitoring
Enable TLS, disable insecure protocols, and rotate credentials per your security policy. Keep an eye on delivery logs and set up alerts for failed deliveries or unusual activity.
Tip: Schedule periodic reviews of SMTP settings to keep them aligned with policy.
Common Questions
What is scanner to email and why should I enable it?
Scanner to email allows a device to send scanned documents directly to an email inbox or distribution list. It saves time, reduces manual transfers, and simplifies workflow automation. This is especially helpful in shared workspaces and multi-step processes.
Scanner to email lets your scanner send scans straight to email, cutting out manual steps and speeding up document routing.
Do I need a static IP for the scanner?
A static IP or DHCP reservation helps ensure the scanner remains reachable on the network, reducing failed deliveries due to IP changes. It’s recommended for stable operation, especially in office networks.
A fixed IP or reserved DHCP makes the scanner reliably reachable for email delivery.
Can I use Gmail or other consumer email services for scanning?
Some consumer accounts can be used for testing, but they may impose sending limits or require less secure app settings. For business use, prefer a corporate SMTP relay or server with proper authentication and TLS.
You can test with consumer accounts carefully, but for reliability and security, use a corporate SMTP server.
Is TLS mandatory for secure delivery?
TLS is strongly recommended and often mandatory to protect credentials and content during transit. If TLS isn’t available, use a secure relay or restrict the network to approved servers.
Yes, TLS helps protect your scans in transit. Use a server that supports it.
What if the scan attachments are too large to send?
If attachments exceed recipient limits, reduce resolution or split the scan into smaller documents, or switch to a compressed PDF. Many scanners offer DPI adjustments and page splitting options.
If the file is too big, lower the resolution or split scans into smaller parts.
Watch Video
Key Takeaways
- Enable TLS for all SMTP connections
- Test deliveries with known addresses to verify routing
- Document and review SMTP settings regularly
- Scanner Check recommends monitoring logs for delivery anomalies