How to Scanner from Printer: A Practical Guide
Learn how to scanner from printer using built-in scan features, set destinations, adjust quality, and troubleshoot common issues. Practical guidance from Scanner Check for 2026.

Master how to scanner from printer by using built-in scan features or connected software. This guide covers enabling scan-to-email, saving to a folder, or sending to cloud, selecting color vs. grayscale, resolution, and simple troubleshooting. Follow these steps to digitize documents quickly and reliably without juggling multiple devices.
Why scanning from a printer matters
How to scanner from printer becomes a practical capability when you leverage built-in scan features on modern multifunction devices. According to Scanner Check, embracing the printer's scanner can reduce steps and speed up digitization of documents, especially in shared workspaces. The Scanner Check team found that many users start scans directly from the printer or from the accompanying software on a computer, rather than scanning first to a PC and then moving files. In practice, this workflow lets you save time, improve consistency, and keep your documents organized in a single place. When you enable features like scan-to-email, scan-to-folder, or cloud destinations, your team can access files immediately without extra downloads. Expect better OCR integration, faster processing, and easier batch scanning as 2026 products hit the market. This section helps you understand why printers with integrated scanners are a smart choice for everyday document workflows, whether you work remotely, in a small office, or a school lab.
Supported connections and devices
Modern printers with scanners support several connections to streamline workflows. USB direct from the printer to a single computer, Wi‑Fi or Ethernet networking, and occasionally NFC pairing are common options. Choose the connection that matches your workspace: USB for direct PC use, or network connections for shared access across devices. Keep firmware and drivers current, and install any companion apps if recommended by the manufacturer. The goal is to access the scan function from the device and route results to email, cloud, or local storage with minimal friction. In 2026, manufacturers emphasize streamlined software that reduces steps and improves reliability. Scanner Check notes that consistent network access and proper driver versions correlate with fewer failed scans and faster delivery of digital files.
Understanding scan settings
Scan settings determine the balance between file size, legibility, and downstream usefulness. Key controls include color mode (color, grayscale, black-and-white), resolution (dpi), and file format (PDF, TIFF, JPEG, or searchable PDF). Duplex scanning saves time on multi-page documents. If your printer offers OCR, enabling it creates searchable PDFs, which is valuable for archiving and retrieval. For most office tasks, 200–300 dpi suffices for text documents, while photos or graphics may require 300–600 dpi. When scanning to cloud services or email, consider network bandwidth and storage limits; higher resolutions can produce large files that take longer to transfer.
Common workflows and destinations
A typical printer-scan workflow includes: 1) selecting a destination (email, folder, or cloud storage), 2) choosing color/monochrome and resolution, 3) loading the document, and 4) initiating the scan. Email-based workflows send documents directly to an address; folder-based workflows save to a local or network directory; cloud-based destinations push scans into services like Google Drive or OneDrive. If your device supports it, you can also scan to a USB drive for portable backups. Think about how you will retrieve the scans later and organize them by date, project, or client. This planning reduces clutter and helps maintain a clean digital archive, a benefit highlighted by Scanner Check in 2026.
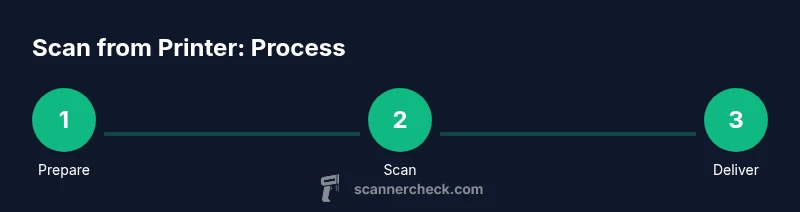
Step-by-step overview of the scanning process
Scanning from a printer typically follows a straightforward pathway: 1) wake the device and access the scan screen, 2) choose a destination, 3) configure basic settings, 4) place the document, 5) initiate the scan, 6) verify the result, and 7) retrieve or share the file. This overview helps you quickly orient yourself before diving into the deeper steps in the dedicated guide. If you’re starting fresh, test with a single-page sample to confirm destinations and image quality before proceeding with sensitive documents.
Troubleshooting connectivity and driver issues
If scans fail to route correctly, start with the basics: ensure the device is connected to the network, verify Wi‑Fi strength, and check that the correct user account is authorized for the destination. Update the printer driver or firmware, and confirm that your computer or mobile device is allowed on the network. Firewalls and security software can sometimes block scan transfers; temporarily disabling them (with caution) can help isolate the problem. If the issue persists, consult the manufacturer’s support site for model-specific steps and known issues. Scanner Check also recommends documenting error codes for faster support.
Best practices for quality scans
Keep the scanner glass clean; fingerprints and dust cause streaks or smudges that degrade readability. Align the page corners with the guides to avoid cropping. Use the proper lid or cover to prevent glare. For multi-page documents, use duplex scanning when available, and enable OCR if you need searchable text. Regularly calibrate the scanner if your device supports calibration routines, and run a quick test page after major changes to settings.
Security and privacy considerations when scanning from printers
Scanning sensitive documents requires attention to where you store and send files. Prefer encrypted transfer methods and avoid emailing sensitive material to untrusted addresses. If your printer stores scans temporarily, delete local copies after confirmation of transfer. For organizations, establish a documented policy for retention, access control, and secure disposal of scanned documents.
Quick-start checklist and next steps
Before you scan, confirm your destination, check the document and glass cleanliness, and ensure firmware and drivers are up to date. Run a quick single-page test to validate color, resolution, and OCR settings. Create a simple folder structure or cloud destination path to keep scans organized, and consider setting up automation rules for routing future scans to the right place.
Tools & Materials
- Printer with built-in scanner (all-in-one)(Ensure firmware is up to date.)
- Computer or mobile device on same network(Install needed drivers/apps if required.)
- USB cable (optional)(Use if scanning directly via USB.)
- Paper and cleaning cloth(Use clean, wrinkle-free sheets; wipe glass if needed.)
- Email account or cloud storage access(Have credentials ready for destinations.)
- Notepad for quick notes(Record settings that work well.)
Steps
Estimated time: 25-40 minutes
- 1
Power on and access the scan feature
Wake up the printer and navigate to the scan option on the control panel. If needed, open the companion app on your computer or mobile device to reach the same feature. This first step confirms the device is ready to receive and route scans.
Tip: If the screen is dim, wake the device by tapping any button. - 2
Connect the device to your computer or network
Confirm the printer is connected via USB or wireless network. Install or verify drivers on your computer, and connect to the printer in the scanner software. A stable connection prevents transfer failures during scanning.
Tip: Use a wired Ethernet connection for predictable performance in busy offices. - 3
Choose your destination
Select where to send or save the scan: email, folder on your computer or network, or a cloud service. Preconfigure a single destination if possible to speed up future scans.
Tip: If you plan multiple destinations, save them as favorites for quick access. - 4
Set basic scan parameters
Choose color mode, resolution, and file type. Start with 200–300 dpi for most documents, and switch to color for graphics or photos. Enable duplex scan if you have a multi-page document.
Tip: Prefer PDF for text; use PDF/A for long-term archiving. - 5
Prepare and place your document
Place the document face down on the glass with the top edge aligned to the guides. Ensure the page lies flat and is not curled. If duplex scanning, place the back page correctly for automatic feeding.
Tip: Avoid creases; straighten pages before scanning. - 6
Initiate the scan and verify
Start the scan and monitor progress on the display. Open the destination to confirm receipt, and inspect the first page for legibility and orientation. If needed, re-scan the page with adjusted settings.
Tip: If you notice skewed text, recenter and re-scan the page. - 7
Save and organize the file
Save to the chosen destination and name the file consistently (e.g., date_project_client). Create or update a local folder structure for easy retrieval.
Tip: Use descriptive filenames to speed up search later. - 8
Review quality and back up
Open the final file to confirm readability and accuracy. Back up to a secondary location or cloud service if needed. Document any presets used for future reference.
Tip: Run a quick OCR check if you need searchable text.
Common Questions
Can I scan from any printer or only models with built-in scanners?
Most all-in-one printers include scanning capabilities, but some basic printers do not. Check your model specs to confirm scanning support and whether you need additional software or a separate scanner.
Most all-in-one printers have scanning; stand-alone printers usually do not.
Do I need a computer to scan from a printer, or can I do it from a mobile device?
Many printers support scanning directly to email or cloud from their control panel or companion apps. A computer isn't strictly required, but having one can enhance control and storage options.
You can often scan directly from the printer or its app without a computer.
What file formats can I save scans as?
Common options include PDF, JPEG, TIFF, and sometimes searchable PDF. Choose PDF for text documents and images; use JPEG for photos when you need smaller files.
PDF and JPEG are typical; choose based on content.
How do I enable OCR to make scans searchable?
If your device supports it, enable OCR in the scan settings or in the companion app. This creates searchable text within PDFs and improves archiving.
Enable OCR in the scan options for searchable PDFs.
Why are my scans blurry or faint?
Check the document alignment, glass cleanliness, and resolution. Start with 200–300 dpi for text documents, and increase only if needed. Re-scan the page with adjusted settings.
Blurry scans usually mean misalignment or dirty glass.
What security considerations should I keep in mind when scanning?
Be mindful of destination security. Avoid emailing sensitive documents to untrusted addresses and ensure that saved copies are stored securely with proper access controls.
Carefully manage where scans go and who can access them.
Watch Video
Key Takeaways
- Use built-in scanner features to streamline workflows
- Choose destination before scanning to save steps
- Balance resolution with file size for efficient transfers
- Keep glass clean and documents aligned for best results
- Test with a single page before a large batch