Scanner to Text: A Practical OCR Guide for Documents
Learn how to convert scanned documents into editable text with OCR. This guide covers hardware, software, workflow, and tips to maximize accuracy and efficiency.

Goal: Turn scanned pages into editable text using OCR, making it easy to search, edit, and archive documents. You’ll need a scanner, a computer or mobile device, and OCR software or a cloud service, plus clean source documents and reasonable expectations for accuracy. According to Scanner Check, the most important step is selecting a solid OCR workflow that matches your document types.
What scanner to text means and how OCR works
Scanner to text refers to the process of extracting readable, editable text from scanned images using optical character recognition (OCR). OCR analyzes the shapes of printed or handwritten characters and converts them into digital characters that your computer can search, edit, and store. Modern OCR engines also try to preserve layout, fonts, and columns, so a multi-page report can look and feel like the original when converted to editable text. For readers of Scanner Check, the core idea is clear: scanning produces images, OCR interprets those images as text, and the quality of both steps determines accuracy. The better your source material and the more capable the OCR engine, the fewer corrections you’ll have to perform later.
In practice, you’re balancing hardware (the scanner), software (the OCR engine), and process (how you scan and review). A strong workflow minimizes manual edits while maximizing reliable text extraction. In 2026, many people combine on-device OCR with cloud-processing for speed and language coverage, but on-site options often give better privacy controls and lower data transfer costs. The Scanner Check team notes that starting with a clean, high-contrast scan dramatically improves recognition, especially for dense documents with mixed fonts.
Key factors affecting OCR accuracy
OCR accuracy depends on multiple factors, including image quality, document layout, and the OCR engine’s capabilities. Resolution is crucial: scanning at 300 dpi is usually sufficient for clean type, while 600 dpi helps with small fonts or fine print. Color vs grayscale vs black-and-white scans matter too; grayscale often yields better edge detection, whereas black-and-white can simplify processing for high-contrast text. Language, font variety, and the presence of columns or tables complicate recognition. OCR engines excel when they can detect the document’s structure—paragraphs, headers, and lists—so layout analysis is a valuable feature. Noise, skew, and page bends degrade accuracy. The Scanner Check analysis shows that investing in minor pre-processing (deskew, crop, and noise reduction) yields a bigger lift than chasing marginal improvements in OCR models alone.
Choosing hardware and software: a practical guide
Selecting the right scanner depends on your volume, page size, and mixed-document types. Flatbed scanners are flexible for non-standard media, while sheet-fed scanners excel at speed for large batches. If you frequently scan color photos or graphics, ensure your device supports color capture with uniform lighting. On the software side, you can choose open-source OCR engines for budget-conscious users or commercial solutions with advanced language packs, language detection, and better table recognition. Cloud-based OCR services offer convenient batch processing and API access, but they require data transfer and may raise privacy concerns. For many professionals, a hybrid approach—local processing for sensitive pages and cloud processing for bulk jobs—strikes a practical balance. The Scanner Check team recommends evaluating OCR accuracy on a representative sample of your documents before committing to a vendor or workflow.
Step-by-step workflow overview (high level)
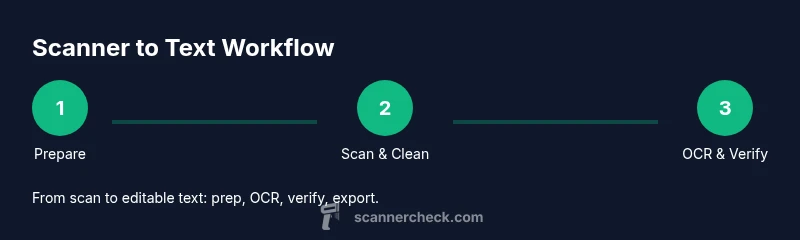
A robust scanner-to-text workflow typically follows these stages: prep and scan, pre-processing (image cleanup), OCR processing, post-processing (manual correction and layout refinement), and export/archiving. Each stage has best practices to reduce errors. Start with high-contrast, clean pages, then run OCR with the most suitable language and layout options. After OCR, verify a sample set of pages for accuracy and adjust settings if needed. Finally, export to your preferred editable formats and store a secure backup.
Common issues and how to fix them
Misrecognized characters often come from blur, skew, or low resolution. Handwriting, unusual fonts, or decorative elements can confuse OCR. If your results are noisy, try increasing resolution, enabling deskew and denoise filters, and enabling page segmentation modes that better match your document type. Tables and multi-column layouts usually lose structure unless the OCR engine supports advanced layout analysis. Inconsistent results across pages can be mitigated by processing documents in smaller batches with consistent settings. When accuracy remains an issue, performing targeted corrections on a representative subset can guide you to the right configuration and post-processing rules.
Security and privacy matter: if you’re scanning sensitive contracts or personal data, consider on-premises OCR or encryption-enabled workflows to minimize exposure. Regularly audit your pipeline and train staff on best practices for labeling scanned images and validating extracted text.
Data privacy, storage, and long-term archiving
OCR creates text data that can be indexed, searched, and backed up. Plan a retention policy that matches your compliance needs and organizational standards. Store sources (image scans) and extracted text in separate, secure repositories with access controls. Create metadata (dates, language, document type) to improve searchability. For long-term archiving, choose stable, widely supported formats (like plain text and PDFs with embedded text layers) and consider periodic format migrations to prevent obsolescence. Remember that OCR quality matters more for archival value than fancy features; prioritize durable, accessible text over perfect layout reproduction.
A practical note on the scanner-to-text journey
Embracing a repeatable workflow reduces surprises and saves time. Track your accuracy over time, compare engine versions, and document settings that consistently yield reliable results. The more you document your decisions, the easier it is to reproduce or adjust processes for new document types. This approach keeps you in control of the OCR process from scan to text, ensuring your digital archives stay usable for years.
Tools & Materials
- Scanner (flatbed or sheet-fed)(Prefer 300-600 dpi, color or grayscale, auto-feeder if available)
- Computer or mobile device(With enough storage for scans and text files)
- OCR software or service(Choose engine with strong language support and layout analysis)
- Quality test documents(Mixed fonts, spacing, and a few languages if needed)
- Cables and power supply(Keep the scanner powered and connected during sessions)
- Desk space and lighting(Even lighting reduces shadows and improves edge detection)
- Calibrator or test chart (optional)(Helps normalize brightness and contrast across scans)
Steps
Estimated time: 30-60 minutes per 20 pages
- 1
Prepare documents
Gather a representative batch of pages. Remove staples or paper clips, flatten pages, and ensure pages lie flat on the scanner glass. Clean digits and margins to reduce shadows that impair recognition.
Tip: Use a light weight or glass plate to flatten pages before scanning. - 2
Set scanning parameters
Choose resolution (300-600 dpi), color versus grayscale, and page size. Enable deskew and border cropping if available to minimize empty margins that OCR might misinterpret.
Tip: Higher resolution helps with small fonts but increases file size. - 3
Scan a test batch
Create a small sample set to test recognition across fonts and layouts. Verify that the text alignment and column structure are preserved.
Tip: Start with 2–4 pages before committing to a larger batch. - 4
Run OCR
Process the scanned images with your chosen OCR engine. Select the correct language, and enable layout analysis if handling multi-column documents.
Tip: If the engine offers multiple segmentation modes, test a couple to find the best fit. - 5
Review and correct
Proofread the extracted text against the original scans. Correct misrecognized characters, adjust stray line breaks, and fix any table or header misreads.
Tip: Keep a correction dictionary for recurring errors to speed future runs. - 6
Refine formatting
Adjust headings, bullets, and indentation to restore readability. Use layout-aware export options to preserve structure where possible.
Tip: Export to multiple formats (TXT for raw text, DOCX for editing, PDF with text layer for sharing). - 7
Export and archive
Save the final text in your preferred formats and back up both the source scans and the text. Use metadata to track version, language, and document type.
Tip: Create a consistent folder structure and naming convention for easy retrieval. - 8
Review periodically
Periodically re-run OCR on old archives with updated engines to improve accuracy as recognition technology evolves.
Tip: Schedule quarterly checks for critical documents.
Common Questions
What is meant by 'scanner to text' in practical terms?
It means extracting readable, editable text from scanned images using OCR. The goal is to turn physical pages into searchable digital text while preserving as much layout as possible.
Scanner to text means turning scanned pages into editable text using OCR software.
Which factors most affect OCR accuracy?
Key factors include image quality, resolution, language, font variety, and how well the document layout is preserved. Deskewing and noise reduction can have a big impact.
Accuracy depends on image quality, fonts, and layout. Clean scans help OCR a lot.
Can OCR handle handwriting?
OCR excels with printed text. Handwriting is much more challenging and often requires specialized ICR tools or manual transcription.
Handwriting is hard for OCR; printed text works much better.
What formats should I export to for editing?
Export to TXT for raw text, DOCX or RTF for editing, and PDF with a text layer for easy sharing and searching.
Export to text-friendly formats like TXT, DOCX, or searchable PDFs.
Is cloud OCR safe for sensitive documents?
Cloud OCR is convenient but can raise privacy concerns. Use on-premises or encrypted workflows for sensitive material.
Cloud OCR is convenient but may raise privacy concerns; use secure options for sensitive documents.
How can I improve long-term archiving of OCR text?
Store both the original scans and extracted text with metadata. Prefer widely supported formats and plan for format migrations over time.
Keep both scans and text with metadata; plan for long-term format changes.
Watch Video
Key Takeaways
- Start with clean, well-aligned scans.
- Choose OCR settings that match document structure.
- Validate accuracy on a representative sample before large batches.
- Export text in accessible formats and back up data.
- Regularly review and update your workflow to improve results.