What to Do If You Don’t Have a Scanner: Practical Guide
Learn practical, scanner-free methods to digitize documents using a smartphone, libraries, and services. This guide covers apps, privacy, formats, and step-by-step workflows to keep your paperwork digital and organized.

Goal: discover practical, step-by-step ways to digitize documents without a dedicated scanner. You’ll compare smartphone scanning, OCR-enabled apps, and local resources like libraries or print shops. By the end, you’ll know which method fits your needs and how to preserve image quality, with minimal equipment.
Why you might need a scanner when you don't have one
If you don’t own a physical scanner, you still have many capable ways to digitize documents. According to Scanner Check, the goal is to produce clear, searchable digital copies with minimal effort. In this guide, you’ll learn practical options, from using a smartphone to leveraging local services. This approach helps you stay productive without buying new hardware. Whether you’re capturing receipts, contracts, or notes, the right method can save time and reduce paper clutter. We’ll also discuss how to maintain privacy and control over your data when you don’t own a scanner.
Smartphone scanning: choosing the right approach
A smartphone can substitute for a scanner in most day-to-day tasks. Use the built‑in document capture features or an OCR-enabled scanning app to capture, crop, and enhance pages. Pay attention to lighting, steady hands, and alignment to avoid skewed images. For best results, scan on a flat, uniform surface, with the document parallel to the camera. Save outputs as PDF or high‑quality images, and enable OCR if you need searchable text. This approach is often fast, inexpensive, and sufficient for most personal and small‑business needs. As you read, consider how you’ll name and store files for quick retrieval later.
No-app options: library and print shop resources
If you don’t want to install apps, you can often access scanning services at libraries, coworking spaces, or local print shops. Many public libraries offer free or low-cost scanning workstations, sometimes with OCR software. Bring your document on paper or as a photo, and request a PDF or TIFF export. Community centers or business centers may also provide scanning kiosks. While these options require a visit, they can deliver higher image quality and authoritative handling for sensitive documents. If you only need a few pages, this route can be cost-efficient and private.
Quality considerations: lighting, perspective, and OCR accuracy
Image quality hinges on lighting and perspective. Even lighting reduces harsh shadows; avoid direct glare by placing the document at an angle to the light source. Keep the camera parallel to the page to minimize keystone distortion. When OCR is enabled, accuracy improves with higher resolution and clean typography. If you notice fuzzy text, re-capture at a higher resolution and crop tightly. Remember that some fonts, tables, and multi-column layouts may require manual corrections after OCR.
File formats and organization: PDFs, JPEGs, and OCR text
Digitized documents can be saved as PDFs, JPEGs, or TIFFs. For long-term archiving and searchability, PDFs with OCR text are generally the best choice. If you need to extract data, consider exporting OCR text to a TXT or DOCX file for editing. Structure your folders with clear, consistent naming conventions (e.g., year, document type, vendor). Backups are essential: store copies on local drives and in a trusted cloud service, with versioning enabled to recover from accidental changes.
Privacy, security, and data handling
Digitizing documents can expose sensitive information. Prefer private spaces when capturing documents containing personal data. Use secure apps, and review permissions and data‑sharing policies. If you’re scanning confidential files, avoid public networks and consider offline workflows when possible. After digitization, delete unneeded originals, and securely wipe local devices if they’re decommissioned. Keeping a clean, private workflow reduces risk while preserving accessibility.
Quick-start decision guide: choosing the right method
Start with the simplest option: use your phone’s built-in capture or a free scanning app for a single document. If you have multiple pages or sensitive information, consider a library or print shop for higher quality or privacy controls. For ongoing workflows, create a predictable naming scheme and decide on a standard output format (PDF with OCR) to minimize future editing. The goal is to balance speed, cost, and quality based on your needs.
Next steps: storage, naming, and backups
Organize scans with consistent naming and folder structure. Use descriptive names (date_documenttype_vendor) and store files in a dedicated folder. Enable automatic backups and keep a secure backup of the most important documents. Periodically review saved scans to remove duplicates and outdated copies. By establishing a repeatable workflow, you’ll shorten turnarounds and reduce stress when you need a copy quickly.
Common mistakes and how to avoid them
Avoid shaky captures by stabilizing the device and using grid alignment. Don’t rely on auto cropping alone; verify that the full page is visible and not cut off. Don’t ignore privacy—avoid capturing sensitive information in public spaces and review app permissions. Finally, don’t skip OCR checks; manually correct errors that OCR may miss, especially with faded text or unusual fonts.
Tools & Materials
- Smartphone or tablet with camera(Any recent device with autofocus works best)
- Free scanning app (OCR-enabled)(Install from your device's app store; enable OCR if you need searchable text)
- Access to computer or cloud storage(For saving PDFs and backups)
- Public library card or community print shop access(Useful for on-site scanning services)
- Optional: home printer with scan feature(Can be handy for occasional double-sided scans)
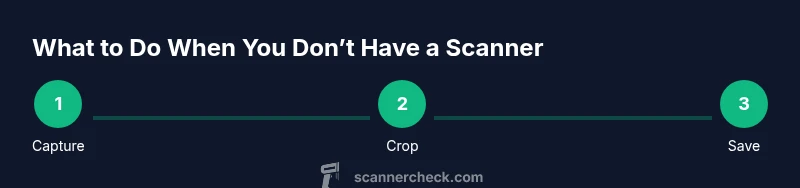
Steps
Estimated time: 25-40 minutes
- 1
Prepare the document and environment
Place the document on a flat, well-lit surface. Minimize shadows by using diffuse lighting and avoid reflections off glossy surfaces. Ensure the entire page is visible and free of folds before you begin.
Tip: If possible, use a neutral background and lock focus on your device to prevent blur. - 2
Capture the page with your device
Open your scanning app and capture the page, keeping the camera parallel to the document. Use a steady grip or a stand, and avoid moving during the shot to prevent distortion.
Tip: Enable a grid or edge-detection feature to help align the page precisely. - 3
Crop, straighten, and enhance
Review the captured image, crop to the page bounds, and straighten if needed. Apply any built‑in enhancement options (contrast, brightness) to improve readability.
Tip: Do not apply excessive sharpening—this can create artifacts. - 4
Run OCR and save as PDF
If you need searchable text, run OCR and export the document as a PDF. Check the text for misreads and correct obvious errors.
Tip: Compare the OCR text with the image for accuracy; fix typos before saving. - 5
Name, organize, and back up
Save the file with a descriptive name and place it in a well-organized folder. Create a backup on a second device or cloud service.
Tip: Use a consistent naming convention and folder structure for easy retrieval. - 6
Review privacy and security
If the document contains sensitive data, ensure you’re in a private space and minimize exposure to others. Remove originals when appropriate and securely handle backups.
Tip: Avoid public networks when uploading sensitive scans.
Common Questions
Can I really scan documents with just a smartphone?
Yes. Modern smartphones can capture high‑quality scans using built‑in features or a free app. For quick tasks, this is often faster and cheaper than buying a scanner.
Yes. A smartphone can scan most documents quickly with the right app and settings.
Will OCR on a phone be accurate enough for my needs?
OCR on phones is generally accurate for clear, standard text. Complex layouts or poor lighting may require manual corrections after export.
Phone OCR works well for simple text; expect a few corrections for tricky layouts.
What file format should I save the scans in?
PDF with OCR is the most versatile for documents and searchability. You can also keep high‑quality images like JPEGs for quick sharing.
PDF with OCR is usually best for documents, with JPEGs handy for sharing.
When should I use a library or print shop instead of my phone?
If you need higher quality, bulk scans, or privacy controls, libraries or print shops offer dedicated scanners and staff assistance.
Consider a library or print shop for higher quality or privacy needs.
How should I organize my digital copies?
Use a consistent naming convention and folder structure. Back up copies and remove duplicates to keep your library tidy.
Name files clearly, back up regularly, and prune duplicates.
Watch Video
Key Takeaways
- Choose the simplest method first: phone scan or library service.
- Maintain consistent file naming and secure backups.
- Use PDFs with OCR for searchable, long-term storage.
- Protect privacy when digitizing sensitive documents.
- Review and correct OCR text to ensure accuracy.