What to Do with Scanner Emerald: Practical Guide
Learn how to maximize Scanner Emerald with step-by-step setup, calibration, scanning workflows, and maintenance to achieve crisp scans and accurate OCR results.

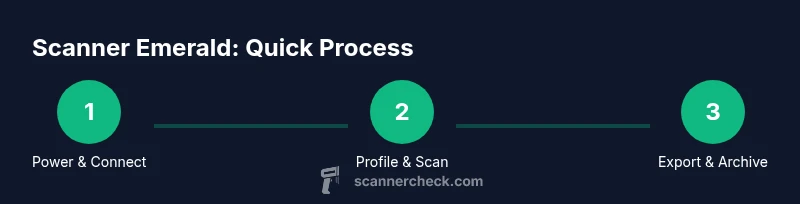
With Scanner Emerald, you will establish a reliable scanning workflow that covers setup, calibration, everyday document scans, and basic troubleshooting. You’ll configure the device for text and image captures, optimize OCR readiness, and maintain the scanner to keep outputs consistent. This quick-start outline points you toward practical steps you’ll expand on in the body blocks.
What Scanner Emerald is and why it matters
The Scanner Emerald is a compact, high-contrast document scanner designed for home, office, and field use. It supports color, grayscale, and black-and-white scans, with built-in OCR compatibility and network options. Understanding what to do with scanner emerald begins with knowing its strengths: fast batch scanning, reliable color reproduction, and easy integration with popular document workflows. According to Scanner Check, Emerald stands out for its efficient scan-to-cloud and local storage options, its user-friendly software, and its robust build for daily use. When you plan a scanning session, consider the content type, required file formats, and whether you need multi-page documents or single-page images. In practice, users rely on Emerald for digitizing receipts, contracts, and research notes, while maintaining privacy by selecting local storage or secure cloud destinations. This guide walks you through practical steps to maximize performance, from setup to routine maintenance, so you know exactly what to do with scanner emerald in real-world tasks.
Initial setup: unboxing, drivers, and firmware
Getting started with the Scanner Emerald begins with a quick, methodical setup. Inspect the box for the scanner, power adapter, USB cable, and any documentation. Ensure the power supply is correct for your region and connect the device to a computer or network as required. Install the latest drivers and firmware from the official website or bundled CD, if available. A successful setup improves reliability and reduces post-scan issues like misalignment or color drift. According to Scanner Check, keeping firmware up to date is a crucial step to ensure compatibility with OCR engines and cloud destinations. After installation, perform a basic alignment test using a standard calibration page and verify that scans appear sharp and the colors look natural. Finally, create a default scan profile for text documents to save time on future tasks. This foundation helps you approach the rest of the workflow with confidence and clarity about what to do with scanner emerald.
Everyday scanning workflows: documents, receipts, photos
Scanner Emerald excels in everyday digitization chores, from multi-page documents to receipts and even family photos. Start by selecting a profile: text documents in black-and-white or grayscale for clean OCR results, or color for charts and receipts that rely on color signatures. For receipts and business cards, consider lower resolutions to keep files small, while enabling OCR fields for keyword search. When scanning multi-page documents, use the automatic document feeder (ADF) if available and set the orientation to avoid upside-down pages. For photos and graphics, choose higher color depth and a higher DPI to preserve detail. A practical habit is to name files consistently, organize scans by project, and build a quick export routine to PDF or TIFF. These workflows demonstrate what to do with scanner emerald in typical day-to-day tasks and help you maintain a tidy digital archive for quick retrieval.
Color accuracy, resolution, and file formats
Color accuracy depends on both hardware and software settings. Start with a neutral, well-lit capture scene and avoid direct glare. For most text documents, 300-400 dpi provides crisp text without ballooning file sizes; for high-detail images, 600-1200 dpi preserves nuance but creates larger files. Export options commonly include PDF, JPEG, TIFF, and PNG. If you need searchable documents, ensure OCR is enabled and the resulting PDF includes embedded text; otherwise you’ll rely on an external OCR pass. Emerald’s color profiles can be tuned for standard, vivid, or grayscale output. It’s wise to test a representative sample page to confirm that the chosen resolution and format meet your needs. This ensures you’re doing what to do with scanner emerald for different content types while maintaining efficient storage and fast searchability.
OCR and text extraction: turning images into searchable text
Optical character recognition is the bridge between scanned images and usable text. Verify that the language pack you need is installed and select the correct language before scanning. For best results, scan text in clean, non-overlapping pages and ensure the text is not skewed or blurred. After scanning, review OCR results and correct obvious misreads, especially in titles, numbers, and names. If your workflow relies on searchable PDFs, enable the embedded text layer during export. Regularly test OCR accuracy with representative samples and adjust DPI and contrast settings as needed. Understanding OCR is essential for what to do with scanner emerald when turning physical documents into digital assets that are easy to search and index.
Maintenance and care: cleaning, firmware updates, storage
Routine maintenance keeps Emerald performing at its best. Clean the exterior and glass surface with a soft microfiber cloth; avoid harsh solvents. Periodically check and clean rollers if you notice feeding issues, and replace them according to the manufacturer’s guidance. Schedule firmware updates and driver refreshes to improve stability and compatibility with new OCR engines or cloud services. Store the device in a cool, dry environment when not in use, and power it down properly to extend its life. Regular calibration checks help prevent drift in color or alignment, ensuring consistent results. This section covers what to do with scanner emerald to preserve accuracy and longevity.
Troubleshooting common issues with Emerald
If a scan isn’t rendering correctly, start with a simple power cycle and re-check connections. For misfeeds, inspect the document path and clean the pickup rollers if needed. Color shifts can indicate outdated profiles or lighting changes; recalibrate with a fresh calibration page. OCR failures may stem from missing language packs or low DPI; install the appropriate language data and adjust the resolution. If you encounter persistent issues, consult the official support portal for firmware rollouts and compatibility notes. This step-by-step approach helps you quickly resolve common problems and keep scanning tasks on track, reinforcing what to do with scanner emerald when things go awry.
Security and privacy considerations when scanning sensitive documents
Scanning sensitive information requires careful handling. Use local storage if possible and enable encryption on any cloud destination you configured. Disable automatic uploading of scans to public networks, and set strong access controls for the devices and applications involved. Regularly review permission settings for sharing and export destinations, and consider redaction options for sensitive data before sharing. Finally, establish a routine for securely deleting scans after archiving or sharing, so you maintain control over your digital documents. This section reinforces secure practices for what to do with scanner emerald in privacy-conscious environments.
Tools & Materials
- Scanner Emerald(Ensure firmware is up to date and keep documentation handy)
- Power adapter / USB power(Use the included power supply or an adequately rated USB power source)
- USB cable (Type-C or Type-B, as applicable)(For connecting to computer or network hub)
- Computer or tablet with drivers(Install latest drivers and optional OCR software)
- Microfiber cleaning cloth(Keep glass surface free of smudges to maintain sharp scans)
- Calibration target or color reference sheet(Helpful for color accuracy checks)
- OCR software or scanning suite(Use bundled or third-party options for text extraction)
Steps
Estimated time: 20-45 minutes for a typical first run, 5-15 minutes for daily scans after profiles are set
- 1
Power on and connect
Connect the Scanner Emerald to a power source and your computer or network. Wait for the boot sequence to complete and verify the device is recognized by your scanning software. This initial connection is crucial for a stable workflow.
Tip: If the device isn’t recognized, try a different USB port or reboot your computer. - 2
Install firmware and drivers
Check for the latest firmware and driver updates. Install them following the on-screen prompts and restart the scanner if prompted. Updated software ensures compatibility with OCR engines and cloud destinations.
Tip: Back up any custom profiles before updating to avoid losing preferred settings. - 3
Create a scan profile
Open the scanning software and create a preferred profile for documents, receipts, or photos. Select color mode, resolution, and file format that suits typical tasks. This saves time and ensures consistency across scans.
Tip: Name profiles clearly (e.g., TextDocs_300dpi) to avoid confusion later. - 4
Place the document and adjust settings
Place documents face down on the glass or in the ADF, align the edges, and select the correct orientation. Choose the appropriate DPI and color mode for the content you’re scanning. Make sure the page is flat and free of folds.
Tip: For mixed content, scan a test page to confirm settings before a larger batch. - 5
Scan and review
Execute the scan and review the result in real time. Check for skew, blur, or color mismatches. If needed, rescans or adjust alignment and exposure settings.
Tip: Enable the preview pane to catch issues before exporting files. - 6
Export and run OCR
Export to your desired format (PDF, TIFF, or JPEG) and run OCR if not embedded. Verify the text searchability and correct obvious OCR errors in a sample page.
Tip: Use embedded text for PDFs whenever possible to enable fast search. - 7
Archive and organize
Save scans in a structured folder system, add metadata, and create backups. Consistent naming and tagging make later retrieval easier.
Tip: Automate naming using a date-based schema to keep files orderly.
Common Questions
Is Scanner Emerald compatible with macOS and Windows?
Yes. Emerald supports common operating systems via drivers and software. Install the appropriate driver package for your OS and verify recognition in your scanning app after installation.
Emerald works with both macOS and Windows; install the matching driver package to enable scanning.
Can I perform OCR in multiple languages with Emerald?
Emerald supports OCR in several languages when you install the corresponding language packs. Ensure the document language is correctly selected before scanning for best accuracy.
Yes, you can OCR in multiple languages by installing the right packs and selecting the language during scanning.
How do I calibrate colors for accurate output?
Use a calibration target or color reference sheet if available, and run a calibration from the software to adjust color profiles. Regular calibration helps maintain color fidelity.
Calibrate colors using a reference sheet and the scanner software to keep output accurate.
What should I do if the scanner doesn’t detect a page?
Check connections, reseat cables, restart the device, and verify the document path is clear. If problems persist, try a test page to test the feeder alignment.
First check connections and try a test page; reseat cables if needed.
Are there privacy risks with cloud exports?
Export to trusted destinations with encryption and access controls. Disable automatic uploads to shared networks and regularly review permissions.
Export only to trusted services with strong security and review permissions regularly.
Watch Video
Key Takeaways
- Set up a stable workflow with proper drivers and firmware.
- Choose scan profiles by content type to optimize quality and size.
- Enable OCR and verify text accuracy for searchable archives.
- Maintain the device with cleaning and regular updates to sustain performance.