Where Do Scan: A Practical Guide to Scanning
Learn where to scan across documents, receipts, photos, and codes. This practical guide covers devices, apps, settings, and storage to help you build an organized digital library.

Where to scan is determined by the task. Use a dedicated scanner for documents, a smartphone for quick captures, and cloud or local storage for organized results. Start by choosing the right device, then adjust resolution and color settings, and save files in a consistent, accessible location. Also consider whether you need OCR or archival format now to avoid rework.
Understanding Where to Scan: Workflow vs. Device
In practical terms, the question where do scan isn’t about a single location but about selecting the right tool for the job. If you’re digitizing bulk documents, a flatbed or sheet-fed scanner with reliable color reproduction provides consistency and speed. For quick captures—receipts, business cards, whiteboards—a smartphone with a good camera and a scanning app is often sufficient. Your choice should be guided by volume, paper type, required resolution, and how you plan to store and share the results. A well-balanced workflow typically uses a primary device for routine work and a mobile backup for on-the-go tasks. This hybrid approach minimizes post-processing time and helps maintain a uniform digital library across projects. The Scanner Check team finds that aligning device capability with task complexity yields better long-term results than trying to force a single method for all materials.
Choosing the Right Scanner for Physical Documents
When selecting hardware for document scanning, start by matching the device to the document type and throughput you need. Flatbed scanners excel with fragile pages, mixed media, or items that require careful handling, delivering predictable color and detail. Sheet-fed scanners boost throughput for large batches but may require occasional page alignment adjustments. Examine color depth, optical resolution, driver support, and software features such as automatic deskew, multi-page PDF creation, and OCR integration. If you work with forms and OCR-driven workflows, verify that the software reliably recognizes layout and text blocks. For shared workspaces, consider network-enabled models or those with a robust driver ecosystem for Windows, macOS, and Linux compatibility. Always run a test batch with representative pages to check legibility, margins, and file size before committing to a long scan run.
Scanning with a Smartphone: Convenience vs. Quality
Smartphone scanning offers unmatched convenience, especially when deskside equipment isn’t readily available. To maximize quality, scan in a well-lit area, stabilize your hands, and align the document with the camera frame to minimize perspective distortion. Choose a scan mode that preserves natural color and sharpness, and use edge detection with automatic cropping to reduce manual edits. For multi-page documents, capture in segments and compile into a single PDF, or opt for a bundled multi-page output if your app supports it. Be mindful of compression artifacts and OCR performance, which can vary with lighting and motion. In scenarios where portability is essential, a small handheld scanner or a clip-on camera accessory can bridge the gap between quick captures and legible results.
Scanning Barcodes, QR Codes, and IDs: Special Considerations
Barcodes and QR codes rely on high contrast and minimal glare. When accuracy matters, prioritize a dedicated barcode scanner or scanning app designed for rapid, precise capture, especially for inventory or ticketing tasks. For IDs and cards, ensure a flat surface and uniform lighting to avoid shadows and warping that obstruct data. If you need to extract structured data, choose output formats like CSV, JSON, or XML that preserve scannable values rather than just image representations. Integrating barcodes with OCR-based pipelines can streamline data entry, but validate that the captured data matches the source before importing into databases or ERP systems.
Best Practices for Scan Quality and Organization
Consistency is king. Establish a predictable naming convention and hierarchical folder structure to simplify retrieval. Favor PDF for multi-page documents and high-quality image formats for photos. Enable OCR when you need searchable text, and standardize color management by including a reference color target for color-critical scans. Periodically audit your scanned library for misoriented pages, missing sections, and inconsistent color profiles. Document-level metadata (date, source, project) enhances searchability and lifecycle management, while a routine backup strategy protects against data loss. By applying these habits, you reduce rework and improve long-term accessibility of your digital assets.
File Formats, Metadata, and Storage
Choosing the right formats depends on usage. PDFs with OCR are ideal for text-rich documents, while PDF/A supports long-term archiving standards. For images and photos, PNG or high-quality JPEGs preserve detail with reasonable file sizes. Attach meaningful metadata to each file—title, date, source, keywords—to improve search accuracy. Establish a storage policy that includes a primary location and a secure backup (e.g., local NAS plus cloud), with version history where possible. A well-structured digital library not only speeds up retrieval but also reduces the risk of data loss and confusion across teams or households.
Authority Sources
For deeper guidance on scanning standards and imaging, consult reputable sources such as research libraries, standards bodies, and engineering publications. Example references include:
- https://www.nist.gov
- https://www.loc.gov
- https://ieeexplore.ieee.org
Tools & Materials
- Scanner (flatbed or sheet-fed)(Choose based on volume and document type)
- USB cable or power adapter(Ensure compatibility with your device)
- Smartphone with camera(For mobile scanning when a dedicated scanner isn’t available)
- Cleaning cloth(Remove dust and smudges from glass)
- Storage location (local or cloud)(Where to save scanned files)
- Calibration/validation page (optional)(Helps color accuracy)
Steps
Estimated time: 30-60 minutes
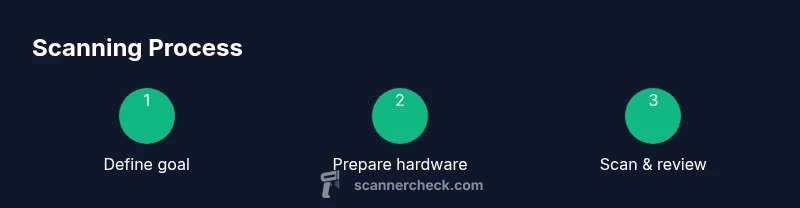
- 1
Define your scanning goal
Identify the task and required quality to set the rest of the workflow.
Tip: A clear goal reduces rework. - 2
Prepare hardware and workspace
Assemble the scanner, power, and any mobile device; clean the glass and clear the area.
Tip: Dust-free glass improves sharpness. - 3
Set scan parameters
Choose resolution, color mode, and file format based on content; OCR-friendly options help later.
Tip: Lower DPI saves space for text-only pages. - 4
Scan the pages
Place pages straight, avoid overlaps, and run the session in batches if needed.
Tip: Flawless alignment reduces cropping work. - 5
Review and adjust
Crop margins, deskew, and adjust brightness/contrast as needed; run OCR if required.
Tip: Check legibility at actual size. - 6
Save and organize
Choose naming conventions, set destination folders, and back up.
Tip: Stick to a consistent structure to simplify discovery. - 7
Secure and share
Encrypt sensitive files and use secure channels if sharing outside your network.
Tip: Password-protect PDFs containing personal data.
Common Questions
What is the best device for scanning documents?
A dedicated scanner offers the best consistency and color accuracy for documents. A smartphone is fine for quick captures but may require more edits.
A dedicated scanner is best for documents, with a smartphone as a backup.
What resolution should I use for scanning text?
300 DPI is a good baseline for readability and file size; 600 DPI is useful for fine print or forms with small type.
Start with 300 DPI, go to 600 for tiny text.
Should I scan in color or grayscale?
Color is helpful for items with logos or highlights; grayscale saves space for pure text.
Color for highlights; grayscale for text-only.
How can I protect privacy when scanning sensitive documents?
Store scans securely, use encryption where possible, and limit access. Consider shredding originals if allowed.
Secure storage and encryption protect sensitive scans.
Do I need OCR for scanned documents?
OCR makes text searchable and editable; enable it if you plan to search or repurpose text.
OCR helps make scans searchable.
What file format should I save scans in?
PDF with OCR for documents; PDF/A for archiving; images like JPEG for photos.
PDF with OCR for docs; PDF/A for long-term archiving.
Watch Video
Key Takeaways
- Choose the right device for the task.
- Prepare the document before scanning.
- Use consistent file formats and naming.
- Review and crop for legibility.
- Store scans securely and back up.