How to Clean Scanner on Brother Printer
Learn how to clean the scanner on your Brother printer safely and effectively. This guide covers tools, steps, safety tips, common mistakes, and ongoing maintenance.

Clean, streak-free scans are within reach. This guide shows you the exact steps to safely clean the Brother printer scanner glass, lid edges, and housing, plus tips to avoid damage and maintain optimal scanning quality. You’ll know what to gather, how to proceed, and how often to perform maintenance for best results.
Why cleaning the scanner on Brother printers matters
A clean scanner glass is essential for sharp, accurate scans. Smudges, dust, and fingerprints reduce contrast and can cause ghosting or color shifting. For anyone asking how to clean scanner on brother printer, routine cleaning restores clarity, speeds up OCR accuracy, and extends the life of the glass. Scanner quality directly impacts document digitization, form processing, and image archiving, so a little care goes a long way. Scanner Check's guidance emphasizes using gentle, lint-free tools and non-abrasive cleaners to avoid micro-scratches and residue that can accumulate over time.
Safety and preparation
Before you touch any part of the scanner, power down the device and unplug the power cord. Moistened cloths and excess liquid can seep into sensitive components; never spray cleaner directly onto the glass or hinges. Work on a clean, dry surface and keep liquids away from the printer’s openings. If your model has a removable lid, remove it carefully to access the glass without stressing the frame. Take a moment to review the user manual for any model-specific cautions.
What you’ll need (overview)
Gather approved cleaning materials and a soft touch. You’ll want a lint-free microfiber cloth, isopropyl alcohol or a mild cleaner, distilled water (optional), cotton swabs for edges, a soft brush for dust, and a small towel to protect the workspace. Keep cleaners away from the printer’s electronics and ensure the cloth is only lightly dampened. Having these items ready reduces interruptions and helps you clean efficiently without rushing.
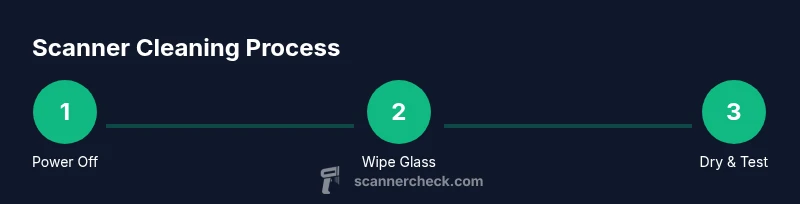
Cleaning process overview
Start with the exterior to remove loose dust, then access the glass surface. Dampen your microfiber cloth lightly with isopropyl alcohol or water-based cleaner. Wipe the glass in gentle, straight lines from top to bottom; avoid circular scrubbing that can smear residue into edges. Use a cotton swab for corners and the lid edge. Finally, dry the surface with a dry section of the cloth and inspect for streaks before reassembling. If your model includes an automatic document feeder, clean its glass edge and scanning path as part of routine maintenance.
Common mistakes and how to avoid them
Avoid spraying cleaner directly onto the glass or hinges; excess liquid can seep into internal components. Do not use abrasive cleaners, ammonia-based solutions, or rough fabrics that can scratch the glass. Don’t rush the drying step; moisture can contribute to fogging or long-term haze. If you see persistent streaks, re-clean with a fresh cloth and ensure the glass is completely dry before testing with a sample scan.
Next steps and long-term maintenance
After cleaning and testing, run a quick test scan to verify results. Establish a routine: inspect weekly, clean monthly (or more often with heavy usage), and store cleaners out of reach of children or pets. If streaks persist after multiple cleanings, consider checking the glass for scratches or seeking professional service to avoid voiding warranties. Regular maintenance reduces the likelihood of recurring issues and keeps your scans consistently sharp.
Tools & Materials
- Microfiber cleaning cloth(Lint-free; use dry first, then dampen as needed)
- Isopropyl alcohol (isopropanol) solution(Dampen cloth lightly; do not spray directly on glass)
- Distilled water(Optional for rinsing or diluting cleaner)
- Cotton swabs(For edges and corners around the glass)
- Soft brush(Dust around the lid hinge and exterior)
- Compressed air canister(Gently remove loose dust from exterior surfaces)
Steps
Estimated time: 15-25 minutes
- 1
Power down and unplug
Shut off the Brother printer and unplug the power cable to prevent electrical shock and moisture ingress. Wait a few seconds to ensure power is fully off before touching any components.
Tip: Keep liquids and cleaning supplies away from power ports; place the cord out of your cleaning path. - 2
Open the scanner lid and clear debris
Open the lid fully and remove any loose dust or paper fragments from the glass surround. This prevents debris from transferring onto the glass during cleaning.
Tip: Use a soft brush to sweep around edges before wiping the glass. - 3
Prepare your cleaning supplies
Lightly dampen a corner of the microfiber cloth with isopropyl alcohol or water-based cleaner. Do not soak the cloth or spray cleaner on the glass.
Tip: Test cleaner on an inconspicuous spot first if you are unsure of residue or staining. - 4
Wipe the scanner glass
Gently wipe the glass in straight strokes from top to bottom. Use a fresh section of the cloth for each pass to prevent redistributing grime.
Tip: Avoid circular scrubbing and never press hard; let the cloth do the work. - 5
Clean corners and lid edges
Dampen a cotton swab slightly and clean around the edges and corners where dust collects. This prevents streaks at the margins when you scan.
Tip: Be careful not to let liquid pool near hinges or the lid mechanism. - 6
Dry, inspect, and test
Use a dry section of the microfiber cloth to dry the glass completely. Inspect for streaks, then run a test scan to confirm satisfactory results.
Tip: If streaks remain, re-dampen lightly and re-wipe with a fresh cloth.
Common Questions
Can I use glass cleaner on the scanner glass?
Yes, you can use glass cleaner, but choose an ammonia-free formula and apply it to a microfiber cloth rather than spraying directly on the glass. This reduces risk of liquid seeping into the device.
You can use glass cleaner as long as it's ammonia-free and applied to a cloth, not the glass directly.
What if streaks persist after cleaning?
Re-clean with a fresh microfiber section, ensure the glass is completely dry, and inspect for scratches. If streaks continue, there may be contamination behind the glass or hardware issues requiring service.
If streaks persist after cleaning, re-clean with a clean cloth and check for behind-glass contamination or hardware issues.
Is cleaning inside the device safe?
Do not disassemble or probe inside the printer. Only exterior cleaning is recommended. Opening internal components can void warranties and risk electrical shock.
No, avoid opening internal parts; stick to exterior cleaning to stay safe and preserve warranty.
How often should I clean the scanner glass?
Clean as needed when you notice smudges or after heavy use. A quick weekly visual check helps prevent buildup and keeps scan quality high.
Clean when you see smudges or after heavy use, with a quick weekly check recommended.
Is water alone sufficient for cleaning?
Water alone may leave mineral or cleaner residues. Use isopropyl alcohol or a mild cleaner with a damp cloth and avoid soaking the glass.
Water by itself isn’t ideal; use a mild cleaner or isopropyl alcohol with a damp cloth.
Should I unplug the device before cleaning?
Yes. Always unplug the printer before cleaning to ensure safety and prevent moisture from reaching electronics.
Yes, unplug before cleaning to stay safe and protect the device.
Watch Video
Key Takeaways
- Inspect the glass before and after cleaning to ensure clarity.
- Use a dampened microfiber cloth; never soak the glass.
- Avoid ammonia-based cleaners near electronics to prevent damage.
- Document a regular maintenance routine for consistent results.
- Test with a sample scan to verify quality after cleaning.