How to Make Scanner Auto Enter: A Practical Guide
Learn how to configure barcode scanners to automatically send Enter after each scan. This educational guide covers suffix options, compatibility, testing, and deployment for reliable data capture across POS, inventory, and more.

If you’re asking how to make scanner auto enter, the quickest path is to enable an Enter suffix (CR/LF) after each scan. This makes the device emulate pressing the Enter key, sending the scanned data followed by a newline to your software. The exact steps vary by model, but the general approach is consistent across USB HID and Bluetooth scanners.
What auto-enter means for scanners
Auto-enterment refers to a configuration on barcode scanners where the device appends a trailing keystroke, usually Enter, after sending the scanned data. This behavior makes the software treat each scan as a complete input action, similar to a user pressing the Enter key. For busy environments—retail checkouts, warehouse docks, or lab stations—auto-enter reduces manual taps and speeds up data capture. According to Scanner Check, standard scanners can typically send a CR, LF, or CRLF sequence as the suffix, depending on the model and firmware. For many teams, the practical benefit is clear: form submissions fire automatically, records are created with minimal delay, and the risk of partial or duplicated data drops is reduced. However, it’s essential to ensure the target application can handle a trailing newline without triggering unwanted actions. If you’re exploring how to make scanner auto enter, assess whether your software expects a newline to signal a new record or simply a string followed by a keystroke. The right configuration often comes from matching the scanner suffix to the host app’s expectations.
How barcode scanners emulate keyboard input
Today’s barcode scanners largely act as HID keyboards or Bluetooth keyboards. When a code is scanned, the device translates the barcode pattern into a stream of ASCII characters and injects them into the active input field on the host. The last event is typically a keystroke for Enter or a CR/LF sequence. This keyboard-emulation approach is why a suffix setting works so well: it guarantees the data ends with a clear boundary that the application can interpret as a new entry. Because most software accepts plain text followed by a newline, you can usually enable Enter suffix without modifying the underlying data format. It’s wise to verify that the target form or database field accepts the trailing newline and does not truncate or alter the data due to newline handling. The key takeaway is that the suffix acts as the signal, not the data itself, so it should be simple and predictable across devices.
Core methods to enable Auto Enter
There are two broad strategies: the Enter suffix method (the most common) and a non-printing key configuration. With the Enter suffix, you configure the scanner to append a CR, LF, or CRLF after every scan. Some devices expose this option via a dedicated suffix barcode, while others use vendor software to set the feature. In practice, most users select CRLF because it most closely resembles a Windows newline and tends to be compatible with a wide range of forms and data-entry fields. For Unix-native apps that expect just LF, you may choose LF. The choice hinges on the software’s newline interpretation, and the safest approach is to test across your typical devices and apps. If you cannot find a suffix option, check for a “suffix code” or “end-of-scan” setting in the manual or vendor utility, and confirm firmware compatibility. The objective is to ensure every scan ends with a predictable boundary that your app recognizes as a complete record.
Choosing the right suffix: CR, LF, or CRLF
CR, LF, and CRLF are control characters that signal a newline in different environments. CR (carriage return) returns the cursor to the start of the line, LF (line feed) advances to the next line, and CRLF combines both actions for a full Windows-style newline. If your application expects a Windows-style newline (most Windows-based forms, Excel sheets opened in Windows environments, or many POS systems), CRLF is usually the safest choice. If the target form handles a single character well, CR or LF may suffice. When selecting, test in the actual field type and UI controls you use during daily work. The goal is a clean, single-scan submission that doesn’t require extra keystrokes or cause duplicate submissions.
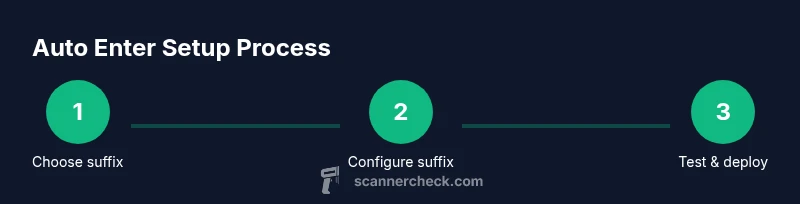
Step-by-step configuration guide for common interfaces
Configuring a scanner to auto-enter involves a few core steps, which are similar across brands but may use different terminologies. First, access the scanner’s configuration mode—this is typically done by scanning a built-in configuration barcode from the user manual or by using vendor-provided software. Next, locate the suffix or end-of-scan option and select the desired suffix (CR, LF, or CRLF) and enable it. Finally, save the changes and power-cycle the device if required. If your scanner supports a per-application profile, consider creating a profile that applies to the target software so other apps aren’t affected. Remember to verify the host device recognizes the suffix correctly by testing in the real form or field you will use: a simple notepad test is often enough to confirm proper behavior. For those using multiple devices, labeling each profile with a descriptive name helps prevent cross-device mix-ups when rolling out the configuration to the team.
Testing in real-world workflows
Testing should mirror the actual workflow to ensure reliability. Start with a simple text editor (Notepad, TextEdit) to confirm that a scan writes the code and the newline triggers a new line. Then test in the target application: a POS screen, an inventory management form, or a label printer software input field. Conduct multiple scans in quick succession to assess consistency and latency. Compare environments with wired and wireless devices to ensure stable performance. If you notice inconsistent endings or data truncation, recheck the suffix configuration and firmware version. Document the steps taken in your test plan so that others can replicate the checks.
Troubleshooting common issues
If scans end without a newline, verify that the chosen suffix is supported by both the scanner and the host app. Some forms may require a specific field focus or a particular input mode; ensure that the input field is active and ready to receive data before scanning. If the scanner continues to emit data but misplaces the line break, try switching between CR, LF, and CRLF to identify compatibility. In environments with multiple scanners, confirm that each device has its own unique profile and that the host doesn’t override settings due to a shared USB port or misconfigured baseline. Firmware updates can fix bugs related to end-of-scan handling, so check the vendor site for the latest releases. Finally, ensure your application does not auto-submit on partial data, which could cause duplicate records when the suffix arrives.
Best practices for reliability and security
Establish a clear policy for suffix usage across devices and departments. Use dedicated profiles per device to minimize cross-device interference, and document the exact suffix setting for future audits. Keep firmware updated to ensure compatibility with modern operating systems and apps. If you handle sensitive data, consider restricting configurations to local terminals rather than shared workstations to reduce exposure risk. Many organizations also implement a brief training for staff on how to test new settings before full deployment, ensuring that everyone remains aligned on the expected workflow.
Tools & Materials
- Barcode scanner(Any USB HID or Bluetooth scanner compatible with your host device)
- Host device(PC, POS terminal, or tablet with USB/Bluetooth support)
- Wired USB cable or Bluetooth pairing setup(Used to connect the scanner to the host device)
- Test form or input field(Notepad/TextEdit or the target POS/inventory app to verify suffix)
- Scanner manual or vendor software(Helpful for firmware updates or advanced configuration)
Steps
Estimated time: 30-90 minutes
- 1
Open the scanner configuration interface
Access the device's built-in configuration by scanning the setup barcode from the manual or launching the vendor software. This opens the settings where you can adjust end-of-scan behavior.
Tip: If you can’t locate the configuration barcode, download the vendor’s configuration utility to access settings. - 2
Select the suffix option
Navigate to the End-of-Scan or Suffix section and choose Enter or CR/LF as the suffix to append after every scan.
Tip: Some devices use a scalar value (e.g., 0x0D 0x0A) instead of labeled options; use the closest match available. - 3
Choose CR, LF, or CRLF
Decide which suffix variant to send: CR, LF, or CRLF. Align with the host app’s newline expectations to avoid misreads.
Tip: Prefer CRLF for Windows-based apps; choose LF if your environment is Unix-like. - 4
Save changes and restart if required
Store the new setting and, if the device requires, power-cycle to apply the change.
Tip: A quick restart guarantees that the new suffix is active across all sessions. - 5
Reconnect the scanner
Reconnect the scanner to the host device to ensure the new setting takes effect in the active session.
Tip: If using Bluetooth, re-pair the device to refresh the connection profile. - 6
Test with a simple input
Open a text field and perform several scans, watching for the trailing newline after each code.
Tip: Run multiple trials with short and long codes to verify consistent termination. - 7
Test in target apps
Repeat tests in the actual POS, inventory, or data-entry forms to confirm compatibility.
Tip: Try edge cases like long codes, special characters, and rapid consecutive scans. - 8
Document and share the profile
Save the final settings as a profile and share it with teammates to ensure consistent rollout.
Tip: Label profiles clearly (e.g., 'AutoEnter-CRLF-HQ') for future reference.
Common Questions
What is an Enter suffix and why do I need it?
An Enter suffix is a trailing keystroke (typically Enter or CR/LF) appended after a scanned code. It signals the host app that the entry is complete, allowing immediate submission or movement to the next field.
An Enter suffix is the trailing keystroke sent after a scan, signaling completion to your app.
Will auto-enter work with all apps?
Most input fields in standard forms accept a trailing newline, but some specialized software may handle input differently. Always test in your target form.
Most common forms accept it, but test in your target app to be sure.
CR, LF, or CRLF—which should I choose?
Choose based on the software’s newline handling. CRLF is common for Windows apps; CR or LF may be better for Linux/Unix or simple input fields.
Pick the suffix that matches what your app expects; test with real forms.
How do I disable auto-enter after a scan?
Return to the scanner’s configuration and remove or reset the End-of-Scan suffix to none. Save changes and restart the device if needed.
Turn off the suffix in the settings and restart if required.
What if multiple scanners are on the same PC?
Create individual profiles per device and ensure each is mapped to the correct app or input field to avoid cross-device conflicts.
Use separate profiles so each scanner behaves correctly in its app.
Can I apply auto-enter to non-barcode scanners?
Auto-enter suffix is typically specific to input-capable devices like barcode scanners; other devices may require different integration methods.
Usually limited to input devices like barcode scanners.
Watch Video
Key Takeaways
- Identify the correct suffix for your app before changing settings
- Test across your busiest workflow to ensure reliability
- Document the final settings for future audits
- If issues arise, revert quickly to no suffix