How to Make a Scanner Default: Step-by-Step Guide for 2026
Learn how to make a scanner default across Windows, macOS, and Linux with clear steps, troubleshooting tips, and best practices from Scanner Check.

Set a default scanner so every scan goes to your preferred device unless an app overrides it. This quick answer previews what you’ll accomplish: identify your OS defaults, choose your scanner, test with multiple apps, and verify consistency. The guide below covers Windows, macOS, and Linux with practical steps and testing tips. In practice this saves time and reduces mis-scans.
What does it mean to set a default scanner?
Setting a default scanner means your operating system automatically routes every scan request to a chosen device unless an application overrides it. This simplifies workflows, reduces mis-scans, and helps protect sensitive documents from ending up on the wrong hardware. If you’re wondering how to make scanner default on your computer, this guide provides practical steps for Windows, macOS, and Linux. According to Scanner Check, establishing a trusted default improves consistency and saves time in everyday scanning tasks. Remember: some apps offer per‑app overrides, so you can still select a different scanner for a specific program when needed. The process generally requires up-to-date drivers and a connected scanner, but switching defaults is usually a quick setting change in your OS. In the following sections, you’ll find platform-by-platform guidance, plus tips for testing, troubleshooting, and maintaining your scanner defaults for secure, reliable operation.
Why this matters: a stable default reduces variability in image quality, color profiles, and OCR workflows. For teams, consistent defaults prevent confusion and ensure capture flows align with policy. Be aware that vendor software can sometimes override OS defaults, so keep an eye on both system and per‑app settings as you implement changes.
How defaults are stored and how apps use them
Defaults live in different places depending on your operating system. Windows stores scanner choices in system settings and sometimes in the registry for legacy configurations. macOS uses a combination of system preferences and individual application preferences (and the Image Capture app often plays a central role in scanning workflows). Linux variants rely on SANE and CUPS, with per-user configuration files in home directories. Applications themselves may offer per‑app overrides, which can supersede the system default when you explicitly choose a different source in the scan dialog. Understanding where the default lives helps you troubleshoot when a new scanner is installed or when you update drivers. If a device disappears from the default list after a driver update, re-scan for hardware changes and reapply your preferred default. The common thread across platforms is that the default is a convenience setting that aims to streamline scanning while preserving user control over device selection.
Tip: Create a quick note of your chosen default name so you can verify it across OS updates or hardware changes.
Testing your default scanner: quick checks
After you set a default scanner, you should test it with several apps to confirm the change propagates correctly. Start with a basic scan from a familiar program, noting which device is selected and where the output is saved. Then try a scan from a second app to see if the same device is used automatically. If an app prompts you to choose a device, that means the app is using its own override rather than the OS default. If you notice mismatches, re-open the defaults panel and reselect the preferred scanner, then perform another round of tests. For teams, create a short checklist and run a batch test that includes emailing a document, saving a PDF, and exporting to a cloud service. Testing helps prevent surprises when you deploy scanning workflows across multiple users or workstations. Keep a record of the sequence you used to change the default, so you can reproduce it or revert if needed.
Pro-tip: always test with at least two apps you commonly use (e.g., email client and a PDF editor) to ensure consistent behavior across environments.
Windows: system defaults and scanning apps
On Windows, the scanner default typically lives in Settings > Bluetooth & devices > Printers & scanners (path may vary by version). Open the page, locate your preferred scanner, and choose Set as default. You may also see a toggle labeled Let Windows manage my defaults; turning that off helps ensure your manual choice stays active. Some apps use their own scanning dialog and ignore the system default, so you may need to select the device there as well. When you add a new scanner, Windows might install a driver and then prompt you to set it as default; verify the change, and then run a test scan from several programs such as Microsoft Paint or Windows Scan to confirm consistency. If problems occur after a driver update, re-run the hardware detection and re-apply the default.
Quick tip: disable “Let Windows manage my defaults” to lock your choice across all apps.
macOS: Image Capture and per-app settings
macOS users often rely on Image Capture for scanning tasks. Connect your scanner, open Image Capture, and confirm which device is in focus. In Vector apps like Preview or Adobe Acrobat, use the Scan dialog to select the scanner—if the app defaults to another device, you may need to set its own preference to your desired device. For automatic workflows, set Image Capture as the default handler for scans and verify that new documents are saved to the expected folder. If you upgrade macOS or install new hardware, re-check both System Settings > Printers & Scanners and Image Capture to preserve consistency. Proactively testing with multiple apps helps catch edge cases where per-app overrides kick in.
Pro-tip: keep a small reference sheet of your preferred scanner names and model numbers to speed up reconfiguration after major OS updates.
Linux: SANE, CUPS, and per-user defaults
Linux defaults are typically managed via SANE and CUPS, with distro-specific paths to change defaults. After connecting a scanner, check supported devices with the sane-find-scanner or scanimage commands. Per-user defaults can live in your home directory under .config or .sane, while system-wide defaults might reside in /etc/sane.d. Since distributions vary, consult your distro’s docs to locate exact files to edit, then restart the relevant services or log out/in to apply changes. If you use multiple scanners, consider creating a per-user profile that specifies the preferred device and ensures consistent behavior across sessions. Remember to re-test after any driver updates or kernel changes, as hardware mappings can shift.
Note: When working in containers or virtual machines, ensure the host OS defaults propagate to the guest environment.
Common pitfalls and best practices
Even with the best intentions, defaults can drift. Common pitfalls include leaving the OS to manage defaults, which can revert after restarts or updates, or assuming all apps respect the system setting. Best practices include testing across multiple apps, keeping drivers current, and documenting the exact steps used to set the default. When possible, use a single point of truth (the OS default) and minimize per-app overrides. If you work in a team, share the exact default scanner model you use and create a standard operating procedure for re-application after updates. Finally, schedule periodic checks (every OS or driver update) to ensure the default remains intact and functional.
Pro-tip: write changes to a brief, accessible document so new users can reproduce the setup quickly.
Authority sources
- Official Windows support and setup guidance: https://www.microsoft.com/en-us/windows
- Apple Support for macOS scanning and Image Capture workflows: https://support.apple.com
- Cybersecurity and safety guidance from a government authority: https://www.cisa.gov
Tools & Materials
- Admin access on the target computer(Necessary to modify system defaults)
- Connected scanner(s) with latest drivers(Ensure drivers are up-to-date before changing defaults)
- Optional driver updates/installer package(Use when the OS requests new drivers during setup)
- Backup of current settings or system restore point(Safer rollback if something goes wrong)
- Notes documenting current defaults(Helpful for reverting or auditing)
Steps
Estimated time: 25-40 minutes
- 1
Open the OS defaults panel
Navigate to the area of your operating system where default apps or devices are managed. Use the search function if the menu paths are hard to locate (e.g., Windows: Default apps, macOS: Printers & Scanners, Linux: SANE settings).
Tip: Use the OS search bar to quickly locate the defaults section. - 2
Select your scanner as the default
From the list of connected scanners, pick your preferred device and set it as the default for scanning. If a toggle exists to lock defaults, switch it off to prevent automatic overrides.
Tip: If you see multiple entries for the same device, remove the older one to avoid confusion. - 3
Test a basic scan in at least two apps
Run a simple scan from two different applications to verify the selected device is used consistently. This helps reveal per‑app overrides.
Tip: Choose apps with different scan dialogs to catch edge cases. - 4
Check per-app defaults and overrides
If an app prompts for a device, check its own settings and align them with the OS default or choose to keep the app override only where necessary.
Tip: Document any app-specific changes. - 5
Update drivers if needed and re-test
After driver updates or OS upgrades, re-check the default and perform another round of tests to ensure ongoing consistency.
Tip: Restart relevant applications after driver changes. - 6
Create a quick backup of the new defaults
Save a note or export configuration if your OS provides an export option for defaults. This makes rollback easy.
Tip: Store the backup in a known, shared location. - 7
Document the steps for future changes
Record the exact navigation path, device name, and test results so you can reproduce the setup later or train others.
Tip: Include OS version and scanner model for future reference. - 8
Review security and privacy considerations
Ensure that the default workflow aligns with your organization’s data handling rules, especially for sensitive documents.
Tip: Limit exposure by keeping default destinations from untrusted apps.
Common Questions
What does setting a default scanner affect?
It makes your chosen scanner the primary device for scans in most apps. Some programs may override this with their own settings.
Setting a default scanner makes your chosen device the primary option for scans in most apps, though some programs can override it.
Can I set different defaults for different OS users?
Yes, many OSes support per-user defaults. Check user profile settings or group policies for shared machines.
Yes, you can often set defaults per user; look under user settings or policies on multi-user machines.
What if I can’t change the default?
Verify drivers are up to date, check for app overrides, and ensure you have admin rights. Reboot or re-login if necessary.
If you can’t change it, update drivers, check app overrides, and ensure you’re using an admin account. A relogin may help.
Do I need to reboot after changing defaults?
Usually no, but restarting affected apps or the OS can help ensure the new default is recognized.
Usually you don’t need a reboot, but restart apps or log out and back in to be safe.
Which apps respect OS defaults?
Most scanning apps follow OS defaults, but some include their own preferences that override the system setting.
Most apps use the OS default, but some have their own scan settings that can override it.
How can I revert to a previous default?
Open the defaults panel again and reselect the old scanner, then run tests to confirm. Keep notes for easy rollback.
Open the defaults again, choose the previous scanner, and test to confirm. Keep a quick rollback note.
Watch Video
Key Takeaways
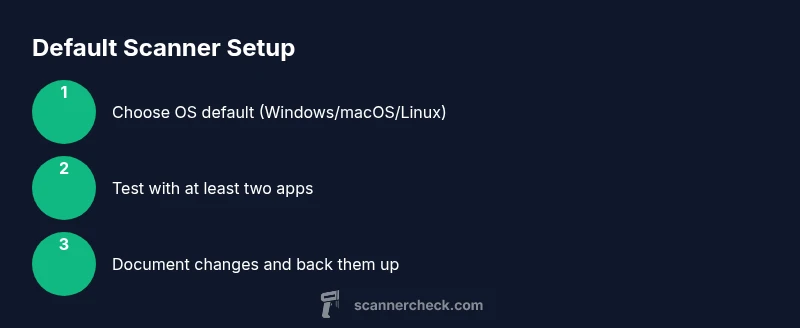
- Identify OS default location and set your scanner.
- Test scans across several apps to confirm consistency.
- Keep drivers updated and re-test after OS updates.
- Document the steps for future changes.
- Consider per-app overrides only when necessary.