How to Scan for Corrupted Files: A Practical Guide
Learn practical steps to detect corrupted files, verify integrity with checksums, and repair data across Windows, macOS, and Linux. Includes tools, steps, and safety tips.

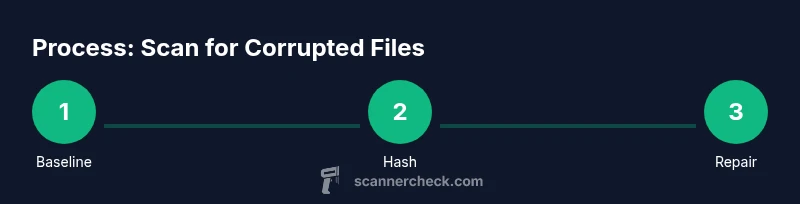
By following this step-by-step guide, you will learn how to scan for corrupted files across Windows, macOS, and Linux using built-in tools, checksums, and trusted utilities. You’ll confirm integrity, isolate affected data, and outline effective repair strategies. The approach covers common file types, removable media, and backup scenarios, plus practical safety practices.
What corrupted files are and how they happen
Corrupted files are data that cannot be read correctly or that contain unexpected, invalid content. They can appear as garbled text in a document, a photo that won’t open, or a database row that reports checksum errors. In practice, corruption undermines trust in your data and can propagate if backups or shares rely on the affected file. According to Scanner Check, corrupted files can arise from disk errors, improper shutdowns, sudden power loss, software bugs, or malware activity. Understanding the root causes helps you pick the right prevention and repair tactics. In this section you’ll learn how corruption manifests, why it matters, and how to structure a reliable scan workflow that catches problems early while minimizing disruption to your work. The information here is presented with practical steps you can apply immediately on common platforms. Scanner Check’s perspective emphasizes caution, verification, and repeatable methods so you can protect critical data.
Quick health checks you can run before deep scans
Before committing to heavy diagnostics, you can perform quick health checks that reveal obvious issues without specialized tools. Start with a plain file listing to spot unusual sizes or timestamps, then move to built-in utilities for surface problems. On Windows, run a basic disk check scheduled during a maintenance window; on macOS, use Disk Utility to perform First Aid on your drives; on Linux, examine system logs for disk-related errors and verify mounted filesystems. These steps are low-risk, fast, and often uncover root causes such as bad sectors, loose cables, or a failing drive. If you notice frequent inconsistencies in multiple files or folders, prepare for a deeper integrity check across the system. This staged approach keeps you in control and minimizes downtime while you build a reliable baseline, a tactic Scanner Check endorses for long-term reliability. The goal is to create a repeatable process you can trust during audits and routine maintenance.
Checksums and hashes: the backbone of integrity verification
Checksums and cryptographic hashes help you verify that a file is exactly what it should be. By comparing the hash value you compute now with a known-good value, you can distinguish between accidental corruption and intentional modification. In practice, generate a hash with a trusted tool, store it securely, and re-check after any transfer, backup, or edit. For cross-platform workflows, you can use built-in commands such as Get-FileHash or certutil on Windows, shasum or sha256sum on macOS and Linux, and third-party GUIs if you prefer a point-and-click approach. The key is consistency: use the same hash algorithm for all checks and repeat the process when you suspect an issue. Scanner Check recommends keeping a small catalog of trusted file hashes for critical data and documenting changes to preserve traceability.
Native OS options for file integrity checks across Windows, macOS, and Linux
Windows users can start with CHKDSK and System File Checker (sfc) to validate disk health and system files. macOS users leverage Disk Utility's First Aid to verify and repair volumes. Linux users inspect filesystem logs, unmount when possible, and run fsck on unmounted partitions. Each platform offers a practical, built-in way to surface corruption without installing new software. The recommended workflow compares results from at least two methods and from multiple disks or partitions when you suspect systemic problems. This cross-OS approach helps ensure you aren't chasing false positives due to transient I/O hiccups. Remember to backup before performing any repair operations, especially on partitions with sensitive data. Scanner Check suggests aligning tests with your organizational change control to avoid unplanned downtime.
Third‑party tools for deeper scans and targeted checks
Sometimes built‑in tools aren't enough, especially for large archives, databases, or mixed media. In those cases, consider reputable third‑party utilities that focus on integrity verification, disk health, and data recovery. Look for tools that support robust hashing, sector-level scans, and non-destructive read modes. When evaluating options, check for regular updates, clear documentation, and a safe testing mode. Use these tools on a non-production copy of the data first if possible. The goal is to triangulate evidence of corruption, not to over-interpret ambiguous results. Scanner Check's guidance emphasizes cautious experimentation and verified backup copies before attempting repairs.
Interpreting scan results: what you might see and what it means
Results can vary by tool and platform, but common signals include unreadable sectors, mismatched checksums, or files flagged as corrupted by a utility. Unreadable sectors usually point to hardware issues, while checksum mismatches indicate data that changed after it was created. If a critical file shows corruption, don’t rush to overwrite it; first determine whether it can be replaced from a known-good source or restored from a recent backup. In some cases, partial file damage can be repaired with vendor tools or data recovery services. Always document the findings and prepare a remediation plan that preserves as much good data as possible. The Scanner Check team emphasizes deliberate validation and transparent reporting to avoid cascading data loss.
Practical strategies to repair or restore corrupted files
Repair options depend on the file type and availability of backups. For documents and media, restore from a verified backup or re-download from the official source if possible. If an original file can't be retrieved, try a repair utility that targets the specific format, or contact the vendor for an official fix. For databases, rely on transaction logs and backups, and consider consulting a data integrity specialist for complex recoveries. In all cases, verify the repaired file with a new hash check and run a secondary scan to confirm the issue is resolved before proceeding. Scanner Check advises keeping a transparent changelog of repairs to simplify audits.
Preventing future corruption: robust practices and safeguards
Prevention is cheaper than remediation. Maintain a disciplined backup strategy with multiple copies, including off‑site or cloud storage, and test restores regularly. Use reliable hardware and keep firmware up to date. Enable file-system journaling where supported, enable write caching safeguards, and invest in a UPS to prevent abrupt power loss. Keep software updated and monitor disk health with periodic scans. Establish a baseline at least once, then run integrity checks after major transfers, OS updates, or media changes. With these safeguards, you reduce the chance that a new problem escapes detection. Scanner Check recommends adopting a proactive monitoring cadence that fits your workload and risk tolerance.
Common pitfalls and how to avoid them
Do not rely on a single tool or single type of check; cross‑verify with multiple methods. Avoid running destructive repairs without backups. Don’t ignore recurring errors; treat them as symptoms and investigate root causes. Finally, avoid scanning in a production environment without notifying users or staging changes, since scans can be I/O heavy and temporarily degrade performance.
Quick-reference integrity checklist
- Establish a known-good baseline for critical files
- Run checksums after every major transfer
- Schedule regular disk health scans
- Verify backups with test restores
- Maintain an updated hash catalog for key data
- Prefer non-destructive testing when possible
- Document every remediation step
- Review results with a peer or team member
Safety, privacy, and ethics when scanning for corrupted files
When scanning across devices or networks, respect data ownership and access rights. Use only tools and copies you are authorized to inspect, and avoid exposing sensitive information during testing. If you handle regulated or personal data, ensure your procedures comply with applicable policies and privacy laws. Always switch to a non‑production environment when experimenting with new tools, and sanitize any test results before sharing externally. Keeping these considerations in mind protects users and organizations from legal and ethical risks.
Tools & Materials
- A computer with administrative access(Needed to run system checks and install tools if required)
- External storage device(Useful for baseline hashes and safe backups)
- Hashing tool (built-in or third-party)(Examples include Windows Get-FileHash, macOS sha256sum, Linux sha256sum)
- Disk health utility(Use CHKDSK (Windows), Disk Utility (macOS), or fsck (Linux))
- Backup solution(Keep verified copies before attempting repairs)
- A non-production test copy(Recommended when experimenting with third‑party tools)
Steps
Estimated time: 45-75 minutes
- 1
Prepare the environment
Identify the scope of the scan (which folders, which drives) and back up critical data. Document the baseline state and ensure you have administrative access for all tools you plan to use.
Tip: Create a non-production copy of sensitive data if possible to avoid accidental changes during testing. - 2
Establish a baseline health
Run quick health checks on primary storage volumes to confirm they’re accessible and not silently failing. Note any hardware alerts or unusual I/O patterns before proceeding.
Tip: Record results with timestamps to track changes over time. - 3
Generate baseline hashes
Create cryptographic hashes for key files or directories to capture their current state. Store the hashes securely offline or in a protected repository.
Tip: Use the same algorithm for all files to keep comparisons meaningful. - 4
Run a checksum verification pass
Compute hashes again after transfers or edits and compare to the baseline. Flag any mismatches for further investigation.
Tip: If a mismatch occurs, verify the source of the file first before repair. - 5
Check disk health and file system integrity
Use platform-specific tools to scan disks for bad sectors and filesystem errors. Resolve, if possible, before deep scanning.
Tip: Prefer unmounted or offline scans on production disks to avoid live data corruption. - 6
Isolate suspicious files
Move potential corrupted files to a quarantine folder to prevent accidental reuse while you repair or restore.
Tip: Label quarantine items with date and findings for audits. - 7
Repair or restore
Restore from backups or use vendor-provided repair utilities when available. Avoid overwriting data you cannot verify.
Tip: Document the remediation steps and preserve the original corrupted copy for forensics if needed. - 8
Verify repaired results
Re-run the integrity checks on repaired files to ensure hashes match the baseline and that no new corruption appeared.
Tip: Run a secondary scan with a different tool to triangulate evidence.
Common Questions
What counts as a corrupted file?
A file that cannot be opened, shows unreadable content, or fails integrity checks is considered corrupted. Symptoms can include inconsistent data, garbled output, or mismatched file hashes.
A corrupted file is one you can't open or that yields garbled data, or fails a hash check.
Which tools should I use first?
Start with built‑in OS utilities for a quick surface check, then supplement with hashing and, if needed, a third‑party tool for deeper verification.
Begin with built‑in OS tools and add hashing or specialized tools if needed.
Can hardware cause corruption?
Yes. Failing disks, faulty memory, or power issues can lead to data corruption. Run hardware diagnostics and consider replacing failing components.
Hardware problems like a failing disk or bad memory can cause corruption; diagnose hardware as well.
How often should I scan for corruption?
Set a regular schedule based on data criticality. For high‑value data, consider monthly checks; for casual data, quarterly checks may suffice.
Regularly schedule checks—monthly for important data, less often for non-critical files.
What if a repair isn’t possible?
If a file cannot be repaired, replace it from a verified backup or official source, and document the loss. Initiate a broader backup and monitoring plan.
If repair isn’t possible, restore from backup and document the issue.
Should I use multiple tools for verification?
Yes. Cross‑verify with different tools and hash algorithms to reduce false positives and confirm results.
Yes—use several tools and hashes to confirm the findings.
Watch Video
Key Takeaways
- Establish a baseline for file integrity.
- Use checksums to verify file contents consistently.
- Corruption has hardware and software roots—address both.
- Backups enable safer recovery and credible restorations.