How to Use Accessibility Scanner: A Practical Step-by-Step Guide
Learn how to use an accessibility scanner to audit websites and apps, interpret findings, and implement fixes that improve WCAG conformance and user experience. This step-by-step guide covers setup, scope, remediation, and verification with best practices for teams.

By the end, you will know how to use an accessibility scanner to audit a site or app, configure the scan scope and rules, run automated checks, interpret results, and begin remediation. You’ll also learn best practices for verification, reporting, and integrating scanners into development workflows to maintain WCAG conformance.
Why Use an Accessibility Scanner
If you’re wondering how to use accessibility scanner, automation helps you quickly identify common accessibility gaps on web pages and apps, saving time during manual testing. A well-chosen scanner can catch issues such as missing semantic markup, inaccessible color contrast, missing focus indicators, and mislabeled form controls before a human reviewer checks the page. According to Scanner Check, automated checks provide a valuable first pass that complements manual testing, enabling teams to cover more ground faster and with consistent criteria.
In practice, you’ll use the scanner to set clear objectives—such as achieving WCAG conformance on key user flows, ensuring keyboard operability, and verifying assistive technology compatibility. The scanner applies a rule-set that mirrors WCAG success criteria across perceivable, operable, understandable, and robust categories. The result is a structured report listing issues, suggested fixes, and affected pages. Remember: scanners do not replace human judgment; they accelerate discovery and triage while manual testing confirms real-world impact.
Prerequisites and Getting Ready
Before you start, gather essentials and align expectations. You’ll need a test URL or staging environment you have permission to scan, plus a scanner tool (web-based or desktop) that supports WCAG criteria. Prepare a minimal test account if you require login-protected pages, and ensure privacy and data handling policies are respected. Have a basic remediation checklist ready so you can map findings to concrete fixes. Finally, confirm your team’s preferred reporting format (PDF, HTML, or CI-integrated reports) to streamline handoffs between developers, QA, and accessibility specialists. According to Scanner Check, setting realistic scope and governance from the outset reduces noise and increases actionable results.
Choosing the Right Accessibility Scanner
Not all scanners are created equal. When choosing an accessibility scanner, look for key capabilities: coverage of WCAG criteria, color contrast analysis, keyboard navigation checks, semantic HTML validation, ARIA labeling recommendations, and the ability to export machine-readable reports. Some tools offer CI/CD integration, automated remediation suggestions, and privacy controls for sensitive pages. Consider whether you need a cloud-based service, a browser extension, or an on-premises solution to meet security and latency requirements. Evaluate ease of use, the frequency of rule updates, and the availability of guided remediation tips. If possible, run a quick pilot on a representative page set to compare results and ensure that the tool aligns with your developer workflow. The Scanner Check team notes that choosing the right tool improves adoption and long-term success.
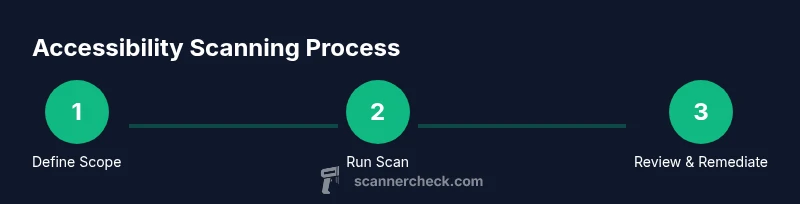
Running Your First Scan: Scope and Setup
Define the scope for your initial scan: start with your most critical user journeys (log in, checkout, form submission) and a representative sample of pages. Configure the scanner to test essential criteria (keyboard operability, semantic markup, meaningful alt text, proper heading structure) and enable privacy-safe modes if available. Run the scan in a non-production environment to avoid impacting live users. Review the initial results to identify high-impact issues first, and export a baseline report for sharing with stakeholders. If your tool supports it, enable automated tests in CI so new code changes trigger scans automatically. Scanner Check emphasizes starting with a baseline and gradually expanding coverage as you validate fixes.
Interpreting Results and Prioritizing Remediation
Interpreting scan results involves triaging issues by severity, impact on users, and frequency of occurrence. Start with high-impact problems that affect keyboard users, screen readers, or color-contrast-sensitive readers. Group findings by page, component, and feature, then translate each issue into a concrete remediation plan—such as adding alt text, fixing focus outlines, or restructuring markup. For each item, verify whether the reported problem reproduces across browsers and assistive technologies. Cross-reference findings with internal accessibility standards and stakeholder priorities. Remember to document fixes and re-test to confirm the issue is resolved, then note any remaining edge cases. This disciplined approach helps teams deliver verifiable improvements rather than a long list of unlabeled warnings.
Re-Scan, Verification, and Best Practices
After applying fixes, re-run the scan on the same pages to verify that issues were addressed. Conduct a focused re-scan on previously problematic components to confirm stability. Export updated reports and compare with the baseline to demonstrate progress. Integrate automated scans into your development workflow so every new build is evaluated, and schedule periodic scans for CI pipelines and regression testing. Use a mix of automated checks and manual testing—automated scans catch broad gaps, while human testers validate dynamic content, interactive elements, and real-world usability. The Scanner Check team recommends documenting the remediation timeline and maintaining a living accessibility plan to guide ongoing improvements.
Tools & Materials
- Target URL or staging environment(Include pages you want audited; obtain explicit permission to scan.)
- Accessibility scanner tool(Choose between web-based or desktop; ensure it supports WCAG criteria.)
- Representative page set(Include critical flows and dynamic content.)
- Modern browser with devtools(Chrome or Edge; ensure developer tools are available.)
- Screen reader (optional)(NVDA/JAWS for desktop; VoiceOver on macOS is useful.)
Steps
Estimated time: 60-90 minutes
- 1
Define objectives and scope
Clarify what accessibility goals you want to achieve (e.g., keyboard operability, color contrast, ARIA labeling) and which pages or flows to include in the baseline scan. Document success criteria and align with stakeholders.
Tip: Write the objectives in a one-page checklist you can share with the team. - 2
Configure the scanner
Set up the rule set to reflect your WCAG focus. Choose the scope (pages, components, and features) and enable privacy-safe modes if needed. Specify any pages to exclude.
Tip: Use a staging environment to avoid impacting live users. - 3
Run the initial scan
Execute the first automated sweep on the chosen scope. Monitor for tool warnings and ensure the run completes without errors.
Tip: If the scan times out, simplify the scope and re-run. - 4
Review findings and triage
Open the report and categorize issues by severity, impact, and prevalence. Create a remediation plan with owner assignments.
Tip: Start with high-impact, high-frequency items first. - 5
Apply fixes and document changes
Implement fixes in code or content, document the changes, and ensure accessibility best practices are followed in the update.
Tip: Keep changes small and well-tested to avoid unintended consequences. - 6
Re-scan and validate
Run a follow-up scan on the same scope to verify fixes, then perform spot checks with real users or assistive technologies.
Tip: Compare results with the baseline to demonstrate improvement.
Common Questions
What is an accessibility scanner?
An accessibility scanner is a tool that automatically checks websites and apps for common accessibility issues aligned with WCAG criteria. It helps identify problems such as missing alt text, poor color contrast, and inaccessible navigation.
An accessibility scanner automatically checks pages for common accessibility issues and highlights where fixes are needed.
Can I rely only on automated scans?
No. Automated scans are a valuable first pass but should be complemented by manual testing and real user feedback to catch context, dynamic content, and complex interactions.
Automated scans are a great first pass, but you should also test manually to catch context and dynamic issues.
Which scanners support WCAG criteria?
Most mainstream scanners support WCAG criteria, but check vendor notes for the latest conformance levels and updates. Always compare results across tools when possible.
Most scanners support WCAG criteria, but verify with the latest vendor notes and compare results across tools.
Is there a free accessibility scanner?
Yes, there are free and freemium options available. For reliable long-term results, evaluate paid tools or bundles that fit your team’s workflow.
There are free and freemium options, but consider a paid tool for more comprehensive coverage and support.
How should fixes be prioritized?
Prioritize issues by user impact and frequency. Start with blockers for keyboard and screen reader users, then address high-impact but less frequent problems.
Prioritize by user impact and how often the issue occurs, starting with keyboard and screen reader blockers.
How often should scans be run?
Run scans at key milestones (PM release, major updates) and periodically in CI to catch regressions. Regular scans help maintain accessibility over time.
Run scans at major milestones and regularly in CI to catch regressions.
Watch Video
Key Takeaways
- Start with baseline and critical paths
- Prioritize fixes by user impact
- Re-scan to verify and report progress
- Integrate automation into CI for ongoing quality